B. Adjusting the Blade Guides
Blade Guide adjustment is critical in ensuring the blade runs true. This adjustment
is carried out at the factory, and the need for readjustment should rarely occur. If
results are unsatisfactory, it is strongly recommended that you try a new blade
before readjusting the guide bearings. If a blade becomes dull on one side for
example, it will cause the blade to run off line. A new blade will correct this.
If it does become necessary to adjust the guide bearings, it is best carried out with
a new blade installed and correctly tensioned.
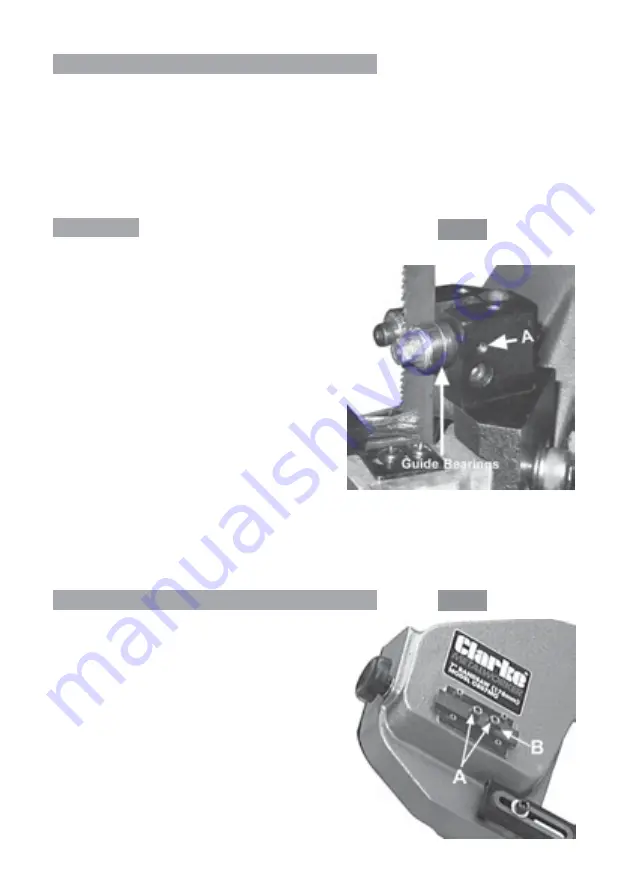
Ref: Fig. 18
NOTE: Guide Bearings support the blade to
prevent it from twisting, and a roller is located
at the back edge of the blade to prevent
lateral movement, i.e. from being forced
backwards, away from the workpiece.
The inner guide bearings are on a fixed axis,
whereas the outer bearings are mounted on
an eccentric shaft, thereby enabling them to
move laterally when the shaft is turned, i.e.
towards or away from the blade.
Clearance between the guide bearing and
blade must be from 0.000in. (just touching) to
0.001in. MAXIMUM.
To adjust bearing clearance, slacken the
Hex socket head screw ‘A’ and turn the
bearing shaft, using the nut on the end of the shaft, so that the bearings just touch
the blade. When satisfied, retighten screw ‘A’
Repeat this process with the guide bearings mounted on the Moveable Guide
Carrier (see Fig. 1, p7).
C. Blade Tracking Adjustment
This adjustment is carried out at the factory
and it should not nor mally require
readjustment. If the blade is thrown, first try a
new blade as this should normally cure the
problem. If the new blade is thrown however,
adjust the tracking as follows:
Ensure the plug is disconnected, then, with
the Frame in the vertical position and the
blade cover removed, adjust the blade so
that only moderate tension is applied.
Slacken the two Hex socket head screws,
shown at ‘A’ fig.19, using a 6mm hex wrench,
by one turn.
Fig. 18
Fig. 19
15


