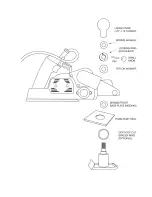
The depth adjustment indicator knob that comes with the planer can be eliminated or re-
placed with any knob with a 3/16" hole.
THE DOUGHNUT AND DEPTH ADJUSTMENT INDICATOR
In this section we will discuss the most important decision you must make when setting up
your planer. Put a lot of thought into this decision for once you glue certain parts together the
decision is fairly permanent.
Before attempting to complete the procedures below it might be helpful to read the rest of the
instructions for the depth adjustment mechanism. Some parts of this mechanism are not obvi-
ous.
Directly under the main depth adjustment knob is an aluminum collar with an Allen Screw
that pinches the collar onto the main depth adjustment screw shaft. We call this part the
DOUGHNUT.
You will note that there is a 3/16" hole drilled in the DOUGHNUT. It is for the 3/16" steel pin
that is the depth adjustment indicator.
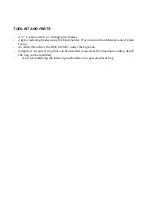
In the Tool Kit you will find an Allen Wrench, a small knob, several 3/16" pins, and a packet
of glue.
You can rotate the DOUGHNUT’s position relative to the depth screw as long as the large
knob has not come unscrewed. Simply loosen the Allen screw and rotate the DOUGHNUT.
(Note that if the large knob loosens during this process you must reassemble the depth ad-
justment mechanism. This procedure is explained in a later section of this Manual.)
Either by trial and error or by past experience set up your depth adjustment indicator.
When you have made your final decision glue the shaft and small knob in place using the
packet of glue in the Tool Kit. The glue should dry within 30 minutes prior to using the
planer. A two-component, fast acting epoxy glue will also work and is fast.
Again, this is a very important decision. If you change your mind at a later date a new
DOUGHNUT, small knob, and 3/16" shaft material can be purchased from Clark Foam.
After you have finished the above procedure you might find that the adjustment is loose and
there is backlash or play. If this happens you must reassemble the depth adjustment mecha-
nism per the instructions later in this Manual.
Summary of Contents for 2003 Model Foam Planer
Page 1: ...CLARK FOAM PLANER 2003 MODEL SAFETY AND OPERATING INSTRUCTIONS Version 1 2003 ...
Page 4: ......
Page 13: ......


