background image

Shows a world map with the sunlit and dark areas of the world. Tap 

to check the exact 

sunrise and sunset times for all your route points.

Shows the GPS Information screen with satellite position and signal strength information.

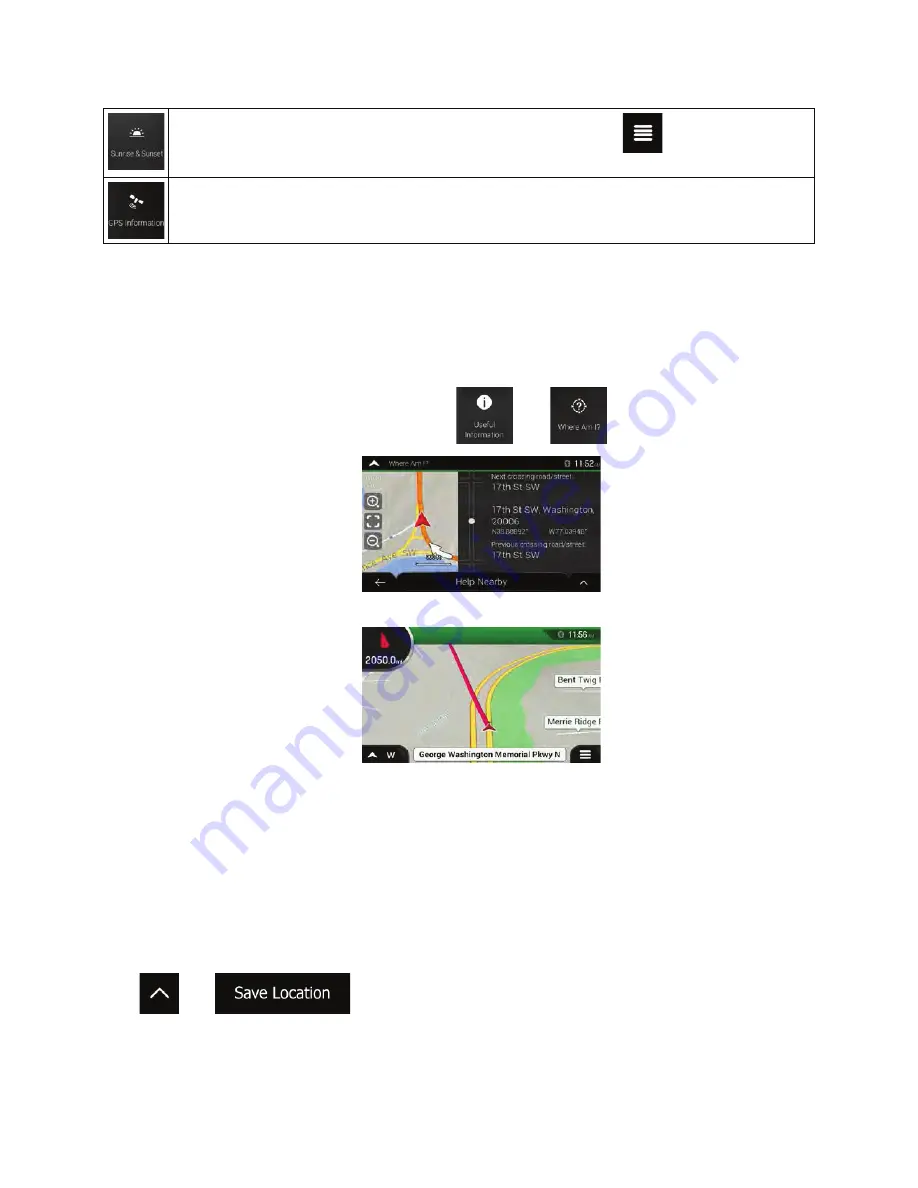
4.2.1 Where Am I

This screen contains information about the current position (or about the last known position if GPS
reception is not available). You can access it the following two ways:

x

By going to the Navigation menu and tapping 

and 

 . 

x

By tapping the current street name if it is displayed below the current position marker on the map.

The following information is shown on the Where Am I screen:

x

Address details (when available) of the current position

x

Latitude and Longitude (coordinate of the current position in WGS84 format)

x

The nearest town

x

Next crossing road/street

x

Previous crossing road/street.

You can also perform some actions on this screen.

Tap 

and

to add the current position to the saved locations and to check the 

country information.

Clarion NX405 English 71

Summary of Contents for NX405

Page 1: ...cio rapido y Manual de instalaci6n NX405 DVD MULTIMEDIA STATION WITH BUILT IN NAVIGATION 6 0 TOUCH PANEL CONTROL Station multimedia DVD avec navigation integree et commande par ecran tactile de 6 0 pouces Estaci6n multimedia DVD con navegaci6n integrada y control de panel tactll de 6 0 pulgadas ...

Page 2: ...duit Clarion INFORMACION DEL REGISTRO DE PRODUCT 0 DE CLARION Querida Cliente Para USA y Canada nomas www clarion com Felicitaciones por su compra de producto electr6nico m6vil de Clarion Estamos seguros que usted gozara de su experiencia con el producto de Clarion Hay muchas ventajas al registrar su producto Le invitamos a que visite nuestro sitio en internet www clarion com para registrar su pro...

Page 3: ...tarting 30 2 Package Contents 30 3 General Cautions 30 4 Cautions on lnstallation 30 5 Installing the Main Unit 31 WIRE CONNECTION 32 Installing The GPS Antenna 33 iPod Audio ID3 Mode Screen 13 iPod Audio Playlist Mode Screen 13 iPod Video ID3 Mode Screen 14 iPod Video Play Mode Screen 14 10 Pandora OPERATIONS 15 Selecting the Pandora Mode 15 Pandora Bluetooth Mode 16 11 Bluetooth AUDIO PLAYER OPE...

Page 4: ...to your desired destination In such instances rely on your own driving judgment taking into account the driving conditions at the time Do not use the navigation system to locate emergency services The database does not contain a complete listing of emergency services such as police stations fire halls hospitals and walk in clinics Please show discretion and ask for directions in such instances As ...

Page 5: ...on will disappear naturally allowing normal operation 2 Driving on extremely bumpy roads which cause severe vibration may cause the sound to skip 3 This unit uses a precision mechanism Even in the event that trouble arises never open the case disassemble the unit or lubricate the rotating parts 4 NX405 INFORMATION FOR USERS This device complies with Industry Canada license exempt RSS standard s Op...

Page 6: ...le for the operation of this device or its compliance with safety and regulatory standards Please note that the use of this accessory with iPod or iPhone may affect wireless performance iPhone iPod Siri and iTunes are trademarks of Apple Inc registered in the U S and other countries Lightning is a trademark of Apple Inc Made for iPod D iPhone Android is the trademark of Google Inc The Bluetooth wo...

Page 7: ...nu Eject Press to eject disc from unit MENU Button Press this button to display main menu press again to return current source Press and hold this button for 2 seconds to turn off the monitor Press any place of the screen to turn on the monitor again 6 NX405 RESET Button Press this button to hardware reset the unit Note When the RESET button is pressed frequencies ofradio stations titles etc store...

Page 8: ... is supplied to this unit Press POWER button on the panel to turn on the unit Press MENU button on the PANEL to show main source menu Change page by dragging lett or right or touching other buttons Touch the icons on the screen to enter corresponding work mode such as Disc mode Tuner mode Telephone mode etc NX405 7 ...

Page 9: ...button to display the Disc Video mode 12 Pandora Touch the button to display the Pandora mode 13 BT Audio Touch the button to display the Bluetooth Audio mode 14 AUX1 Touch the button to display the AUX1 mode 15 AUX2 Touch the button to display the AUX2 mode 16 Camera Touch the button to display the Camera mode 17 Setting button Touch the button to display the Setting menu 18 Monitor off Touch the...

Page 10: ... 5 Next Chapter Fast Forward button 6 Elapsed playing time 7 Seek bar 8 Total time 9 Menu List button 10 System time 11 Bluetooth status indicator 12 DVD playback information 13 Shortcut button 14 Repeat Switching button 15 Audio Channel switching button 16 Subtitle switching button 17 Angle button 18 Direct chapter or title searching button 19 Information button Operate the DVD Player Menu Using ...

Page 11: ... Track Fast Backward button 3 Play Pause button 4 Next Track Fast Forward button 5 Elapsed playing time Seek bar 6 List Mode button 7 System time 8 Bluetooth status indicator 9 Playback information 10 Repeat button 11 Audio button 12 Subtitle button 6 CD PLAYER OPERATIONS Showing CD Player Mode Screen 1 After disc is loaded the play mode is automatically engaged 2 If disc have been loaded you can ...

Page 12: ... Repeat Foiaer and Repeat All 2 Current Folder Showing title of current folder The number on the folder symbol is the number of files and folders number in current folder Touch the title of current folder play list will show files and folders in upper folder 7 USB AUDIO OPERATIONS This system can play audio files MP3 WMA AAC FLAC stored in an USB memory which is recognized as USB Mass Storage Clas...

Page 13: ...can play USB video files MP4 3GP etc stored in an USB memory which is recognized as USB Mass Storage Class device You can use your USB memory as an audio device by simply copying desired audio files into it Note This system will not operate ormay operate improperly with some USB memory Files protected with any DRM cannot be played 1 Previous Track Fast Backward button 2 Play Pause button 3 Next Tr...

Page 14: ...k Fast Backward button 5 Play Pause button 6 Next Track Fast Forward button 7 103 information 8 Next I Previous Page button 9 Category list 10 System time 11 Bluetooth status indicator 12 Playback status indicator 13 Art work 14 Shortcut button 15 Progress bar iPod Audio Playlist Mode Screen p n l l l 1 II c 1 Switch to information button 2 Playing list 3 Page turning button Song 01 Song 02 Song 0...

Page 15: ...I Previous PageS button 9 System time 10 Bluetooth status indicator 11 Playback status indicator 12 Art work 13 Shortcut button 14 Progress bar 14 NX405 0 12 47 v 0 iPod Video Play Mode Screen 1 Previous Track Fast Backward button 2 Play Pause button 3 Next Track Fast Forward button 4 Progress bar 5 Menu list button 6 Repeat button 7 System time 8 Bluetooth status indicator 9 Playback information ...

Page 16: ... playback and pause 1 Touch the button during playback Playback pauses 2 To resume playback touch the key again 6 Next track button 7 Thumbs up 8 System time 9 List button II m m m II Touch this button to show list screen 10 Current station name 11 Current title Touch icon to store current title to track favorites list 12 Current artist Touch icon to store current artist to artist favorites list 1...

Page 17: ... with some 81uetooth audio players For detailed information on the playable 81uetooth audio players see ourhome page www clarion com Selecting the 8 uetooth Audio Mode 1 Touch the Biuetooth Audio key to select the Bluetooth Audio mode The system changes to the Bluetooth mode If the connection with a Bluetooth audio player has been already established you may select the Music function 2 Press MENU ...

Page 18: ...the liiJ button to display the Inquiring Device screen 4 Touch your desired device button and touch button to register for the Bluetooth audio player Then select an image of this device And select a type of this device When the pairing operation completes the registered Bluetooth audio player is set as the current device after selecting the favorite icon the display return to the device list scree...

Page 19: ...0 Album 01 tnv1c l l QD I 11 IJ I Note Occasionally depending on the environment playback sounds may be fragmented orswitch noises may be generated 18 NX405 Playing Music After the connection with a Bluetooth audio player is established the play mode is automatically engaged When playback is not started for some devices touch the Pausing Playback 1 Touch the button during playback Playback Pauses ...

Page 20: ...ction with a Bluetooth Telephone has been established the icon Ill and signal level indicator are displayed at the top of the screen 0 10 30cv Clear 333 Phone 1 2 ABC 3 DEF J 4GHI 5JKL 6w o 1 phone D1 E 1 7 PQR5 8 TUV 9 WXYZ 0 J C call l J Bluetooth Telephone Settings You can confirm various information concerning about the Bluetooth Interface features 1 Touch the 1i11 button to display the inform...

Page 21: ...gs Adjust the level if the person on the other end ofthe telephone has a reception problem 20 NX405 Registering Your Cellular Phone Pairing You can register up to 5 cellular phones The registering method is as same as Registering your Bluetooth audio player 1 Turn on the power of the cellular phone you wish to register 2 Touch the Device button Ill to display the Device Select screen 3 Touch the D...

Page 22: ...I button to display the Device Select screen 2 Touch the currently connected device then touch i ii button to disconnect the active device 3 Touch the desired Device button you wish to use Touch button to select it as your active device The corresponding cellular phone is set as the current telephone If the power of the cellular phone is not turned on turn it on The cellular phone may prompt to ac...

Page 23: ...he same way as using it on the iPhone 4 To finish Siri Eyes Free function touch the button Notes Siri Eyes Free is availabe on iOS 6 1 or higher Please use external mic when you use the Siri Eyes Free function 22 NX405 ...

Page 24: ... Store A beep sounds and the stations with good reception are stored automatically to the preset list Notes 1 After auto store the previous stored stations will be overwritten 2 The unit has 4 bands but FM3 and AM can store by AS function Preset Scan The Preset Scan receives the stations stored in the preset memory in order This function is useful when searching for the desired station in memory 1...

Page 25: ...e online or by calling SiriusXM Listener care Visit www siriusxm com activatenow Call SiriusXM Listener Care at 1 866 635 2349 For Canadian Subscriptions please contact Visit www siriusxm ca activatexm Call XM customer Care at 1 877 438 9677 As part of the activation process the SiriusXM satellites will send an activation message to your tuner When your radio detects that the tuner has received th...

Page 26: ...with iPhone made by Apple Inc 2 Connection with the iPhone 5 iPhone 5s and iPhone 5c ll HDMI cable sold in the market or CCA 802 iPhone 5 iPhone 5s and iPhone 5c at Ill l c L UghtningT cable supplied with iPhone Lightning Digital AV adapter made by Apple Inc 3 Connection with the Android Phone Micro USB cable sold in the market Android phone ill D HDMI cable sold in the market MHL adaptor sold in ...

Page 27: ...e country and state of the last known position 4 1f needed select a new city 5 Enter the street name 6 Enter the house number 7 A full screen map appears with the selected point in the middle 8 Tap to confirm the destination You can also select a nearby point on the map or tap Ellto select a different destination 9 The route is calculated and the map apppears showing the entire route where you can...

Page 28: ...ength on the map and check route parameters and route alternatives 8 Delete your route Setting menu You can configure the navigation settings and modify the behavior of NX405 by tapping and II 0 0 1 Select the road types used in route planning and the route planning method 2 Adjust the different sound volumes 3 Enable and set up warnings for speed limit Alert Points such as speed cameras and road ...

Page 29: ... can result in injury or material damage Installation Precautions WARNING When installing the unit to a vehicle with an airbag system never install ÁÌ ÁÆ ÈÄ ÏÀ Ê ÁÌ Å Ñ Ű Ì ÌÀ ÇÈ Ê ÌÁÇÆ Ç ÌÀ Áʺ Ɩ Do not install this unit in the following locations A location interfering with the driver s visual range or operation A location where the gear shift or brake pedal are hindered A location where passeng...

Page 30: ... Á ÆÌƯŲÊ ºÑ short circuit Take care when wiring in the engine compartment When wiring the connecting cables in a vehicle with an airbag system Æ Î Ê ÌÀ ºÄ Ë ÌÀÊÇÍ À ÈÄ ÏÀ Ê ÁÌ Å Ñ Ű Ì ÌÀ ÇÈ Ê ÌÁÇÆ of the airbag An airbag not operating correctly in an emergency may cause increased injury WARNING CAUTION Connection Notes Verify wires with a digital multi meter prior to making any connections Many ne...

Page 31: ...ller 1 USB extension cable 1 Electro tap 2 Flush mount bolts 8 Hexagon Head Screw 8 ʾ ÈÁÆ ºÄ 1 ʿʽ ÈÁÆ ºÄ 1 Lead cramp 1 Trim ring 1 3 General Cautions ʾƖ Ç ÆÇÌ ÇÈ Æ ÌÀ Ë Ɩ À Ê Ê ÆÇ ÍË ÊƘ Ë ÊÎÁ ºÄ È ÊÌË ÁÆËÁ Ɩ ÑÇÍ ÊÇÈ ÆÑÌÀÁÆ ÁÆÌÇ ÌÀ ÍÆÁÌ ÍÊÁÆ ÁÆËÌ ÄÄ ÌÁÇÆƓ ÇÆËÍÄÌ ÑÇÍÊ Ä Ê ÇÊ Æ ÍÌÀÇÊÁÒ Ä ÊÁÇÆ Ë ÊÎÁ ÆÌ ÊƖ ʿƖ Ë ËÇ ÌƓ ÊÑ ÄÇÌÀ ÌÇ Ä Æ ÌÀ Ë Ɩ Î Ê ÍË ÊÇÍ À ÄÇÌÀƓ ÌÀÁÆÆ ÊƓ º ÆÒÁÆ Ɠ ÇÊ Ä ÇÀÇÄ Ì Ɩ ÇÊ ÌÇÍ À ÁÊÌ...

Page 32: ...Å ÁÆ ÍÆÁÌ ÁÆ Î ÀÁ Ä ËƓ ÍË ÌÀ È ÊÌË ÌÌ À ÌÇ ÌÀ Î ÀÁ Ä Æ ÇÄÄÇÏ ÌÀ ÁÆËÌÊÍ ÌÁÇÆË ÁÆ Á ÍÊ Ɩ 2 Wire as shown in Section 7 3 Reassemble and secure the unit in the dashboard and set the face panel and center panel Figure 4 ÇÊ Î ÀÁ Ä ÇÍÆÌÁÆ Ê Ï ÇÄ Ë Ƽ Á Á Ï Ç ÌÀ ÁÆ ÆÁÌƽ ÇÊ Î ÀÁ Ä Installing the Main Unit in NISSAN Vehicle Figure 5 È Ê ƼÌÀÁ ÃÆ ËËƕ ʾÅÅƽ Ƽ ÇÌ ÌÌ À ÌÇ ÌÀ Å ÁÆ ÍÆÁÌƽ 6 Flat head screws Ƽ Ð ƽ Ƽ Ì...

Page 33: ...Æ ºÊ Ã Ì ÁÆÌ Ê Ê Ë ÏÁÌÀ ÌÀ ÍÆÁÌƓ º Æ Æ Ŵ ÌÌ Æ ÁÌ with a nipper or similar tool Typical Mounting Brackets Ð ÅÈÄ ʾ Ð ÅÈÄ ʿ űÐ ÌÀ Ë Ê ÏË ÌÇ ÌÀ marks Ð ÅÈÄ ˀ Main Unit Note ƹ ÇÊ ÁÆËÌ ÄÄÁÆ Ɠ º ËÍÊ ÌÇ ÁË ÇÆÆ Ì ÌÀ Æ ÌÁÎ ºÄ Ç ÌÀ Ê battery ƹ Æ ÌÀ ÇÈÌÁÇÆ Ä ÎÁ ËƓ ÌÀ ºÄ Ë Æ ÌÀ ÇÆÆ ÌÇÊ ºÄ Ë Ê separately sold items ƹ À Æ ÇÆÆ Ì ÌÀ ºÄ Ɠ º ËÍÊ ÌÇ ŲÐ ÏÁÌÀ ÌÀ Ä ÅÈƖ WIRE CONNECTION Refer to page 34 ˁʽ GPS Antenna ÁÊÁ...

Page 34: ...ÌÀ ÆÌ ÆÆ ÇÊ ÍÌ ÇŰƖ À ÈÇÏ Ê cables in the cord may be short circuited WARNING Note The supplied GPS antenna is for installing inside the vehicle Do not install it outside the vehicle Install the GPS antenna more than 50 cm away from the main unit other audio devices such as CD player and a radar detector If it is installed near these devices GPS reception may be impaired ƹ Ç ÁÅÈÊÇÎ ÌÀ ËÁ Æ Ä Ê ÈÌÁÇ...

Page 35: ... signal cord Stopper Parking brake signal cord Parking brake cord Ƽ Ê ËËƘ Ê Æƽ How to attach the electro tap ʾƖ Ä ÌÀ ÊÃÁÆ ºÊ à ÇÊ Ì ÌÀ ËÌÇÈÈ ÊƓ and fold it back in the direction of the arrow ʿƖ ËË ÌÀ ÊÃÁÆ ºÊ à ËÁ Æ Ä ÇÊ ÌÀÊÇÍ ÀƓ and fold it back in the direction of the arrow Parking brake signal cord Note 1 Connecting the PHONE INTERRUPT terminal The phone interrupt will mute the audio if the lead...

Page 36: ...2015 1 Clarion Co Ltd All Rights Reserved Copyright 2015 Clarion Co Ltd Printed in China lmprime en Chine lmpreso en China ...

Page 37: ...DVD MULTIMEDIA STATION WITH BUILT IN NAVIGATION 6 0 TOUCH PANEL CONTROL NX405 Owner s manual ...

Page 38: ... des informations important de produits Enregistrer à www clarion com c est facile de mettre à jour votre produit Clarion Querido Cliente Felicitaciones por su compra de producto electrónico móvil de Clarion Estamos seguros que usted gozará de su experiencia con el producto de Clarion Hay muchas ventajas al registrar su producto Le invitamos a que visite nuestro sitio en internet www clarion com p...

Page 39: ...23 Operate the CD Player Menu 23 Listening to Compressed Audio 24 Tag Display Function 24 Playback MP3 WMA AAC menu 25 9 USB AUDIO OPERATIONS 26 Notes on Using USB Memories 26 Select USB Audio Mode 26 Playing Audio Files in USB Memory 27 Notes on Using USB Memories 28 Select USB Video Mode 28 Playing Video Files in USB Memory 28 Playable Video Format 28 10 USB VIDEO OPERATIONS 28 11 iPod OPERATION...

Page 40: ...riusXM Radio ID 44 Channel Selection by Up Down Button 45 Channel Selection by Channel Number 45 Tuning to Channels from the Channel List 45 Tuning to Channels from the Preset Channel List 45 Tuning to Channels from the Category List 45 Parental Control Lock Unlock 45 Setting the Password 45 Replay 46 SmartFavorites 46 TuneStart 46 TuneMix 46 iTunes Radio Tagging 46 17 HDMI MODE 48 Wire Connection...

Page 41: ...4 NX405 English Owner s Manual USB Device 57 Bluetooth 57 SiriusXM Advisory Messages 58 TFT Screen 59 23 ERROR DISPLAY 60 DVD Player 60 24 SPECIFICATIONS 61 25 WIRE CONNECTION GUIDE 63 ...

Page 42: ...ith ID3 TAG Display Built in Bluetooth Handsfree HFP and Audio Streaming A2DP AVRCP Front Panel Auxiliary Input and 6ch RCA Output with Subwoofer Control iPod Expanding Visual Features Rear Monitor Rear Vision Camera Expanding Audio Features External Power ÅÈÄÁŲ Ê iPhone USB Memory Bluetooth Telephone Connect via CCA 750 Connect via CCA 750 Connect via CCA 771 CCA 802 iPhone Smartphone via HDMI Si...

Page 43: ...gal act place you in a dangerous situation or take you into an area you consider unsafe t 5IF BEWJDF QSPWJEFE CZ UIF OBWJHBUJPO TZTUFN JT UP CF SFHBSEFE BT B TVHHFTUJPO POMZ 5IFSF NBZ be times when the navigation system displays the vehicle s location incorrectly fails to suggest the shortest route or fails to direct you to your desired destination In such instances rely on your own driving judgme...

Page 44: ...otection against harmful interference in a residential installation This equipment generates uses and can radiate radio frequency energy and if not installed and used in accordance with the instructions may cause harmful interference to radio communications However there is no guarantee that interference will not occur in a particular installation If this equipment does cause harmful interference ...

Page 45: ...at trouble arises never open the case disassemble the unit or lubricate the rotating parts This device complies with Industry Canada license exempt RSS standard s Operation is subject to the following two conditions 1 this device may not cause interference and 2 this device must accept any interference including interference that may cause undesired operation of the device Le présent appareil est ...

Page 46: ...irt apply some neutral detergent diluted in water to a soft cloth wipe off the dirt gently then wipe again with a dry cloth Do not use benzene thinner car cleaner etc as these substances may damage the cabinet or cause the paint to peel Also leaving rubber or plastic products in contact with the cabinet for long periods of time may cause stains ƹ Ä ÆÁÆ ÌÀ ÄÁÉÍÁ ÊÑËÌ Ä È Æ Ä The liquid crystal pane...

Page 47: ...T TUPSBHF DBTF press down on the center of the case and lift the disc out holding it carefully by the edges t P OPU VTF DPNNFSDJBMMZ BWBJMBCMF EJTD protection sheets or discs equipped with stabilizers etc These may damage the disc or cause breakdown of the internal mechanism Storage t P OPU FYQPTF EJTDT UP EJSFDU TVOMJHIU PS any heat source t P OPU FYQPTF EJTDT UP FYDFTT IVNJEJUZ or dust t P OPU F...

Page 48: ...is not responsible for the operation of this device or its compliance with safety and regulatory standards Please note that the use of this accessory with iPod or iPhone may affect wireless performance iPhone iPod Siri and iTunes are trademarks of Apple Inc registered in the U S and other countries Lightning is a trademark of Apple Inc ƹ AndroidTM is the trademark of Google Inc ƹ The Bluetooth wor...

Page 49: ...N TO DISPLAY MAIN MENU PRESS AGAIN TO RETURN CURRENT SOURCE s 0RESS AND HOLD THIS BUTTON FOR SECONDS TO TURN OFF THE MONITOR 0RESS ANY PLACE OF THE SCREEN TO TURN ON THE MONITOR AGAIN RESET Button s 0RESS THIS BUTTON TO HARDWARE RESET THE UNIT Note When the RESET button is pressed frequencies of radio stations titles etc stored in memory are cleared microSD slot OTE 4HE MICRO3 CARD IS ONLY FOR NAV...

Page 50: ...SE ENSURE THE TRAY IS INSERTED IN THE CORRECT DIRECTION s EEP THE BATTERY OUT OF THE REACH OF CHILDREN 3HOULD THE BATTERY BE SWALLOWED CONSULT A DOCTOR IMMEDIATELY s ATTERIES BATTERY PACK OR BATTERIES INSTALLED MUST NOT BE EXPOSED TO EXCESSIVE HEAT SUCH AS SUNSHINE lRE OR THE LIKE 3IGNAL TRANSMITTER PERATING RANGE ªIN ALL DIRECTIONS 0 9 SRCH BACK TITLE ZOOM MUTE AUDIO POWER SRC VOLUME SET PIC TAG ...

Page 51: ... ROM THE MAIN MENU YOU CAN SELECT YOUR DESIRED SOURCE OR CHANGE YOUR SETTINGS MENU Button s 0RESS THIS BUTTON TO ENTER THE 5 OR RETURN CURRENT RESOURCE PIC Button s 0RESS AND HOLD THIS BUTTON TO CHANGE YOUR MONITOR IMMER ENT Button s 0RESS TO lX THE ENTERED DATA IN THE EY 0AD SCREEN OR ENTER THE ITEM THE CURSOR IS ON TAG Button s I4UNES TAGGING IN 3IRIUS8 MODE TITLE Button s 0RESS TO GO TO THE TIT...

Page 52: ...DE s 0RESET 5P OWN 4RACK 5P OWN 4UNE IX IN 3IRIUS8 MODE UTTONS s 0RESS TO MANUALLY SELECT THE NEXT LOWER OR HIGHER STATION IN 4UNER MODES s 0RESS TO PERFORM FAST BACKWARD OR FAST FORWARD SEARCHING 0RESS AGAIN TO CHANGE THE SPEED TO X X X OR X s 0RESS FOR MOVEMENT OF BACKGROUND SOURCE IN AVIGATION MODE s 0RESET 5P OWN HANNEL 5P OWN IN 4UNE IX s HANNEL 5P OWN IN 3IRIUS8 MODE ZOOM Button s 0RESS TO T...

Page 53: ...DORA 4OUCH THE BUTTON TO DISPLAY THE 0ANDORA MODE 4 UDIO 4OUCH THE BUTTON TO DISPLAY THE LUETOOTH UDIO MODE 58 4OUCH THE BUTTON TO DISPLAY THE 58 MODE 58 4OUCH THE BUTTON TO DISPLAY THE 58 MODE AMERA 4OUCH THE BUTTON TO DISPLAY THE AMERA MODE 3ETTING BUTTON 4OUCH THE BUTTON TO DISPLAY THE 3ETTING MENU ONITOR OFF 4OUCH THE BUTTON TO TURN OFF THE MONITOR AY IGHT 4OUCH THE BUTTON TO CHANGE THE DIMMER...

Page 54: ...it and CD RW unit Cause disc characteristics cracks dust dirt dust dirt on player s lens etc t If a CD R or CD RW disc that has not been finalized is played it will take a long time to start playing Also it may not be possible to play depending on its recording conditions t You cannot play SuperAudio CD The CD player is not supported even if it is a hybrid disc About MP3 WMA AAC playback This unit ...

Page 55: ...ET THE PARENTAL LEVEL ID 3AFE ID 3AFE ENERAL UDIENCES 0 0ARENTAL UIDANCE 3UGGESTED 0 0ARENTS 3TRONGLY AUTIONED 0 2 0ARENTAL UIDANCE 2ESTRICTED 2 2ESTRICTED O NE ND 5NDER DMITTED DULT NLY DULT s 4HE CONTENTS THAT THE PARENTAL LEVEL RESTRICTS VARY WITH THE COUNTRY CODE Note 4HE RATING CAN BE SELECTED ONLY UNDER THE password unlocked status and the limits can be set only under the password locked sta...

Page 56: ...OR UP FROM CURRENT LOCATIONS AS MANY TIMES AS THE BUTTON IS TOUCHED AND PLAYBACK STARTS Skip use seek bar 4OUCH THE TRIANGLE ON SEEK BAR AND DRAG IT TO ANY POSITION WHERE YOU WANT TO START PLAYBACK Fast Forward Fast Backward 4OUCH or BUTTON AND HOLD SECONDS TO START FAST BACKWARD OR FAST FORWARD DURING PLAYBACK 4HE PLAYBACK SPEED STARTS AT X THEN WILL INCREASE TO X X AND X 2ELEASE THE BUTTON WILL ...

Page 57: ...CORDED OR DETAILS SEE THE MARK OF THE DISC NDICATES THAT AUDIOS HAVE BEEN RECORDED 7HEN THE POWER IS TURNED ON AND WHEN THE DISC IS CHANGED TO A NEW ONE THE LANGUAGE SET AS THE FACTORY DEFAULT IS SELECTED F THAT LANGUAGE HAS NOT BEEN RECORDED ON DISC THE LANGUAGE IS SPECIlED ON THE DISC EPENDING ON THE DISC SWITCHING MAY BE COMPLETELY IMPOSSIBLE OR IMPOSSIBLE ON SOME SCENES Switching Subtitles N 6...

Page 58: ...RATION PLAYS BACK VIDEO lLES RECORDED ON THE DISC REPEATEDLY 4HE REPEAT SET AS THE FACTORY DEFAULT IS 2EPEAT ALL 3HOWING THE VIDEO lLES PLAYER MENU TOUCH button 4OUCH BUTTON ONCE FOR 2EPEAT 4RACK AGAIN FOR 2EPEAT OLDER 4OUCH BUTTON AGAIN FOR 2EPEAT LL Switching Audio 3OME VIDEO lLES WILL HAVE TWO OR MORE AUDIO CHANNELS YOU CAN SWITCH AMONG THE AUDIO CHANNELS DURING PLAYBACK 4OUCH BUTTON DURING PLA...

Page 59: ...2 NX405 English Owner s Manual MP lLES s FORMAT 0 6ISUAL 3IMPLE s 0ICTURE SIZE X s UDIO FORMAT s UDIO SAMPLING FREQUENCY Z MPG lLES s FORMAT 0 s 0ICTURE SIZE X s UDIO FORMAT 0 s UDIO SAMPLING FREQUENCY Z ...

Page 60: ...t file s 4OUCHING button starts playback from the beginning of the next track s 4OUCHING button starts playback from the beginning of the current track When this button is touched again within 5 seconds playback starts from the beginning of previous track Fast Forward Fast Backward 1 Touch or button and hold more than 2 seconds to start fast backward or fast forward during playback The playback spe...

Page 61: ...EXTENSION h 0 v OR h MP v TO AN 0 lLE AND h 7 v OR h WMAv TO A 7 AND h M Av TO A lLE BY USING SINGLE BYTE LETTERS F YOU ADD A lLE EXTENSION OTHER THAN SPECIlED OR FORGET TO ADD THESE lLE EXTENSION THE lLE CANNOT BE PLAYED N ADDITION IF YOU USE UPPER CASE AND LOWER CASE LETTERS CAPITAL AND SMALL LETTERS MIXED FOR lLE EXTENSIONS NORMAL PLAY MAY NOT BE POSSIBLE ILES OTHER THAN 0 7 DATA CANNOT BE PLAY...

Page 62: ...WEEN 2EPEAT OLDER 2EPEAT LL AND 2EPEAT 4RACK 2EPEAT OLDER AND 2EPEAT LL URRENT OLDER s 3HOWING TITLE OF CURRENT FOLDER s 4HE NUMBER ON THE FOLDER SYMBOL IS THE NUMBER OF lLES AND FOLDERS NUMBER IN CURRENT FOLDER s 4OUCH THE TITLE OF CURRENT FOLDER PLAYLIST WILL SHOW lLES AND FOLDERS IN UPPER FOLDER Other operations about playing MP3 WMA AAC are almost same as CD Player mode 3TOP 0LAYBACK 4OUCH BUT...

Page 63: ...CTURE s 4HE FOLDER HIERARCHY MUST BE WITHIN HIERARCHICAL LEVELS THERWISE PLAYBACK MAY BE IMPOSSIBLE s 4HE MAXIMUM ALLOWABLE NUMBER OF FOLDERS IS INCLUDING ROOT DIRECTORY AND FOLDERS WITH NO 0 7 lLE s 4HE MAXIMUM ALLOWABLE NUMBER OF lLES IN A FOLDER IS s 9OU CAN STORE THE 0 7 lLES TOGETHER IN A FOLDER s 4HE SYSTEM MAY BECOME SLOW IF THE lLES OR FOLDERS EXCEED THE LIMITATION ABOVE Notes on the Tag t...

Page 64: ...m Art work F 0 AUDIO lLE CONTAINS ALBUM ART IMAGE IN THE PICTURE WILL BE DISPLAYED IN THIS AREA ID3 Information Area 4HIS AREA DISPLAY INFORMATION OF PLAYING lLE Skip Using Seek Bar 4OUCH ON SEEK BAR AND DRAG IT TO ANY POSITION WHERE YOU WANT TO START PLAYBACK Select a Folder on Display List 4OUCH THE FOLDER TITLE ON THE DISPLAY LIST THE DISPLAY LIST WILL DISPLAY lLES AND FOLDERS IN SELECTED FOLDE...

Page 65: ...E SYSTEM CHANGES TO THE 53 6IDEO MODE AND STARTS PLAYBACK FROM THE PREVIOUS POSITION OR FROM THE BEGINNING Note 4HIS SYSTEM HAS TWO 53 CONNECTORS AND CAN CONNECT TWO 53 9OU CAN SELECT THE DESIRED 53 BY TOUCHING THE LIST OF 53 ROOT MENU 4HIS SYSTEM INDICATE THE 53 AS h Y 53 v h Y 53 v on the list Playing Video Files in USB Memory F THE VIDEO IS PLAYING TOUCH THE SCREEN OF THE PLAYING VIDEO TO DISPL...

Page 66: ...S IS PAUSE 4OUCH BUTTON TO RESUME PLAYBACK 4HE SCREEN WILL GO TO VIDEO SCREEN AUTOMATICALLY Switch to Previous Next file 4OUCH or BUTTON DURING PLAYBACK TO PLAY PREVIOUS NEXT lLE s 4OUCH BUTTON TO STARTS PLAYBACK FROM THE BEGINNING OF THE NEXT TRACK s 4OUCH BUTTON TO STARTS PLAYBACK FROM THE BEGINNING OF THE CURRENT TRACK WHEN THIS BUTTON IS TOUCHED AGAIN WITHIN ABOUT SECONDS PLAYBACK STARTS FROM T...

Page 67: ...ECTED TO THIS UNIT WHEN THE INTERNAL BATTERY OF I0OD I0HONE HAS RUN DOWN THIS FUNCTION MAY NOT OPERATE CORRECTLY 9OU MUST CONNECT THE I0OD I0HONE AFTER CHARGING THE BATTERY IF IT HAS RUN DOWN iPod Audio Menu Operations ONNECT YOUR I0OD I0HONE TO THE 53 CONNECTOR 4HE SYSTEM WILL AUTOMATICALLY DETECT THE CONNECTED DEVICE AND THE I0OD UDIO BUTTON WILL BE ENABLED FOR OPERATION ON THE AIN ENU SCREEN No...

Page 68: ...AT 4RACK AGAIN FOR 2EPEAT LL AGAIN FOR 2EPEAT FF Shuffle Playback 4OUCH BUTTON TO SHUFmE THE TRACKS IN PLAYING FOLDER DURING PLAYBACK 4OUCH THIS BUTTON AGAIN TO TURN OFF THE FEATURE Album Art work F CURRENT AUDIO lLE CONTAINS ALBUM ART IMAGE IN THE PICTURE WILL BE DISPLAYED IN THIS AREA ID3 Information Area 4HIS AREA DISPLAY INFORMATION OF PLAYING lLE SONG TITLE ARTIST INFORMATION ALBUM INFORMATION...

Page 69: ...od Selecting a list item from a list screen 4OUCH THE LIST SCREEN AND mICK UP OR DOWN TO SCROLL THE LIST 4OUCH A DESIRED LIST ITEM ON THE SCREEN TO DISPLAY THE CORRESPONDING LIST OF TRACKS 4OUCH THE DESIRED TRACK NAME ON THE LIST to play it iPod Video Menu Operations ONNECT YOUR I0OD I0HONE TO THE 53 CONNECTOR 4HE SYSTEM WILL AUTOMATICALLY DETECT THE CONNECTED DEVICE AND THE I0OD 6IDEO BUTTON WILL...

Page 70: ...tton once for Repeat One again for Repeat All again for Repeat Off Album Art work If current video file contains album art image in ID3 the picture will be displayed in this area ID3 Information Area The area is display the title of the playing file Category List Select different category movies to play The category is same as the iPod iPhone iPod Video List Mode Screen This operation is same as thi...

Page 71: ...ase refer to the iPod Audio Mode operation Note Video playback is not available on all iPod iPhone devices Please contact your Clarion dealer for details An optional connection cable or accessory may be required for this feature Note s 6IDEO IS NOT DISPLAYED WHEN THE AUTOMOBILE IS MOVING s MAGE DATA MAY NOT BE PLAYED BACK ACCORDING TO THE status of the iPod iPhone s 4HE VOLUME SETTING OF VIDEO DAT...

Page 72: ...LAYBACK FROM THE BEGINNING OF THE NEXT TRACK Note s 3OME TRACK ARE NOT ABLE TO BE SKIPPED s F SKIP LIMIT HAS BEEN REACHED 3KIP TRACKS IN THIS FUNCTION WILL NOT AVAILABLE s4RACK RATING 4OUCH OR BUTTON TO 4HUMBS DOWN OR 4HUMBS UP CURRENT TRACK AND THE BUTTON WILL LIGHT Note s4OUCH BUTTON WILL SKIP TO NEXT TRACK SKIP LIMIT HAS NOT BEEN REACHED s3OME TRACK IS NOT ABLE TO BE RATED I E AUDIO ADS AND SHA...

Page 73: ...YSTEM CHOOSES THE PREVIOUSLY CONNECTED DEVICE NDROID OR I 3 7HEN IT IS CONNECTED NDROID 4 I0HONE 4 OR 53 TOGETHER AND h O NOT SHOW AGAINv IS NOT CHECKED DISPLAY THE POPUP OF CHOOSE DEVICE 3 When connect the mobile phone by Bluetooth or USB when the Pandora mode there is a case the change device button works correctly We recommend that after finished the Pandora mode then connect other mobile phone ...

Page 74: ...HE USIC FUNCTION 0RESS 5 BUTTON ON PERATIONAL 0ANEL TO RETURN TO THE AIN ENU s 7HEN THE CONNECTION WITH BLUE ICON A LUETOOTH AUDIO PLAYER HAS BEEN ESTABLISHED THE ICON IS DISPLAYED AT THE TOP OF THE SCREEN Bluetooth Audio Player Settings 9OU CAN CONlRM VARIOUS INFORMATION CONCERNING ABOUT THE LUETOOTH NTERFACE FEATURES 4OUCH THE BUTTON TO DISPLAY THE INFORMATION ON THE SCREEN 7HEN YOU lNISH CONlRM...

Page 75: ...SIRED EVICE BUTTON YOU WISH TO USE 4OUCH BUTTON TO SELECT IT AS YOUR ACTIVE DEVICE 4HE CORRESPONDING CELLULAR PHONE IS SET AS CURRENT TELEPHONE 4OUCH THE BUTTON TO RETURN TO THE PREVIOUS SCREEN Controlling the Bluetooth Audio Player Note s CCASIONALLY DEPENDING ON THE ENVIRONMENT PLAYBACK sounds may be fragmented or switch noises may be generated Playing Music FTER THE CONNECTION WITH A LUETOOTH A...

Page 76: ...LEVEL INDICATOR ARE DISPLAYED AT THE TOP OF THE SCREEN Bluetooth Telephone Settings 9OU CAN CONlRM VARIOUS INFORMATION CONCERNING ABOUT THE LUETOOTH NTERFACE FEATURES 4OUCH THE BUTTON TO DISPLAY THE INFORMATION ON THE SCREEN 0ERFORM SETTING FOR THE DESIRED ITEM 3EE THE FOLLOWING SECTIONS FOR DETAIL 7HEN YOU lNISH CONlRMING THE LUETOOTH INFORMATION TOUCH THE button to return to the PREVIOUS SCREEN ...

Page 77: ...PLAY RETURNS TO THE 4ELEPHONE SCREEN s 4O DELETE THE CELLULAR PHONE REGISTRATION 4OUCH THE BUTTON TO DELETE THE DEVICE CONlRMATION SCREEN IS DISPLAYED 4OUCH THE BUTTON TO CONlRM DELETE Select the Cellular Phone 4O CHANGE THE CURRENT CELLULAR PHONE TO THE OTHER DEVICE WHICH IS ALREADY REGISTERED PERFORM THE FOLLOWING OPERATION 4OUCH THE BUTTON TO DISPLAY THE EVICE 3ELECT SCREEN 4OUCH THE CURRENTLY ...

Page 78: ...ORE USING THIS FUNCTION THE 0HONE OOK DATA MUST be sent from the cellular phone s NLY THE 0HONE OOK ITEMS WITH AT LEAST ONE TELEPHONE NUMBER REGISTERED IN THE CAPTURED 0HONE OOK DATA ARE DISPLAYED ON THE 0HONE OOK SCREEN 4OUCH THE BUTTON TO DISPLAY THE 0HONE OOK SCREEN 4OUCH THE DESIRED NAME BUTTON YOU WISH TO DIAL s LICK THE LIST UP AND DOWN TO SCROLL THE LIST 4OUCH THE BUTTON TO CALL THE SPECIlE...

Page 79: ...setting of your iPhone 2 Press and hold the VOICE button until you hear the warning tone The indicator change as follows 3 Talk to Siri the same way as using it on the iPhone 4 To finish Siri Eyes Free function touch the button Notes Siri Eyes Free is availabe on iOS 6 1 or higher Please use external mic when you use the Siri Eyes Free function ...

Page 80: ...K TUNING STEP TUNING OR PRESET TUNING 4OUCH AND HOLD THE DESIRED 0RESET BUTTON YOU WANT TO STORE FOR ABOUT SECONDS Auto Store 4HE UTO 3TORE IS A FUNCTION FOR STORING UP TO STATIONS THAT ARE AUTOMATICALLY SEARCHED IN SEQUENTIALLY F THE NUMBER OF RECEIVABLE STATIONS CANNOT REACH TO THE PREVIOUS STORED STATION REMAINS 4OUCH THE FM1 2 3 AM BUTTON TO SELECT THE DESIRED BAND OR 4OUCH THE BUTTON AND THEN...

Page 81: ...ISIT WWW SIRIUSXM CA ACTIVATEXM s ALL 8 CUSTOMER ARE AT As part of the activation process the SiriusXM satellites will send an activation message to your tuner When your radio detects that the tuner has received the activation message your radio will display Subscription Updated Once subscribed you can tune to channels in your subscription PLAN OTE THE ACTIVATION PROCESS USUALLY TAKES TO MINUTES B...

Page 82: ... 2 To store the current channel as a preset touch and hold a preset button for more than 2 seconds to save the channel to that preset button Tuning to Channels from the Category List Satellite Radio allows you to select broadcast channel category contents 1 Touch the Category List button on the SiriusXM Menu display to enter category list preview mode 2 Touch and flick the category list up or down ...

Page 83: ...SXV200 and SXM1 SXM2 SXM3 bands for SXV300 or later TuneStart With the TuneStart feature turned ON you will hear the beginning of the song when you tune to one of your Preset channels It may take a minute or two for the feature to work after power up or after changing preset bands You can turn TuneStart On or Off in the following operation 1 Touch the Option Setting button to enter the setting men...

Page 84: ...n to blue with a message of Tagging x 64 in the header portion of the screen x is the number of songs tagged stored on your head unit Note 1 During tagging if your iPod iPhone is connected to the head unit then tagged songs will be stored directly to the iPod iPhone instead of the head unit If no iPod iPhone is connected then the tag information will be saved to the head unit 2 This unit can store...

Page 85: ...SOLD IN THE MARKET OR SOLD SEPARATELY AND DIGITAL V ADAPTER Note 4HE FOLLOWING IS PART OF THE WIRING EXAMPLE Depending on the device there is a case to connect to the device directly with the CCA 771 Depending on the adapter or device there is a case that the audio noise and video noise is generated Wire Connection of HDMI Mode 1 Connection with the iPhone 4 and iPhone 4s 2 Connection with the iPh...

Page 86: ...N THEN APPEAR THE SCREEN OF THE CONNECTED DEVICE This HDMI mode is only indicate the screen of the iPhone Android Can t operate by the touch screen of NX405 Note EPENDING ON THE APPLICATION AND MODEL OF THE MOBILE PHONE THERE IS THE CASE THAT BLACK FRAME APPEARS AROUND THE SCREEN ...

Page 87: ...N AIN ENU 4HE WILL DISPLAY THE EXTERNAL CAMERA VIDEO 4HE SCREEN WILL DISPLAY h O 6IDEO 3IGNALv MESSAGE IF A VALID CAMERA IS NOT CONNECT TO THIS HEAD UNIT 0RESS 5 BUTTON ON PERATIONAL 0ANEL TO RETURN TO THE AIN ENU Setting Camera audio 3ELECT h v BUTTON IN THE AMERA UDIO SETTING OF THE ENERAL SETTING 4HE AUDIO FROM CAMERA WILL HEARD WHEN BACK GEAR IS ON 4HE VOLUME CONTROL IS AVAILABLE BUT NOT INDIC...

Page 88: ...r Zone Touch the 2 Zone off button to close the Rear Source Note F THE SOURCE IS SELECTED AS THE FRONT THE SOURCE IN REAR CAN T BE SELECTED F THE SOURCE IS SELECTED AS THE REAR THE SOURCE IN FRONT CAN T BE SELECTED 4OUCH THE RONT BUTTON TO ACCESS THE MAIN MENU BUT NOT CLOSE THE 2EAR 3OURCE DVD Video in Rear PTION BUTTON 3HOW URSOR KEYS 0REVIOUS HAPTER AST ACKWARD BUTTON 0LAY 0AUSE BUTTON EXT HAPTE...

Page 89: ...AT BUTTON 3AME AS I0OD FUNCTION OF FRONT SOURCE RONT 2EAR BUTTON F THE SCREEN DISPLAYS 2EAR 3OURCE TOUCH TO SWITCH TO RONT 3OURCE F THE SCREEN DISPLAYS RONT 3OURCE TOUCH TO SWITCH TO 2EAR 3OURCE iPod Video Rear Source ID3 Mode 4 F THE SOURCE IS SELECTED AS THE FRONT THE SOURCE IN REAR CAN T BE SELECTED F THE SOURCE IS SELECTED AS THE REAR THE SOURCE IN FRONT CAN T BE SELECTED 4OUCH THE RONT BUTTON...

Page 90: ... HOOSE THE DESIRED WALLPAPER 4HERE ARE THREE OPTIONAL IMAGES WHICH YOU CAN IMPORT FROM 53 3ELECT h MPORTED v AND TOUCH MPORT 4HE FORMAT SHOULD BE JPEG OF LESS THAN BYTES Illumination Color Set the illumination color on the panel NPUT UX 3ENSE 58 INPUT SWITCH INCLUDING OW IDDLE IGH Tel Speaker There are two options Left and Right For example if current setting is Right when BT phone is coming in on...

Page 91: ...AGNA ASS 8 HOOSE THE LOUDNESS N OR FF Note PTIONAL CABLE SOLD SEPARATELY IS NECESSARY WHEN YOU USE UDIO LINE OUT Navigation Setup Menu 03 4IME 3ET THE SYSTEM TIME TO BE SYNCHRONIZED WITH 03 LOCAL TIME OR NOT AVI NTERRUPT 4HERE ARE THREE CHOICES N 0OPUP FF h Nv 4HE NAVIGATION SCREEN WILL COVER TO 6 SCREEN WHEN REACHING SOME KEY POINT h0OPUPv 7HEN SMALL TURN INFO WINDOW WILL POP UP IN THE TOP OF THE...

Page 92: ...GE ANTI THEFT CODE 4OUCH 9 3 BUTTON THE NUMERICAL KEYPAD IS DISPLAYED NTER THE NEW PASSWORD TWICE THEN ANTI THEFT CODE IS SET AND YOUR UNIT IS SECURED 7HEN THE NTI THEFT IS h Nv YOU NEED ENTER CORRECT NTI THEFT CODE TO TURN THE UNIT ON F YOU ENTER WRONG CODE THREE TIMES THE UNIT IS LOCKED AND MUST BE UNLOCKED BY THE PROFESSIONALS F YOUR UNIT IS SECURED HOLD THE BUTTON MORE THAN SECONDS THEN THE NT...

Page 93: ... control unit it may not work The battery of the remote control unit is dead or there is no battery in the remote control unit Check the battery of the remote control unit Problem Cause Measure Disc cannot be loaded A disc is already loaded Eject the disc before loading the new one There is foreign matter already in the disc slot Remove the foreign matter or consult a service station Sound skips o...

Page 94: ...USB device Sound skips or is noisy ˀƯ ŲÄ Ë Ê ÆÇÌ encoded properly Ë ˀƯ ŲÄ Ë Æ Ç properly The video image of iPod iPhone is disturbed The TV Signal setting of the iPod iPhone is not set correctly Set the TV Signal setting NTSC PAL of the iPod iPhone correctly Bluetooth Problem Cause Measure Cannot pair the Bluetooth enable device with the car audio system The device does not support ÌÀ ÈÊÇŲÄ Ë Ê ÉÍ...

Page 95: ...LLATION MANUAL FOR MORE INFORMATION ON ANTENNA INSTALLATION 2EPLACE THE ANTENNA IF THE CABLE IS DAMAGED 3IRIUS8 PRODUCTS ARE AVAILABLE AT YOUR LOCAL CAR AUDIO RETAILER OR ONLINE AT WWW SHOP SIRIUSXM COM 3UBSCRIPTION 5PDATED 4HE RADIO HAS DETECTED A CHANGE IN YOUR 3IRIUS8 SUBSCRIPTION STATUS 0RESS THE v NTERv BUTTON TO CLEAR THE MESSAGE N THE 5 3 VISIT WWW SIRIUSXM COM OR CALL IF YOU HAVE QUESTIONS...

Page 96: ... the Dimmer properly The operating condition is not good The temperature inside the vehicle may be 0 C or lower Set to an appropriate temperature 25 C or so and check it again The headlight of the vehicle is lit The display is made dark at night to prevent the glare When the headlight of the vehicle is lit in the daytime the display gets dark There are red green and blue points in display This is ...

Page 97: ...use Measure BAD DISC A disc cannot be played due to scratches etc Replace with a non scratched non warped disc Invalid Disc A disc is loaded upside down inside the DVD deck and does not play Eject the disc then reload it properly PARENTAL VIOLATION Parental level error Set the correct Parental level Region code error Region code error Eject the disc and replace correct region code disc ...

Page 98: ...s Mid 650 mVrms Low 1 3 Vrms Audio Video output Video output voltage 1 0 Vp p 75 Screen Size 6 0 wide type Pixels 1 152 000 Resolution 800 x 480 x 3 RGB Bluetooth Specification Bluetooth Ver 4 0 Profile HFP1 5 Hands Free Profile HSP1 0 Headset Profile A2DP Advanced Audio Distribution Profile AVRCP1 2 1 3 1 4 AV Remote Control Profile PBAP Phone Book Access Profile SPP Serial Port Profile Power Class 2 USB...

Page 99: ...62 NX405 English Owner s Manual 8 DIMENSIONS 8 WEIGHT KG m m 0 0 1 m m 8 7 1 165mm 172mm 7 4 6 8 6 4 ...

Page 100: ... ÌÇÊ ºÄ Ë Ê Ë È Ê Ì ÄÑƘËÇÄ ÁÌ ÅËƖ ƹ À Æ ÇÆÆ Ì ÌÀ Æ ºÄ Ɠ º ËÍÊ ÌÇ ŲÐ ÏÁÌÀ ÌÀ Ä ÅÈƖ 0 Radio Antenna GPS Antenna HDMI CABLE SiriusXM Vehicle Tuner AUX2 VIDEO IN AUX2 AUDIO IN LCH AUX2 AUDIO IN RCH SUBWOOFER 1 SUBWOOFER 2 YELLOW WHITE RED WHITE WHITE WHITE D E R D E R D E R SWI CAMERA YELLOW MIC YELLOW WHITE RED VIDEO OUT REAR_LCH REAR_RCH Connector Cable Refer to next page ...

Page 101: ...WH 5HDU ULJKW PXUSOH ODFN 3XUSOH UD ODFN UD KLWH KLWH ODFN UHHQ UHHQ ODFN HG PXUSOH KLWH UDVV JUHHQ 5HDU ULJKW URQW ULJKW URQW ULJKW URQW OHIW URQW OHIW 5HDU OHIW 5HDU OHIW 9 DFFHVVRU 5HYHUVH JHDU FRUG 3DUNLQJ EUDNH FRUG Note 1 Connecting the PHONE INTERRUPT terminal The phone interrupt will mute the audio if the lead receives a negative or ground signal ...

Page 102: ...Clarion Co Ltd All Rights Reserved Copyright 2015 Clarion Co Ltd ...

Page 103: ...NX405 English Owner s manual Clarion NX405 English 1 ...

Page 104: ...o fully understand the screens and features Easy map updates It is easy to keep the navigation system up to date Simply download new map data from Clarion s portal site store them on a microSD card and insert it into the Clarion NX405 via the front card slot Unpleasant surprises are now avoided as navigation maps will match the real world Latest Map Guarantee When you start using the product you h...

Page 105: ...ew 19 2 3 8 Tunnel view 20 2 3 9 Freeway services 20 2 3 10 3D object types 21 2 4 Navigation menu 21 3 Using the navigation 24 3 1 Selecting a destination 24 3 1 1 Using combined search 24 3 1 2 Selecting an address 27 3 1 2 1 Entering an address with states 28 3 1 2 2 Entering an address starting with the street name 31 3 1 2 3 Selecting a town center 33 3 1 2 4 Selecting the midpoint of a stree...

Page 106: ...route 59 3 3 8 Pausing guidance 60 3 4 Saving a location 60 3 4 1 Editing a saved location 61 3 5 Adding an Alert Point 62 3 6 Running a Simulation 63 3 7 Off road navigation 64 3 7 1 Switching to off road navigation 64 3 7 2 Selecting the destination in off road mode 64 3 7 3 Navigating in off road mode 65 4 Reference guide 66 4 1 Concepts 66 4 1 1 2D 3D GPS reception 66 4 1 2 Natural and TTS voi...

Page 107: ...iew settings 79 4 3 5 Regional settings 82 4 3 6 Display settings 82 4 3 7 Trip Monitor settings 83 4 3 8 Usage Reports settings 83 5 Troubleshooting 84 5 1 GPS signal cannot be received 84 5 2 Address cannot be found 84 5 3 The calculated route is not optimal 84 5 4 Disabling the speed limit warning 85 5 5 Keyboard buttons are grayed out 85 5 6 The map is hidden behind an image of a junction 86 6...

Page 108: ...ne is able to track any personal information If you change your mind later you can enable or disable the log collection in Settings page 83 It is important to look at the display only when it is safe to do so If you are the driver of the vehicle we recommend that you plan and review your route before you start your journey Plan the route before your departure and stop if you need to change the rou...

Page 109: ...ction Later you can change it in Regional settings page 82 2 Read the end user license agreement and tap if you agree with the terms of use 3 You are now asked whether you allow the software to collect usage information and GPS logs that may be used for improving the application and the quality of maps Tap to allow the anonymous statistics or disable this function Later you can turn them on or off...

Page 110: ...If needed modify the time format and unit settings Later you can change them in Regional settings page 82 Tap to continue 7 If needed modify the default route planning options Later you can change them in Route Preferences page 74 Tap to continue 8 The initial set up is now complete tap to enter the Navigation view 8 Clarion NX405 English ...

Page 111: ...you use the controls 2 2 2 Using the cursor You can select a map location in the following ways x By tapping the map when navigating x By tapping the map when you are asked to confirm the destination at the end of a search When a map location is selected the cursor appears at the selected point on the map The location of the cursor can be used as the destination of the route or a new Alert Point Y...

Page 112: ... and a family name or in multi word street names Tap the button at the bottom center of the screen Entering upper and lower case letters By default when entering a text the first character appears in upper case while the rest of the text is in lower case Tap to enter an upper case letter or tap it twice to turn on Caps Lock Tap again to use lower case letters Entering numbers and symbols Tap to sw...

Page 113: ...tinuously x Tap and hold the following button on keyboard screens to quickly delete several characters x Tap and hold the following buttons in long lists to scroll pages continuously Dragging Drag the screen in the following cases x To move the handle on a slider x To scroll a list grab the list anywhere and slide your finger up or down Depending on the speed of the sliding the list scrolls faster...

Page 114: ...layed on the screen NX405 uses maps that let you examine the locations at various zoom levels always with optimized content It always displays street names and other text with the same font size never upside down and you only see the streets and objects that you need Map scaling has a limit in 3D map view mode If you zoom out further the map switches to 2D view mode Tap once to modify the view in ...

Page 115: ...the compass The direction of the compass shows North Returning to normal navigation Move the map back to follow the current GPS position Automatic map rotation is also re enabled The map manipulation buttons disappear and the navigation continues Selecting additional options Open a list of additional features like saving a location or searching for Places around the cursor Selecting a destination ...

Page 116: ...en buttons data fields and route information on the map during navigation Note Some buttons fields or icons may not be available in your product version Number Name Description 1 Current position marker The current position is displayed as a blue arrow by default When there is no GPS position the current position marker is transparent and it shows your last known position See page 16 2 GPS positio...

Page 117: ...u can check the trip summary find Places around your final destination save the current location or suspend the navigation 11 Lane information On multi lane roads it shows the lanes ahead and their directions The highlighted arrows represent the lanes and direction you need to take See page 19 12 Alert point warning It shows the type of the alert points when approaching a road safety camera or oth...

Page 118: ...ition markers When your GPS position is available NX405 marks your current position By default this marker is a blue arrow The dot near the arrow shows the GPS position as perceived by the GPS receiver When on road navigation is selected the current position marker may not show your exact GPS position and heading If roads are near it is aligned to the nearest road to eliminate GPS position errors ...

Page 119: ...ate destination It is an intermediate destination of the route before reaching the final destination Destination end point It is the final destination of the route Route color The route always stands out with its color on the map both in daytime and night color modes Streets and roads that are excluded from the navigation You can choose whether you want to use or avoid certain road types page 74 H...

Page 120: ... left corner Most of the maneuver icons are intuitive The following table lists some of the frequently shown route events Icon Function Turn left Turn right Turn back Bear right Turn sharp left Keep left Continue straight in the intersection Enter the traffic circle and take the first exit next maneuver Enter the traffic circle second next maneuver Enter the freeway Exit the freeway Board the ferr...

Page 121: ...able destinations and the road numbers All signposts look similar when cruising when there is no planned route During navigation only the signpost that points to the lane s to be taken is highlighted all the others are darker If you want to hide the currently displayed signposts tap any of them and the normal Navigation view returns until new signpost information is received You can modify the sig...

Page 122: ...original map view returns Tunnel view can be turned off in See page 79 2 3 9 Freeway services When you are driving on a freeway the button appears at the top right corner of the Navigation view Tap it to open a panel with the details of the next few service stations gas stations restaurants Tap any of them to display the exit area on the map You can now easily add this service station as a waypoin...

Page 123: ...ings are block representations of full town building data containing actual building sizes and positions on the map 2 4 Navigation menu On the Navigation view tap to open the Navigation menu You can see the following menu options when you are navigating without a planned route Button Function Select your destination by entering an address or its coordinate or by selecting a Place a Saved Location ...

Page 124: ...rnatives Tap to access additional options like Simulation or Route Preferences Delete your route Delete the next waypoint or the whole route In the navigation menu you have the following additional options Button Function Open the Saved Locations screen where you can save a location as a favorite destination or edit a saved location Suspend navigation Resume navigation Access the User profiles men...

Page 125: ...reen to display additional features Tap it to open the list of additional features on certain screens Tap it to return to the map from any menu screen Tap the Back button to return to the previous screen You can also press and hold this button to quickly return to the Navigation view from any other screen Clarion NX405 English 23 ...

Page 126: ...stination by selecting one of the following options x Using combined search to search among different destination types at once see page 24 x Entering a full address or a part of an address for example a street name without a house number see page 27 x Selecting a Place as your destination see page 37 x Selecting a previously saved location as your destination see page 44 x Selecting a location fr...

Page 127: ...e search area and start entering the name of the new search area on the keyboard You only need to enter a few letters to get a result The most likely result appears below the input field as you enter new letters a If the new search area is in a different country or state start entering the country state and the town b Tap to see the whole list of the matching results 5 With the proper search area ...

Page 128: ...e list of matching Places ordered by their distance from your current location x optional If your product contains Places from different data providers you can further narrow the list by showing the results from one provider only Look for the provider logos Tap one of them to see Places from that provider Tip To search for an intersection in the combined search enter the names of the streets conne...

Page 129: ...arameters or tap to start your journey 3 1 2 Selecting an address If you know at least a part of the address this is the quickest way to select your destination Using the same screen you can find an address by entering the following information x The exact address including the house number see page 28 x The address starting with the street name see page 31 x The center of a town see page 33 x The...

Page 130: ... a country from the list below the input field or tap the button and start entering the first few letters of the country on the keyboard If you select a country without a state you can search for a town in all its states b Tap to open the list of results and select one country from the list 4 If needed select a new city a Tap the City or ZIP code field b optional In the Select City or ZIP code scr...

Page 131: ...of suggestions c Otherwise start entering the street name on the keyboard the names that match the string appear in a list d Tap to open the list of results Select the street from the list 6 Enter the house number by performing the following steps a Tap the House number or crossing street field b Enter the house number on the keyboard To enter letters tap Clarion NX405 English 29 ...

Page 132: ...m if necessary Tap to enable or avoid freeways tap for roads with Period Charge or Per use Toll tap for ferries or tap for carpool lanes 9 Tap to confirm the destination You can also select a nearby point on the map or tap to select a different destination 10 The route is calculated and the map appears showing the entire route where you can check route information and route alternatives Tap to mod...

Page 133: ...hange the country Tap a In the Select Country screen you can immediately select a country from the list below the input field or tap the button and start entering the first few letters of the country on the keyboard b Tap to open the list of results and select one country from the list 4 If needed select a new city a Tap the City or ZIP code field b optional In the Select City or ZIP code screen y...

Page 134: ...street from the list 6 Enter the house number by performing the following steps a Tap the House number or crossing street field b Enter the house number on the keyboard To enter letters tap c Tap the selected address to finish the address search 7 A full screen map appears with the selected point in the middle If necessary tap the map somewhere else to modify the destination The cursor appears at ...

Page 135: ...oute alternatives Tap to modify the route parameters or tap to start your journey 3 1 2 3 Selecting a town center The town center is not the geometric center of the town but an arbitrary point the map creators have chosen In towns and villages it is usually the most important intersection and in larger towns it is one of the important intersections 1 Go to and modify the country and state as descr...

Page 136: ...wn becomes the destination of the route 3 1 2 4 Selecting the midpoint of a street To navigate to the midpoint of a street without entering the house number perform the following steps 1 Go to and select the country and town as described earlier The Select Street screen appears 2 Enter the street name by performing the following steps a Tap the Street name field b optional On the Select Street scr...

Page 137: ... 5 Selecting an intersection in a town To navigate to an intersection perform the following steps 1 Go to and select the country and city as described earlier 2 Enter the street name by performing the following steps a Tap the Street name field b optional On the Select Street screen you can immediately select a street from the list of suggestions c Otherwise start entering the street name on the k...

Page 138: ...select a destination You can also select any kind of destination by entering the ZIP code instead of the city name To select the ZIP code perform the following steps 1 Go to and modify the country and state as described earlier page 28 if necessary 2 Tap the Town or ZIP code field 3 Enter the ZIP code by performing the following steps a Tap to open the numeric keypad b Start entering the ZIP code ...

Page 139: ...arched types of Places with the Quick search categories see page 37 x Searching for a Place by its name see page 41 x Searching for a Place by its category see page 39 In case of emergency you can also find help nearby see page 43 3 1 3 1 Using Quick search categories The Quick search feature helps you quickly find the most frequently selected types of Places Perform the following steps 1 Tap on t...

Page 140: ...f Places 4 The Places in the list can be ordered by their distance from the current or last known position from the destination or by the length of the necessary detour If you need to reorder the list tap To filter the list of results by providers tap and then the provider logo on the right side of the screen 5 optional If needed tap to further filter the list of results 6 Browse the list and tap ...

Page 141: ...natives Tap to modify the route parameters or tap to start your journey 3 1 3 2 Searching by category To search for Places by their categories and subcategories perform the following steps 1 Tap on the Navigation view to access the Navigation menu 2 Tap and 3 Tap 4 Select the area around which you would like to search for the Place by tapping By default the search area is around the current positi...

Page 142: ...oute The result list is ordered by the distance from the destination x Tap to search for a place within a selected town The result list is ordered by the distance from the center of the selected town 5 optional If you have selected select the town to search in 6 Select one of the main Place categories for example Accommodation then browse the subcategories for example Hotel or Motel to find your d...

Page 143: ... by name browse the various Place categories or use the mixture of the two search types perform the following steps 1 Tap on the Navigation view to access the Navigation menu 2 Tap and 3 Tap to open the Search By Name or Category window 4 Select the area around which you would like to search for the Place By default the search area is around the current position or if it is not available around th...

Page 144: ...ered by the length of the necessary detour 5 optional If you have selected select the town to search in You can search for the name of a Place in all categories by performing the following steps 1 Tap Using the keyboard start entering the name of the Place or browse in the categories 2 After entering a few letters tap to open the list of Places or Place categories with names containing the entered...

Page 145: ...p and Places in the following pre set search categories can be searched for around the current position or around the last known position if the current position is not available x Car repair and roadside assistance services x Medical and emergency services x Police stations x Gas stations 3 Tap any of the quick search buttons to get an instant list of those types of Places 4 optional The Places i...

Page 146: ... and 3 The list of saved locations is displayed It contains two pre set categories Home and Work 4 Tap the location that you want to set as your destination If necessary browse the list to see more results 5 optional If needed tap to enable the editing option so that you can rename the saved locations or delete any of them 6 After you have selected a saved location as the destination a full screen...

Page 147: ...check route information and route alternatives Tap to modify the route parameters or tap to start your journey 3 1 5 Selecting a History item The destinations that you have used earlier appear in the History list Smart History offers these locations from your previous destinations using parameters like the current time of day the day of week and the current location The more you use the navigation...

Page 148: ...selected If necessary scroll the list to see earlier destinations 4 Select a destination from the list 5 A full screen map appears with the selected point in the middle If necessary tap the map somewhere else to modify the destination The cursor appears at the new location 6 Check the settings for road types and change them if necessary Tap to enable or avoid freeways tap for roads with Period Cha...

Page 149: ... a saved route The routes that you have saved earlier appear in a list To select a previous route perform the following steps 1 Tap on the Navigation view to access the Navigation menu 2 Tap and 3 The list of saved routes appears If necessary scroll the list to see earlier routes 4 Select a route and the Multipoint Route screen appears If necessary modify the saved route Otherwise tap Clarion NX40...

Page 150: ... your journey 3 1 7 Entering coordinates To select a destination by entering its coordinates perform the following steps 1 Tap on the Navigation view to access the Navigation menu 2 Tap and 3 You can enter the latitude and longitude values in any of the following formats decimal degrees degrees and decimal minutes or degrees minutes and decimal seconds Tap 48 Clarion NX405 English ...

Page 151: ...change them if necessary Tap to enable or avoid freeways tap for roads with Period Charge or Per use Toll tap for ferries or tap for carpool lanes 6 Tap to confirm the destination You can also select a nearby point on the map or tap to select a different destination 7 The route is calculated and the map appears showing the entire route where you can check route information and route alternatives T...

Page 152: ...e 3 optional If needed tap to list the Places near the selected point or to save this location Tip If you already have a planned route tap and to add the selected location to your route 4 Tap to select the cursor as the destination 5 The route is calculated and the map appears showing the entire route where you can check route information and route alternatives Tap to modify the route parameters o...

Page 153: ... of route points the starting point of the route which is normally the current GPS position 4 Tap to select the destination 5 The New Route to screen appears where you can select the destination of the route the same way as described in the previous sections 6 When the selected location appears on the map tap and the list returns If needed you can add further intermediate destinations Clarion NX40...

Page 154: ...ute is automatically calculated 3 2 Checking Route Information and Alternatives To get a map overview of the planned route and check different parameters of the planned route perform the following steps 1 Tap on the Navigation view to access the Navigation menu 2 In the Navigation menu tap 3 The planned route is displayed in its full length on the map with the following additional information x Th...

Page 155: ... Editing the route When navigation has already started there are several ways to modify the planned route You have the following options x Setting a new starting point see page 54 x Adding an additional destination see page 55 x Modifying the list of destinations see page 56 x Saving the planned route see page 56 x Deleting the planned route see page 57 x Selecting a route alternative when plannin...

Page 156: ...n the Navigation view to access the Navigation menu 2 In the Navigation menu tap 3 The first line from the bottom is the start of the route normally the current GPS position Tap select and confirm your action at the warning message 4 The Change Start to screen appears Select the starting point of the route the same way you select a destination 5 You can see the new starting point on the map Tap an...

Page 157: ...ation as described in the above sections the route to the previous destination is deleted and a new route is calculated To add a new intermediate destination to the planned route perform one of the following actions x Tap the map anywhere to browse it After selecting the location on the map tap and to add the selected location to your route as an intermediate destination The other destinations of ...

Page 158: ...nts or the route x Tap the name of the intermediate destination to move it up or down in the list to save the location or to delete it from the list x If you have a route with at least one intermediate destination you can delete the waypoint from the list right from the Main menu Tap then confirm the deletion 3 3 4 Saving the planned route To save the planned route perform the following steps 1 Se...

Page 159: ...s to delete the navigated route x If you already have a planned route and you select a new destination as described in the above sections the route to the previous destination is automatically deleted and a new route is calculated x In the Navigation menu tap or If there are no waypoints the planned route is deleted after a confirmation If you have waypoints you can choose to delete the whole rout...

Page 160: ...nd go to the route confirmation screen 2 Tap 3 You can see the basic details of route alternatives Tap any of them to see it on the map 4 To view more suggestions tap and scroll down for other alternative routes with different route planning methods 5 Select one of the route alternatives and tap to return to the previous screen NX405 recalculates the route Tap to start your journey The orange line...

Page 161: ...sic details of a few route alternatives Tap any of them to see it on the map If there are suitable alternatives calculated with the route planning method that is selected in Route preferences page 74 they are shown on top of the list Routes with other route planning methods are shown at the bottom of the list 4 If there are more than a few suggestions you can tap and scroll down for routes 5 Selec...

Page 162: ...g a location To add any location to the saved locations the list of frequently used destinations perform the following steps 1 Select a destination as described before It can be an address a Place any location on the map a previously used destination from History and so on 2 When the map appears with the selected location in the middle tap 3 Tap 4 optional Using the keyboard you can change the nam...

Page 163: ...saved location To edit a location that you have already added as a Saved Location perform the following steps 1 On the Navigation view tap and 2 The list of Saved locations is displayed 3 Tap and 4 Tap the location you want to edit tap and enter the name of the location on the keyboard then tap Note In Saved Locations Home and Work cannot be renamed To change your home or work location tap or and ...

Page 164: ...led when you are in a country where road safety camera warning is prohibited However you must make sure that using this feature is legal in the country where you intend to use it 1 Return to the Navigation view and select the Alert Point The red cursor appears there 2 Tap 3 Scroll down the list and tap 4 Select the type of the Alert Point the direction from which you expect the alert and if applic...

Page 165: ...The simulation starts from the starting point of the route and leads you through the whole planned route using a realistic speed optional You have the following controls during the simulation the control buttons disappear after a few seconds but you can open them again if you tap the map x Jump to the next route event maneuver x Pause the simulation x Jump to the previous route event maneuver Clar...

Page 166: ... and 2 Tap and select Most of the procedures described for on road navigation also apply to off road navigation However there are some that are not available in this navigation mode For example x You cannot open the itinerary as you have no maneuvers just route points and straight lines between them x There are no route alternatives and route planning method x Vehicle settings are disabled 3 7 2 S...

Page 167: ...turn by turn navigation just a recommended direction You can see an orange line drawn between your current position and the next destination to reach The Turn Preview field in the top left corner shows a compass with your bearing and the distance of the next destination When you reach the final destination the navigation ends Note If you do not want to use off road navigation switch back to on roa...

Page 168: ...ional type of voice instructions Every phrase that occurs in voice guidance messages is recorded in a studio with a real person The advantage of pre recorded voice is that it sounds really natural but the range of instructions that can be given this way is limited Location specific information such as street names cannot be announced TTS technology provides a machine generated way to give voice in...

Page 169: ...e route contains one starting point and one or more destinations The starting point is the current or last known position by default If you need to see a future route the starting point can be replaced with any other given point See page 54 Once the destination has been selected NX405 calculates the route based on your preferences These preferences are the route planning method and the road types ...

Page 170: ...gent navigation With the help of intelligent navigation the planned route can adapt to traffic and other changes during navigation The following sections describe these features 4 1 7 1 Congestion detour on highways NX405 may offer a detour when you slow down on a highway due to a traffic jam The Potential congestion detour window appears and shows the length and duration of the detour You can ign...

Page 171: ... suggested route by tapping You can accept the recommended detour by tapping 4 1 7 3 Parking around destination If you leave the planned route by exiting a freeway NX405 tries to guess the reason for making a detour By tapping you can open a top down map with the recommended parking Places around the destination By tapping the arrows on the sides you can switch between the recommended parking faci...

Page 172: ...l functions It can be found in the Navigation menu You need an Internet connection via your cell phone to access online services like parking and weather information Button Description Shows information on the current position latitude longitude nearest town next crossing street and so on or the last known position if GPS reception is not available See page 71 Offers assistance near your current p...

Page 173: ... two ways x By going to the Navigation menu and tapping and x By tapping the current street name if it is displayed below the current position marker on the map The following information is shown on the Where Am I screen x Address details when available of the current position x Latitude and Longitude coordinate of the current position in WGS84 format x The nearest town x Next crossing road street...

Page 174: ...tion By selecting a recorded trip you can delete rename or change the color of the recorded route You can export all logs into the sdmmc folder You can access the Trip Monitor Settings where you can enable saving the trip logs automatically or you can save the trip logs manually See page 83 By tapping your recorded trip on the Trip Monitor screen you can check information such as time speed altitu...

Page 175: ...ow the software helps you navigate with different kinds of route related information on the Navigation view Change the voice guidance language set the time zone the measurement units the time and date and formats and customize the application for your local language Enable or disable menu animations Turn the automatic trip log saving on or off and check the current size of the trip database Collec...

Page 176: ... method See page 75 Select on road or off road navigation See page 64 Select your preferred road types for the route See page 76 4 3 1 1 Vehicle profile You can select the following vehicle types Button Description Maneuver restrictions and directional constraints are taken into account when planning a route Roads are used only if access for cars is allowed Private roads and resident only roads ar...

Page 177: ...ute if you can travel at or near the speed limit on all roads Usually the best selection for fast and normal cars Results in a route with fewer turns and no difficult maneuvers With this option you can make NX405 take for example the freeway instead of a series of smaller roads or streets Gives a short route to minimize the travel distance It can be optimal for slow vehicles Searching for a short ...

Page 178: ...ad for a longer period of time They can be enabled or disabled separately from toll roads Per use toll roads are pay roads where there is a per use charge in the routes by default If you disable toll roads NX405 plans the best toll free route NX405 includes ferries in a planned route by default However a map does not necessarily contain information about the accessibility of temporary ferries You ...

Page 179: ...comes inactive Tap again to re enable it Button Function Disable verbal instructions This function is enabled by default Choose from the following options x Announce the street names in the native language area of the selected voice guidance language x Announce the road numbers only x Announce the maneuvers only Street names sound correct only if you use a native voice profile for the country Choo...

Page 180: ... is able to warn you if you exceed the current speed limit This information may not be available in your region or may not be fully correct for all roads on the map The maximum speed set in the vehicle profile is also used for this warning NX405 alerts you if you exceed the pre set value even if the legal speed limit is higher This setting lets you decide whether you wish to receive visible and or...

Page 181: ...imit x Only when speeding The audio warning is only played when you exceed the given speed limit x When approaching The audio warning is always played when approaching one of these Alert Points In order to draw your attention the audio alert is different when you exceed the speed limit Maps may contain driver alert information that can be shown on the Navigation view in a similar way as real life ...

Page 182: ...oo many Places make the map crowded so it is a good idea to keep as few of them on the map as possible Tap the name of the Place category to show hide it or to open the list of its subcategories You can modify the following additional settings on the Navigation View screen If you are navigating with a planned route you can set three data fields to be displayed on the Navigation view You can choose...

Page 183: ...ure on or let the map be displayed for the whole route When entering tunnels the surface roads and buildings can be disturbing Tap it to show a generic picture of a tunnel instead of the map A top down overview of the tunnel and the remaining distance are also displayed In certain situations NX405 offers a detour when there is a traffic jam on a highway See page 68 In certain situations NX405 offe...

Page 184: ...pre recorded sounds can only tell you basic information about turns and distances x TTS Voice street names announced These computed voices can read out complex instructions street names or system messages x TTS Voice with a microphone icon Besides the above mentioned profiles it can also be used for voice recognition You can set the measurement units and time date format to be used NX405 may not s...

Page 185: ...ll trip and track logs saved 4 3 8 Usage Reports settings If you enable it when first using the application it collects usage information and GPS track logs that may be used for improving the application and the quality and coverage of maps Data are processed anonymously no one is able to track any personal information You can enable or disable collecting the following logs Button Description Anon...

Page 186: ...our current position Solution 2 Wait a few minutes for the GPS signal 5 2 Address cannot be found Issue NX405 cannot find the address you entered Cause The digital map data may not include every single address Solution 1 If the house number is not known or NX405 cannot find it select only the street name This way NX405 will navigate you to the midpoint of the street where you can find the exact ad...

Page 187: ...isable the speed warning by performing the following steps 1 Tap and 2 Tap and 5 5 Keyboard buttons are grayed out Issue Some keyboard buttons are grayed out and cannot be used Cause NX405 has a smart keyboard for address search which means that only those buttons are active that can be used to type a name that is available on the map Solution Check if you entered the name correctly If the name is...

Page 188: ...rsection and the needed information exists the map is replaced with a 3D view of the junction The lanes you need to take are displayed with arrows Solution If you want to hide the currently displayed junction and return to the Navigation view tap the picture To turn off this feature perform the following steps 1 Tap and 2 Tap Now the tunnel view will not appear again 86 Clarion NX405 English ...

Page 189: ...he route 53 F Fast route 75 Favorites Saved Locations 44 60 61 G GPS Information 71 Green route 75 H Help Nearby 43 History 45 Home address 44 60 I Intelligent navigation 68 Intersection 35 J Junction view 16 19 L Language settings 77 82 M Map colors 80 Map location 50 Multipoint Route 21 51 N Natural voice 66 Navigation mode 64 74 75 Navigation view 14 Navigation view settings 79 New Route 21 24 ...

Page 190: ...gs 77 Trip Monitor settings 83 Usage Reports settings 83 Warning settings 78 Short route 75 Simulation 63 Smart zoom 67 Sound settings 77 Speed camera 66 79 85 Speed limit 78 85 Speed limit warning 67 85 Starting point 54 Street midpoint 34 Sunrise and Sunset 71 T Touch gestures 11 Town center 33 Traffic Historical traffic 66 Trip Monitor 72 Trip Monitor settings 83 TTS voice 66 Tunnel view 16 20 ...

Page 191: ... hereinafter User and the business entity distributing selling the Device together with the Navigation Product under its own name and or branding hereinafter Licensor This Agreement sets out the conditions and limitations of use of the Navigation Product The User and the Licensor are referred together as Parties 1 2 User represents and warrants that i he she is not located in a country that is sub...

Page 192: ...ereof shall be deemed parts of the Navigation Product 4 3 Error corrections updates or upgrades or any other modifications to the Navigation Product used by the User following the conclusion of this Agreement shall also be used in accordance with this Agreement 4 4 Your rights under this Agreement will terminate immediately without notice from Licensor if you materially breach them or take any act...

Page 193: ... the User s personal purposes only 6 2 In the event that the Navigation Product comes preinstalled on or otherwise licensed together with the Device or acquired from Licensor by the User for a specific Device the Navigation Product shall be tied to the Device and may not be separated transferred to or used with another Device or sold to another User without selling the Device itself 6 3 The Databa...

Page 194: ...ity for damages incurred due to the Navigation Product not being applicable for any defined purpose or due to the error or incompatibility of the Navigation Product with any other system device or product 8 5 NEITHER LICENSOR NOR ITS SUPPLIERS SHALL BE LIABLE TO USER FOR ANY INCIDENTAL CONSEQUENTIAL SPECIAL INDIRECT OR EXEMPLARY DAMAGES ARISING OUT OF THIS AGREEMENT INCLUDING LOST PROFITS OR COSTS...

Page 195: ... website and the User is obliged to use the services in line with those terms In the event of conflict between this Agreement and such additional terms the additional terms shall prevail 8 11 Purchase and acquisition of activation licence for the use of certain functions Databases or Services may require Internet connection and no alternative way of acquisition is offered by Licensor or the suppli...

Page 196: ...tion Product may allow the User to access and communicate third party servers directly In such cases use of such servers is for User s own risk entirely Licensor shall not undertake any liability whatsoever for such servers and services accessed and received directly form third parties Server availability No warranty is provided regarding the availability of the servers enabling the Services When ...

Page 197: ...position of the User s device may be used for providing better search results Also the search result chosen by the User may be processed anonymously by the Service supllier for statistical purposes When using the online search functionality the User may not i interfere with the performance of the Service ii complete mass downloads or bulk feeds of any content or information derived from the Servic...

Page 198: ...out the express written consent of Clarion 2014 Clarion 2006 2014 TomTom All rights reserved This material is proprietary and the subject of copyright protection database right protection and other intellectual property rights owned by TomTom or its suppliers The use of this material is subject to the terms of a license agreement Any unauthorized copying or disclosure of this material will lead to...

Page 199: ......

Page 200: ...CautionII Please don t press on LCD screen or button panel while installing ...

Page 201: ...on ou au remplacement du produit qui est sujet uniquement aIa discretion de Clarion 6 Ce produit doit est retourne dans son emballage d origine ou equivalent Le colis doit etre entierement assure et tous frais de transport doivent etre prepayes Clarion n assumera aucune responsabilite en cas de perte ou dommages survenue lors du transport 7 TOUS PRODUITS CLARION ACQUIS PAR L ENTREMISE AUTRE QUE PA...

Page 202: ...ir of the product or replacement of the product at the sole discretion of Clarion 6 Product must be shipped in its original carton or equivalent carton fully insured with shipping charges prepaid Clarion will not assume any responsibility for any loss or damage incurred in shipping 7 CLARION PRODUCTS PURCHASED FROM A SOURCE OTHER THAN AN AUTHORIZED CLARION DEALER INCLUDING ANY AND ALL PURCHASES VI...

Reviews: