background image

English

7

M608

5. OPERATIONS

Basic Operations

Note:

•  Refer to the diagrams in “3. CONTROLS” 

when reading this chapter.

CAUTION

Listening to the unit at or near maximum 
volume level can be harmful to your 
hearing.

Power On / Off

Note:

•  Start the engine before using this unit.

•  Be careful about using this unit for a long 

time without running the engine. If you 

drain the battery too far, you may not be 

able to start the engine and this can reduce 

the service life of the battery.

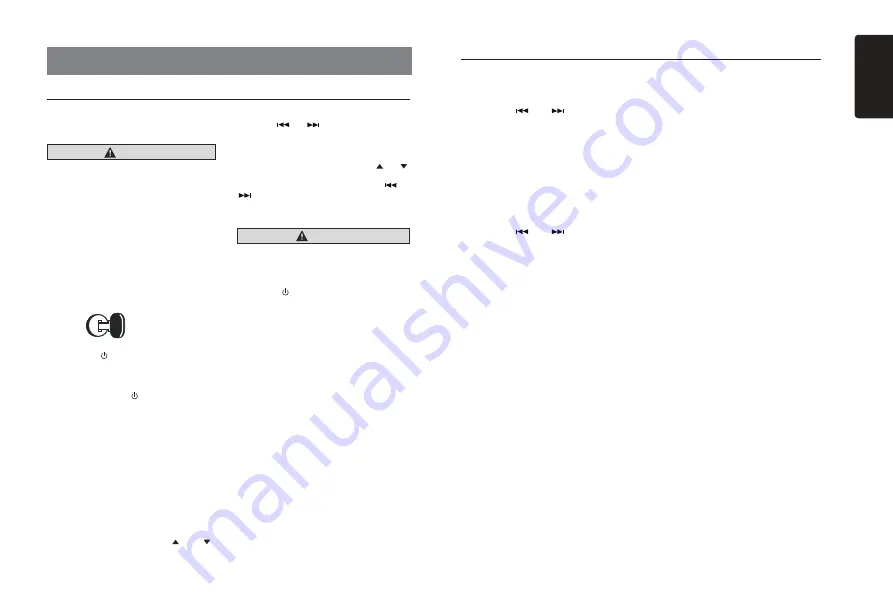
1. Start the engine. The power button / knob 

illumination on the unit will light up.

Engine ON 

position

2. Press the [  / 

SRC

] button on the front 

panel or remote control to turn on the 

power under standby mode. The unit goes 

back to the last status after power on.

3.  Press and hold the [  / 

SRC

] button on the 

front panel or the remote control to turn off 

the power.

Mute

Press the [

MUTE

] button on the remote control 

to mute the volume from the unit.

Note:

Doing the operation above again or adjusting 

volume will release muting.

Volume Adjustment

STANDARD

: Rotate the [

VOLUME

] knob 

on the front panel or press the [   ] or [   ] 

button on the remote control.

MULTI ZONE

: In Volume adjustment mode, 

press the [

] or [

] button to select ZONE 

number, then rotate the [

VOLUME

] knob to 

adjust.

TOWER

: In linked mode, rotate [

VOLUME

knob on the front panel or press the [ ] or [ ]  

button on the remote control. In non-linked 

while in volume adjustment press the 

[

] or 

[

] button to select Zone 1 or Tower, then 

rotate the [

VOLUME

] knob to adjust.

The adjustable range of volume is 0 to 40.

CAUTION

While driving, keep the volume level at 
which external sounds can still be heard.

Changing Sources

Press the [  / 

SRC

] button to change the 

operation mode. 

Changing the Display

Press and the 

[ENT]

 button on the front panel 

or press the [

DISP

] button on the remote control 

to switch the display information from clock, sta-

tion information (radio mode), or track informa-

tion (USB mode).

System Setup

AUX SENS (AUX mode)

Rotate the 

[UP/DOWN]

 knob to choose AUX 

Input sensitivity LOW, MID or HIGH in 

AUX 

mode.

PARENTAL (SiriusXM mode)

Change parental password. Default code is 

0000

”.

LOCK CH (SiriusXM mode)

Lock the current channel

UNLOCK ALL CH (SiriusXM mode)

Unlock all parental locked channels.

SELECT

The “

SELECT

” menu is intended to auto-

matically pair with a stored mobile device. 

This unit can store a maximum of three 

mobile devices. The mobile devices will be 

stored in the order they are paired to the 

unit. If you wish to add a different device 

than those already paired, you will need to 

delete the unwanted mobile device from the 

DELETE

” menu. 

DELETE 

1.    Press the [

ENT

] button.

2.     Rotate  the 

[UP/DOWN]

 knob to choose 

the paired mobile phone name from the 

pairing list.

3.    Press the [

ENT

] button.

to confirm.

DISCON (BT mode)

Disconnect currently connected mobile 

phone.

1.    Press the [

ENT

] button, mobile phone 

displays are currently connected.

2.   Press the 

[ENT]

 button to disconnect.

AUTO CON: ON/OFF

1.  Rotate the [

UP/DOWN

] knob to choose 

AUTO CONNECTION ON or OFF.

   ON: When detect the phone paired 

before, the unit will reconnect to it auto-

matically.

Changing Adjustment Settings

1.   Press and hold 

[MENU]

 button to switch to 

system setup mode.

2.  Press the [ 

 ] or [ 

 ] button to select 

the “

item name

”.

3.  Rotate the [

UP/DOWN

] knob to select the 

desired setting value

”.

  *  For some options, you should press the 

[

ENT

] button to adjust the setting value.

4.  After completing the setting adjustment, 

press the [

MENU

] button to return to the 

previous mode.

CLOCK

1.  Press the [

ENT

] button.

2.  Press the [ 

 ] or [ 

 ] button to select 

the hour or the minute.

3.  Rotate the [

UP/DOWN

] knob to set the 

correct time.

  *  The clock is displayed in 12-hour format 

by default.

4.  Press the [

ENT

] button to store the time 

into memory.

Note:

•   The clock can only be set while the unit 

is  on.  If  you  drain  or  remove  the  boat’s 
battery or take out this unit, the clock will 
reset. While  setting  the  clock,  if  another 
button or operation is selected, the clock 
set mode is canceled.

AUDIO MODE

1.  Rotate the [

UP/DOWN

] knob to select  

STANDARD, MULTI ZONE or TOWER.

2.  Press the [

ENT

] button to confirm.

DX/LO (RADIO mode)

Rotate the [

UP/DOWN

] knob to choose radio 

local or distant at 

RADIO

 mode.

• 

LO

:  Only stations with strong signal can 

be received.

• 

DX

:  Stations with strong and weak signals 

can be received.

Summary of Contents for CL92700

Page 1: ...WMA RECEIVER LECTEUR MARINE TANCHE BLUETOOTH USB MP3 WMA RECEPTOR BLUETOOTH USB MP3 WMA ESTANCO PARA EMBARCACIONES Owner s manual Installation manual Mode d emploi et manuel d installation Manual de...

Page 2: ...RROR DISPLAYS 15 8 SPECIFICATIONS 15 9 INSTALLATION WIRE CONNECTION GUIDE 16 CLARION PRODUCT REGISTRATION INFORMATION For USA and Canada only www clarion com Dear Customer Congratulations on your purc...

Page 3: ...he limits for a Class B digital device pursuant to Part 15 of the FCC Rules These limits are designed to provide reasonable protection against harmful interference in a residential instal lation This...

Page 4: ...Cleaning the Body Use a soft dry cloth and gently wipe off any dirt or dust For tough dirt apply some neutral detergent diluted in water to a soft cloth wipe off the dirt gently then wipe again with...

Page 5: ...orward Fast Backward Long Press Pandora mode Skip track SiriusXM mode Channel Up Down UP DOWN Knob Radio mode Toggle from the preset stations USB mode Select folder file Pandora mode Select search mod...

Page 6: ...unit s rear cover in the direction shown 2 Insert battery CR2025 into insertion guides with printed side up 3 Press battery into compartment as shown 4 Replace and slide cover until it clicks into pl...

Page 7: ...g WARNING EXPOSING THE UNIT TO WATER WITH THE FRONT PANEL OPEN WILL CAUSE DAMAGE OR UNIT MALFUNC TION Optional Wired Remote Control Unit Operations Buttons RADIO mode Preset station up down USB mode N...

Page 8: ...e PARENTAL SiriusXM mode Change parental password Default code is 0000 LOCK CH SiriusXM mode Lock the current channel UNLOCK ALL CH SiriusXM mode Unlock all parental locked channels SELECT The SELECT...

Page 9: ...essing the ENT button will reset the unit STANDARD 1 Press the button to enter sound effect setting mode First press shows current BEAT EQ setting Rotate the UP DOWN knob to change BEAT EQ in this ord...

Page 10: ...nd Subscription are required For more information visit www siriusxm com Displaying the Radio ID Before you listen to satellite radio you must subscribe to the service using the SiriusXM Radio ID numb...

Page 11: ...Preset scan receives the channels stored in preset memory in order This function is useful when searching for a desired channel in memory 1 Press and hold the SCAN button 2 When a desired channel is t...

Page 12: ...function resets to the first track of the storage Press and hold 3 button to play the first track track No 1 In case of MP3 WMA the first track of the current folder will be played Other Playback Func...

Page 13: ...the button is pressed some A2DP devices will restart the current track depending on the duration of playback During music streaming playback A2DP will be shown on the display Information iPod Menu Alp...

Page 14: ...device This is generally found in the USB settings section 2 Connect the Android device to the M608 via a USB cable 3 The unit will play the media on your Android device automatically AUX Operations...

Page 15: ...noisy MP3 WMA files are not encoded properly Use MP3 WMA files encoded properly SiriusXM Advisory Messages Message Description CHECK TUNER Check the SiriusXM tuner connection on the back of the unit t...

Page 16: ...A Dimensions of the Main Unit 195 98mm Width 88 98mm Height 228 4mm Depth 7 23 32 Width 3 1 2 Height 9 Depth Weight of the Main Unit 3 08 lb 1 44 kg Dimensions of the Remote Control unit 43mm Width 11...

Page 17: ...ws M4 x 30 mm 6 Power supply cable 1 Owner s manual 1 Warranty card 1 4 Cautions on Installation 1 Prepare all articles necessary for in stalling the source unit before starting 2 Install the unit wit...

Page 18: ...stems 6 Cautions on Wiring Fuse Fuse case Figure 6 1 2 2 3 4 5 6 7 8 1 Source unit 2 RCA extension cable sold separately 3 4 Channel power amplifier 4 Front speakers 5 Rear speakers 6 Wired remote con...

Page 19: ...attached to the source unit Yellow wire Memory back up lead Red wire Power lead Blue White wire Amplifier turn on lead Blue wire Auto ANT lead Black wire Ground lead Orange White wire Illumination lea...

Page 20: ...ellow wire Memory back up lead Red wire Power lead Blue White wire Amplifier turn on lead Blue wire Auto ANT lead Black wire Ground lead Orange White wire Illumination lead Connect to remote turn on l...

Page 21: ...attached to the source unit Yellow wire Memory back up lead Red wire Power lead Blue White wire Amplifier turn on lead Blue wire Auto ANT lead Black wire Ground lead Orange White wire Illumination lea...

Page 22: ...Notes...

Page 23: ...e produit lectronique mobile Clarion Nous sommes confiants que vous appr cierez votre exp rience Clarion II y a beaucoup d avantages enregistrer votre produit Nous vous invitons visiter notre site Web...

Page 24: ...conforme aux limites tablies pour des appareils num riques de classe B en vertu des dispositions de l alin a 15 de la r glementation FCC Ces limites sont destin es fournir une protection raisonnable...

Page 25: ...ci Nettoyage du bo tier Utilisez un chiffon doux et sec pour liminer d licatement toute trace de salet ou de poussi re En cas de traces tenaces appliquez sur un chiffon un d tergent neutre dilu dans d...

Page 26: ...Pour passer d autres sta tions que les stations pr s lectionn es Mode USB S lectionner un dossier fichier ModePandora S lectionner le mode recherche station Mode radio SiriusXM S lectionner la cat go...

Page 27: ...rcle et faites le coulisser jusqu ce qu il s enclenche en position Guide d insertion Bouton SRC Recherche Pour changer de source audio Marche arr t pression longue Boutons Mode Radio Recherche manuell...

Page 28: ...OSER L APPAREIL L EAU LORSQUE LE PANNEAU AVANT EST OUVERT POUR VITER D ENDOMMAGER L APPAREIL OU DE PROVOQUER SON DYSFONCTIONNEMENT Fonctionnement de la t l commande filaire en option Boutons Mode RADI...

Page 29: ...sir la sensibilit LOW Bas MID Moyen ou HIGH Haut de l entr e AUX en mode AUX PARENTAL Contr le parental mode SiriusXM Changez le mot de passe parental Le code par d faut est 0000 LOCK CH Canal verroui...

Page 30: ...NDARD 1 Appuyez sur le bouton pour entrer en mode de r glage de la sonorisation La premi re pression affiche le r glage BEAT EQ actuel Tournez le bouton UP DOWN pour changer la fonction BEAT EQ dans c...

Page 31: ...et divertissements Bienvenue dans l univers de la radio satellite Il vous faut un syntonisateur SiriusXM et un abonnement Pour en savoir plus rendez vous sur www siriusxm com Affichage de l identifian...

Page 32: ...est effectu e dans les 10 secondes le mode Navigation par cat gorie est annul Balayage des stations pr s lectionn es Le balayage des canaux pr s lectionn s permet de recevoir les canaux m moris s dans...

Page 33: ...ste piste n 1 Avec des MP3 WMA c est la premi re piste du dossier actuel qui sera lue Autres fonctions de lecture Scan play Lecture par exploration Cette fonction vous permet de localiser et de lire l...

Page 34: ...o Bluetooth Lorsque l on appuie sur le bouton certains p riph riques A2DP font rejouer la piste actuelle selon la dur e de la lecture Pendant la lecture en transit de musique A2DP appara t sur l affic...

Page 35: ...vient la source audio s lectionn e plus t t Certains lecteurs audio Bluetooth peuvent ne pas avoir les fonctions lecture pause synchronis es avec cet appareil Assurez vous que le p riph rique et l uni...

Page 36: ...iph rique USB Stockez ces fichiers correctement sur le p riph rique USB Le son saute ou gr sille Aucun fichier MP3 WMA n est stock sur le p riph rique USB Utilisez des fichiers MP3 WMA correctement co...

Page 37: ...ge 10k Fusible 15 A Dimensions de l appareil principal 196 mm Largeur 88 8 mm Hauteur 235 6 mm Profondeur 7 23 32 Largeur 3 16 32 Hauteur 9 9 32 Profondeur Poids de l appareil 1 94 lb 0 88 kg Dimensio...

Page 38: ...e fixation 1 crou M4 1 Rondelle M4 2 Vis M4 x 30 mm 6 C ble d alimentation lectrique 1 Manuel d utilisation 1 Carte de garantie 1 4 Pr cautions d installation 1 Pr parez tous les articles n cessaires...

Page 39: ...usible Porte fusibles Figure 6 1 2 2 3 4 5 6 7 8 1 Appareil source 2 Rallonge RCA vendue s par ment 3 Amplificateur 4 voies 4 Haut parleurs avant 5 Haut parleurs arri re 6 T l commande filaire 7 Synto...

Page 40: ...hone SiriusXM Prise de commande distance du volant 8 canaux d amplification Syntonisateur de connexion SiriusXM vendu s par ment Se branche la t l commande filaire externe vendu s par ment Droite Roug...

Page 41: ...AUX IN 2 Se branche aux dispositifs de cl USB iPod iPad iPhone SiriusXM Prise de commande distance du volant 8 canaux d amplification Syntonisateur de connexion SiriusXM vendu s par ment Se branche l...

Page 42: ...ERROR 55 8 ESPECIFICACIONES 55 9 GU A DE CONEXI N INSTALACI N DE LOS CABLES 56 INFORMACI N SOBRE EL REGISTRO DE PRODUCTOS CLARION Para Estados Unidos y Canad solamente www clarion com Estimado cliente...

Page 43: ...de clase B en cumplimiento de la Secci n 15 de las Normas de la Comisi n Federal de Comunicaciones FCC por sus siglas en ingl s Estos l mites fueron dise ados p a r a p r o p o r c i o n a r u n a p...

Page 44: ...o suave y seco limpie la suciedad o el polvo suavemente Para manchas dif ciles de quitar aplique detergente neutro diluido en agua a un pa o suave limpie la suciedad suavemente y luego pase un pa o se...

Page 45: ...io Alterna entre las estaciones preestablecidas Modo USB Selecciona carpeta archivo Modo Pandora Selecciona el modo de b squeda estaci n Modo SiriusXM Radio Seleccione categor a Opera en modos de cate...

Page 46: ...estra 4 Regrese a su lugar la cubierta y desl cela hasta que ajuste en su lugar con un clic Gu a de inserci n Bot n SRC fuente Alterna las fuentes de audio Encendido Apagado presione largo tiempo Boto...

Page 47: ...O HAR QUE FALLE LA UNIDAD Operaciones de la unidad de control remoto cableada opcional Botones Modo RADIO Estaci n prefijada hacia arriba hacia abajo Modo USB Sin funci n Modo iPod Navegar en modo Men...

Page 48: ...media o alta en el modo AUXILIAR PARENTAL Control de los padres Modo SiriusXM Cambio de contrase a para el control de los padres El c digo predeterminado es 0000 LOCK CH bloqueo de canal Modo SiriusXM...

Page 49: ...al de BEAT EQ Ecualizador de ritmo Gire la perilla UP DOWN para realizar cambios a BEAT EQ en este orden EQ OFF POP CLASSIC JAZZ CUSTOM E n e l m o d o d e a j u s t e C U S T O M Personalizado presio...

Page 50: ...trevistas comedias y entretenimiento Bienvenido al mundo de la radio por sat lite Se requiere un sintonizador SiriusXM y una suscripci n Si desea m s informaci n visite www siriusxm com C mo visualiza...

Page 51: ...do 4 Presione ENT para sintonizar el canal seleccionado Nota Si no se realiza una operaci n en 10 segundos se cancela el modo de exploraci n de categor a Exploraci n prefijada La exploraci n prefijada...

Page 52: ...as almacenadas Presione el bot n 3 para reproducir la primera pista pista 1 En caso de archivos MP3 WMA se reproduce la primera pista de la carpeta actual Otras funciones de reproducci n Explorar y re...

Page 53: ...talla LCD para cancelar la reproducci n aleatoria B squeda alfab tica en el men del iPod Esta funci n realiza b squedas en las subcarpetas de letras del alfabeto deseadas 1 Presione el bot n MENU para...

Page 54: ...se mostrar A2DP En esta unidad no se puede mostrar informaci n sobre las pistas por ejemplo el tiempo de reproducci n transcurrido el t tulo de la canci n etc Cuando se desconecte un dispositivo A2DP...

Page 55: ...ce archivos MP3 WMA bien codificados g Mensajes de aviso de SiriuxXM Mensaje Descripci n CHECK TUNER REVISAR SINTONIZADOR Revise la conexi n del sintonizador SiriusXM en la parte trasera de la unidad...

Page 56: ...amplificador 4 0 V modo de reproducci n de USB 1 kHz 0 dB 10 k de carga Fusible 15 A Dimensiones de la unidad principal 196 mm de ancho 88 8 mm de alto 235 6 mm de fondo 7 23 32 de ancho 3 16 32 de al...

Page 57: ...la fuente de alimentaci n 1 Manual del propietario 1 Tarjeta de garant a 1 4 Precauciones con la instalaci n 1 Prepare todos los art culos necesarios para instalar la unidad fuente antes de comenzar...

Page 58: ...eado Fusible Caja de fusible Figura 6 1 2 2 3 4 5 6 7 8 1 Unidad fuente 2 Cable de extensi n RCA se vende por separado 3 Amplificador de potencia de 4 canales 4 Altavoces frontales 5 Altavoces posteri...

Page 59: ...ja blanco cable de iluminaci n Conecte al cable de encendido remoto en el amplificador Conecte a la antena auto Conecte a tierra Conecte al circuito de iluminaci n en el barco Conecte directamente a l...

Page 60: ...nja blanco cable de iluminaci n Conecte al cable de encendido remoto en el amplificador Conecte a la antena auto Conecte a tierra Conecte al circuito de iluminaci n en el barco Conecte directamente a...

Page 61: ...Notes...

Page 62: ...index html Espa ol Por la presente Clarion Corporation of America declara que este modelo M608 cumple con los requisitos esenciales y otras disposiciones apli cables de la Directiva 2014 53 UE El text...

Reviews: