


ADB340MP/ADB341MP
13
CD/MP3 Operations
Ejecting a CD
Press [
CD EJECT
] button to eject the CD. Take
it out from the ejected position.
∗
If a 5" CD (12 cm) is left in the ejected position for
15 seconds, the CD is automatically reloaded
(Autoreload).
∗
The Radio mode is selected automatically 4 sec-
onds after the [
CD EJECT
] button is pressed.
Notes:
• If you force a CD into before auto reloading, this
can damage the CD.
CAUTION
3” (8 cm) disc can’t be played. Using an
adapter and inserting them into this unit can
cause damage, please do not insert by any
means.
Listening to a CD already inserted
Press the [
FNC
] button to select the CD mode.
Play starts automatically. If no CD is loaded in
the unit, “
NO DISC
” appears in the display.
Pausing play
1. Press the [
] button to pause play.
“
PAUSE
” appears in the display.
2. To resume CD play, press the [
] button
again.
Displaying CD titles
This unit can display title data for CD-text/MP3
disc and user titles input with this unit.
1. Press the [
DISP
] button to display the title.
2. Each time you press and hold the [
DISP
] but-
ton for 1 second or longer, the title display
changes in the following order:
●
CD-TEXT disc
User title (disc)
➜
Disc title (CD-text)
➜
Artist
name (CD-text)
➜
Track title (CD-text)
➜
User
title (disc)...
●
MP3 disc
Folder
➜
File
➜
Album TAG
➜
Artist TAG
➜
Title
TAG
➜
Folder...
Notes:
• If the CD playing is not a CD-text CD or no user
title has been input, “
NO TITL
” appears in the dis-
play.
• If MP3 disc is not input TAG, “
NO TAG”
appears
in the display.
• For MP3, supports ID3 Tags V1 / 2
• Only ASCII characters can be displayed in Tags.
Up to 64 characters.
Selecting a track
●
Track-up
1. Press the [
] button to move ahead to the
beginning of the next track.
2. Each time you press the [
] button, the
track advances ahead to the beginning of the
next track.
●
Track-down
1. Press the [
] button to move back to the
beginning of the current track.
2. Press the [
] button twice to move to the
beginning of the previous track.
Fast-forward/fast-backward
●
Fast-forward
Press and hold the [
] button for 1 second or
longer.
●
Fast-backward
Press and hold the [
] button for 1 second or
longer.
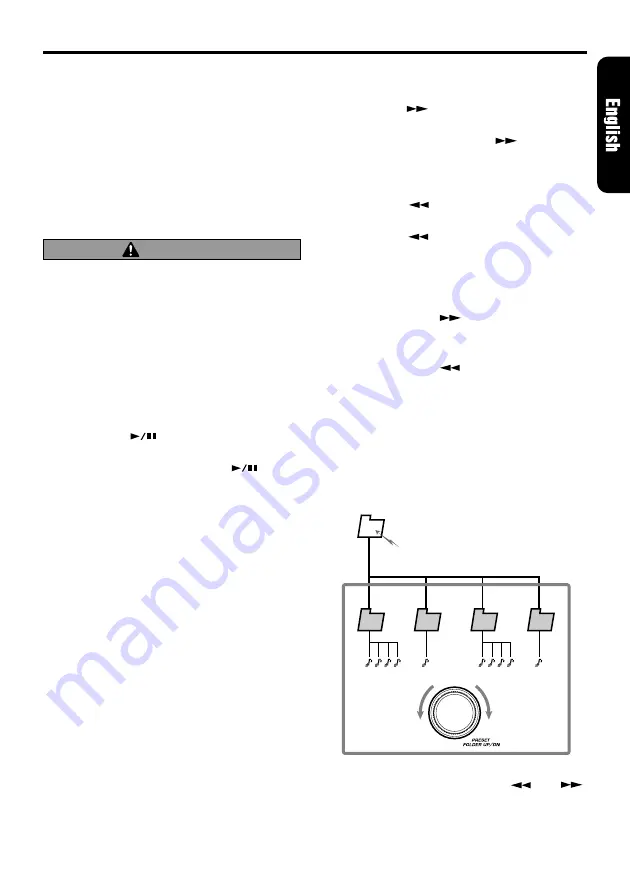
Folder Select
This function allows you to select a folder con-
taining MP3 files and start playing from the first
track in the folder.
1. Turning the [
PRESET
] knob clockwise or
counterclockwise to select a folder. The folder
name is displayed.
∗
Folder without an MP3 file is not selectable.
2. To select a track, press the [
] or [
]
button.
1
Root folder
2
3
4
5


