background image

5. OTHER

5.1 External Views and Dimensions

(Unit: mm)

125

10

8

(1

11

)

165

– 51 –

Summary of Contents for CT-E301 Series

Page 1: ...LINE THERMAL PRINTER MODEL CT E301 User s Manual...

Page 2: ...sta por la sobre residuos de aparatos el ctricos y electr nicos RAEE vigente nicamente en la Uni n Europea Ge Fr Sp It Se desiderate gettare via questo prodotto non mescolatelo ai rifiuti generici di...

Page 3: ...nstruction manual maycause interference to radio communications It has been tested and found to complywith the limits for a Class A computing device pursuant to Subpart J of Part 15 of FCCRules which...

Page 4: ...om the loss of data caused by accidents re pairs tests or other occurrences l If you find omissions errors or have questions please contact your Citizen Systems dealer l If you find any pages missing...

Page 5: ...RATED l Ethernet is a registered trademark of Fuji Xerox Corporation l CITIZEN is a registered trademark of Citizen Watch Co Ltd l All other trademarks are the property of their respective owners l Ci...

Page 6: ...ee of hazard and damage that could occur if the printer is improperly operated by ignoring the instructions indicated by the warning symbols Be sure to read this information carefully WARNING Neglecti...

Page 7: ...object such as paper clips pins or screws into the printer n Do not place a flower vase pot or anything containing water on the printer n Do not spill coffee soft drinks or any other liquid into the p...

Page 8: ...ause an unexpected injury or accident if they are handled or used improperly l Keep the power cord and signal cables out of the reach of children Also chil dren should not be allowed to gain access to...

Page 9: ...near a radio or TV set or from supplying it from the same electric outlet as these appliances l Avoid using the printer interconnected with a cable or cord that has no protec tion against noise For in...

Page 10: ...losion could result Telephone line ground Lightning rod l If lightning strikes a large surge of current may cause fire or shock Water pipes l Plastic water pipes should not be used for grounding Those...

Page 11: ...lure emission of smoke fire or electric shock u An overload may cause the power cord to overheat catch fire or the circuit breaker to trip l Do not allow anything to rest on the power cord Do not plac...

Page 12: ...WARNING l Hold the plug and connector when plugging or unplugging the power cord or signal cable after turning off the printer and the appliance connected to it 12...

Page 13: ...ter with the paper roll inside l Printer failure or damage may occur To prevent possible malfunction or failure observe the following l Do not open the paper cover during printing l Avoid operating th...

Page 14: ...tems serv ice for repair l Be careful that the covers do not pinch your hands or fingers l Be careful of the sharp edges on the printer Do not allow them to injure you or damage property u May result...

Page 15: ...CAUTION The thermal head is at a dangerously high temperature immediately after printing Allow it to cool off before starting maintenance work 15...

Page 16: ...5 Precautions for Installing the Printer 37 3 6 Loading Paper 38 3 7 58 mm Width Roll Paper Partition 41 3 8 Precautions for Creating Applications and Practical Operations 42 3 9 Download Site for Va...

Page 17: ...80 mm and 58 mm l High speed cutter employed l Equipped with a paper anti curling function l Equipped with triple interface USB serial Ethernet or single interface USB l Built in drawer kick interface...

Page 18: ...1 2 Unpacking Make sure the following items are included with your printer NAME QUAN TITY ILLUSTRATION Printer 1 AC Adapter 37AD5 1 AC power cord 1 Quick Start Guide 2 18...

Page 19: ...hod Line thermal dot print method Print widths 72 mm 576 dots 68 25 mm 546 dots 64 mm 512 dots 54 5 mm 436 dots 54 mm 432 dots 52 5 mm 420 dots 48 75 mm 390 dots 48 mm 384 dots 45 mm 360 dots factory...

Page 20: ...W in standby mode approx 0 3 W with power off AC Adapter 37AD5 Rated input AC 100 to 240 V 50 60 Hz 150 VA Rated output DC 24 V 2 1 A Weight Approximately 1 2 kg Outside dimen sions 125 W 165 D 108 H...

Page 21: ...open the paper cover 3 POWER button Hold down two or three seconds to switch power on or off 4 FEED button Press this button to feed paper In case of a cutter error press the FEED button with the pap...

Page 22: ...ion POWER LED Turns on when the power is turned on and turns off when the power is turned off Flashes when a memory error occurs and when data is being re ceived ERROR LED Flashes when the print head...

Page 23: ...nnector Connect to the cable from the cash drawer 3 Power connector Connect to the AC adapter cable 4 USB connector 5 Ethernet connector 6 Panel button The current configuration information can be pri...

Page 24: ...nsor detects there is no paper 3 Platen Feeds the paper Do not remove the platen except to do maintenance 4 Auto cutter Cuts the paper Refer to 5 3 Manual Setting of Memory Switches 5 Manual cutter Fo...

Page 25: ...Notes The anti curling roller and anti curling damper do not straighten the paper completely 25...

Page 26: ...e printer becomes the state of USB linked power OFF after 3 seconds when PC power off or USB connection lost This mode is canceled when the PC is turned back on or when a USB connection is established...

Page 27: ...pecific head heating element If no data is received within 15 seconds after each cut or print the print position is automatically slid N dots to the right The original print position is returned to at...

Page 28: ...he power 2 Connect the power connector to the AC adapter cable connector Next connect the AC power cord to the AC inlet and insert the plug into an electric outlet 1 3 4 5 2 1 Cable connector 2 Power...

Page 29: ...ctric shock n Keep the AC power cord away from heat generating appliances The insulation on the AC power cord may melt and cause a fire or electric shock n If the printer is not going to be used for a...

Page 30: ...USB USB serial Ethernet CAUTION n When disconnecting the cable always hold the connector n Be careful not to insert the USB cable into the cash drawer kick out connector n Hold the connector of the L...

Page 31: ...er of the USB interface Use a serial cable with the connection layout shown below 9 pin female 9 pin female cable Printer PC Signal Pin Pin Signal RXD 2 2 RXD TXD 3 3 TXD DTR 4 4 DTR SG 5 5 SG DSR 6 6...

Page 32: ...anel button l Returning to factory settings Hold down the panel button A buzzer will sound and then hold down the panel but ton again within 3 seconds It returns network settings to its factory settin...

Page 33: ...anging network settings You can use a web browser to access a special settings page to check and change board settings l Access the special settings page 1 Use a web browser to access the URL of the s...

Page 34: ...3 Press the Change Settings button to enter the following Change Settings screen For details refer to a separate manual 34...

Page 35: ...1 2 1 3 1 Cash drawer kick out connector 2 Cash drawer kick out cable connector 3 Ground wire 4 Screw for ground wire CAUTION n Connect only the cash drawer kick out cable to this connector Do not co...

Page 36: ...characteristics 1 Drive voltage 24 VDC 2 Drive current Approx 1 A max not to exceed 510 ms 3 DRSW signal Signal levels L 0 to 0 5 V H 3 to 5 V 3 DRSW signal Status can be tested by commands 4 Drive c...

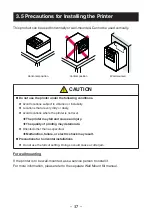
Page 37: ...ery dirty or dusty l Avoid locations where the printer is not level u The printer may fall and cause an injury u The quality of printing may deteriorate l Oriented other than as specified u Malfunctio...

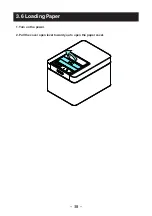
Page 38: ...3 6 Loading Paper 1 Turn on the power 2 Pull the cover open lever toward you to open the paper cover 38...

Page 39: ...shown by arrow A Set the roll paper so that it passes over the paper anti curling damper A 4 Pull a few centimeters of paper straight out in the direction of arrow B B 5 Close the paper cover until y...

Page 40: ...Be careful of paper cuts while loading the paper Notes n Always use the specified types of paper rolls n Confirm that the paper roll is set correctly n If the paper is skewed and not coming straight o...

Page 41: ...g of Memory Switches CAUTION n When opening the paper cover be careful not to touch the entrance of the blade of the auto cutter n The print head is very hot immediately after printing Be careful not...

Page 42: ...appear in the printouts when you are printing graphics or gradated text which require large amounts of data USB interfaces may be susceptible to the effects of electromagnetic interference from the ho...

Page 43: ...printer n Wipe off the disinfectant with a soft damp cloth after cleaning procedure No water droplets should remain on the printer n Do not soak or wipe the inside of the printer nor allow disinfecta...

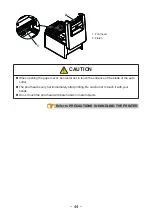
Page 44: ...ful not to touch the entrance of the blade of the auto cutter n The print head is very hot immediately after printing Be careful not to touch it with your hands n Do not touch the print head with bare...

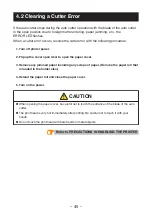
Page 45: ...r open lever to open the paper cover 3 Remove any jammed paper including any scraps of paper Remove the paper roll that is loaded in the holder also 4 Reload the paper roll and close the paper cover 5...

Page 46: ...the FEED button and turn on the power 2 Hold the FEED button down for about one second until the buzzer sounds Release the button to start self test The printer will print its model name version memor...

Page 47: ...he printer will print HEX dump print mode followed by the received data printed in hexadecimal numbers and some characters How to stop hexadecimal dump printing Do one of the following to stop printin...

Page 48: ...nd press the FEED key If the auto cutter still does not move and the pa per cover cannot be opened refer to Clearing a Cutter Error Refer to 4 2 Clearing a Cutter Error l Print Head Hot Dense printing...

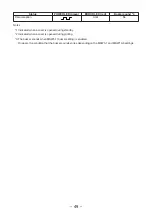
Page 49: ...it No Notes 1 Indicated when a cover is opened during standby 2 Indicated when a cover is opened during printing 3 The buzzer sounds when MSW5 1 buzzer setting is enabled However the condition that th...

Page 50: ...for Which Printing Speed Changes When printing for which the printing speed changes is performed white lines may be printed or paper may not be fed depending on the printing conditions To prevent the...

Page 51: ...5 OTHER 5 1 External Views and Dimensions Unit mm 125 108 111 165 51...

Page 52: ...pon Paper TP50KR 2Y TP50KJ R TL69KS LH TF50KS E2D Oji Paper PD150R PD160R PD160R 63 Mitsubishi Paper Mills HP220AB 1 P220AB Koehler KT48 FA Unit mm Max printing width 72 Paper width 80 0 1 Printing su...

Page 53: ...Notes Use thermal paper that is wound as follows l Not creased and fits tight to the core l Not folded l Not glued to the core l Rolled with the printable side out 53...

Page 54: ...d paper 2 While the paper cover is open press and hold the FEED button and turn on the power 3 Press the FEED button three and close the paper cover The printer enters memory switch quick setting mode...

Page 55: ...tData Invalid 420 dots Individual setting mode Set the memory switches individually Do the settings while confirming the memory switch function and settings on the print out 1 Load paper 2 While the p...

Page 56: ...ds The selected settings are set The next memory switch function and settings are printed 8 Repeat steps 5 to 7 to change different functions for the current memory switch num ber 9 Open the paper cov...

Page 57: ...pool Print Invalid Valid MSW2 4 Full Col Print LineFeed WaitData MSW2 5 Resume aft PE Next Top MSW2 6 Reserved Fixed MSW2 7 Reserved Fixed MSW2 8 Reserved Fixed MSW3 1 Resume Cttr Err Valid Invalid MS...

Page 58: ...4 Line Gap Reduce Invalid Invalid 3 4 2 3 1 2 1 3 1 4 1 5 ALL MSW8 5 Reduced Char V H 100 100 100 100 75 100 50 100 100 75 75 75 50 75 MSW8 6 Auto Side Shift Invalid Invalid 1 dot 2 dots 3 dots 4 dot...

Page 59: ...CT E301_UM_110_EN PMC 2207 July 2022...

Reviews: