Chapter 2
Installing and Using the Camera Utility
8
Wireless-N Internet Home Monitoring Camera
Controls
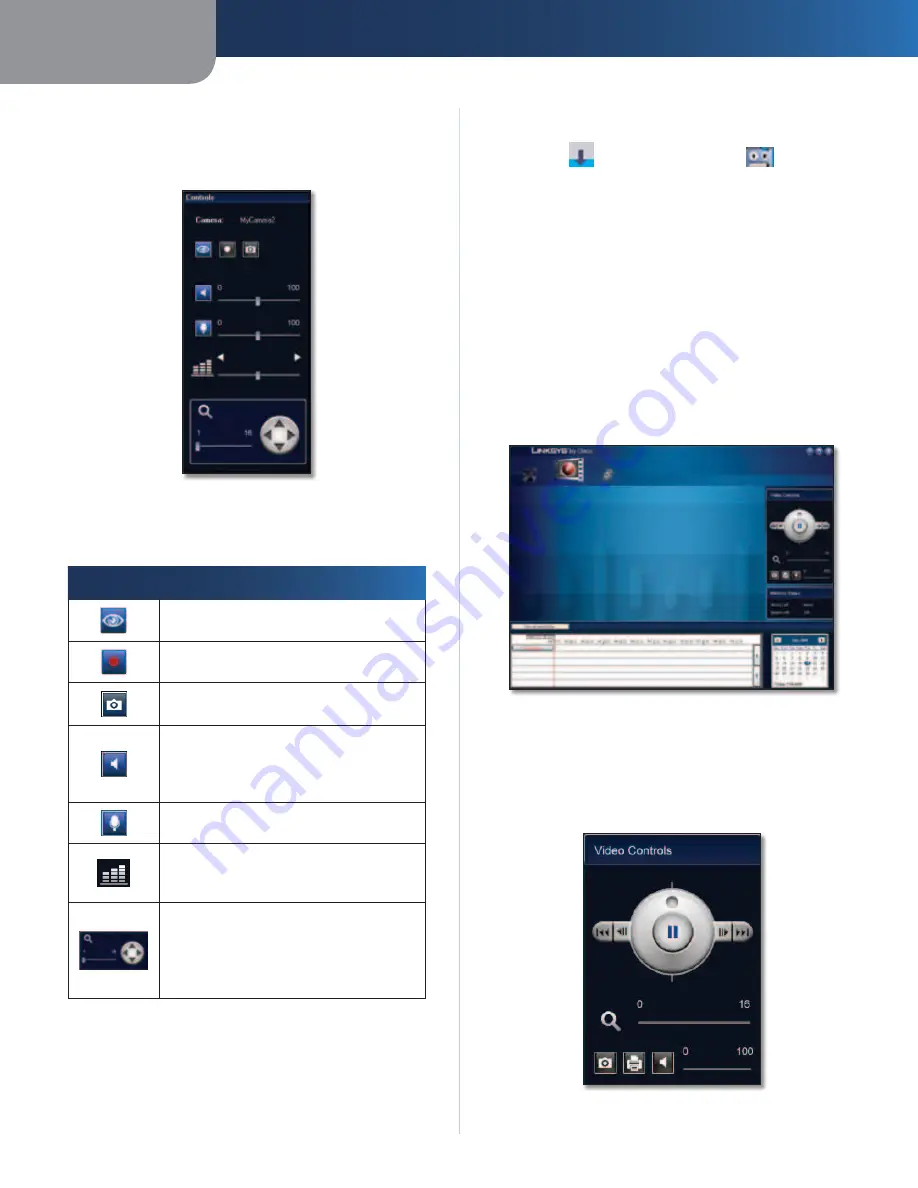
The video controls are located along the right edge of the
LiveView
window in the
Controls
section.
Controls
These controls act upon the selected Camera as explained
below.
Control
Function
View
Click this button to view the
current video.
Instant Record
Click this button to
record the current video.*
Snapshot
Click this button to take a
snapshot of the current video image.
Speaker
Click this button to toggle the
sound on or off. Move the slider to the
left to decrease the volume or to the
right to increase the volume..
Microphone
This feature is not available
on the WVC80N.
Quality
Move the slider to the left to
decrease the video quality or to the right
to increase the video quality.**
Zoom
Move the slider to zoom into
current video display. The zoom factor
cycles from 1x to 16x. Click the Up, Down,
Left, and Right arrows to navigate within
the monitor window.
* The length of the recording is configured in the
Setup > Settings screen of the Camera Utility. During
recording, the Utility’s System Tray icon turns into an
animated icon (arrow moves up and down).
When recording ends, the icon reverts to its original state.
Recording In Progress
No Recording In Progress
** This option will only be selectable when the MPEG-4/
MJPEG Setting is set to Fixed Quality. This setting is found
in the Advanced Configuration > Image screen of the
Camera’s Web-based Utility.
View Recordings
The
View Recordings
window is accessed by clicking the
View Recordings
icon. The
View Recordings
window
is used to play back videos that you have recorded and
saved. This window has three sections:
Video Controls
,
Memory Status
, and the video playback section.
View Recordings
Video Controls
This section of the
View Recordings
window allows you to
perform basic functions on the video you have selected
for playback.
Video Controls


