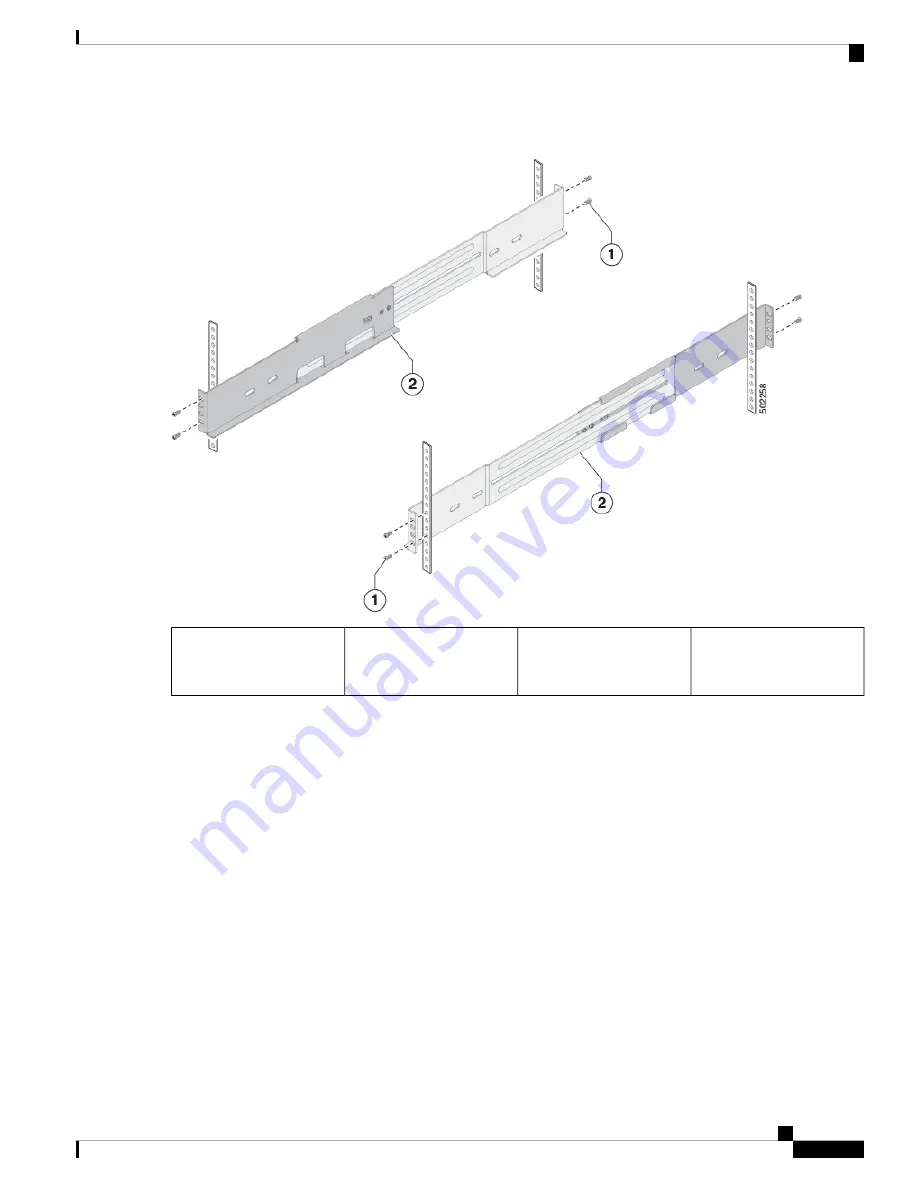
Figure 6: Positioning the Bottom-Support Rails
The bottom-support
brackets (2)
2
Screws holding the
bottom-support bracket to
the rack
1
b) Holding the bottom-support rail level, attach the rail to the front and rear vertical mounting rails using four
customer-supplied screws that are appropriate for the rack (use two screws for each vertical mounting rail), and
tighten each screw to the appropriate torque setting for that screw.
Typically, you use one of the following types of screws and the associated torque settings when tightening them:
• M4 screws—use 12 in-lb (1.36 N·m) of torque
• M6 screws—use 40 in-lb (4.5 N·m) of torque
• 10-32 screws— use 20 in-lb (2.26 N·m) of torque
If the rack requires another type of screw, use the appropriate torque setting for that type of screw.
c) Repeat Steps 3a and 3b to attach the other expanding bottom-support rail to the other side of the rack at the same
level as the attached bottom-support rail.
Verify that the two sets of bottom-support rails are level with each other before going to the next step.
Note
Step 4
Install the chassis in the rack as follows:
a) Slide the power supply end of the chassis onto the installed bottom-support rails as shown in the following figure.
Cisco Nexus 3400-S Hardware Installation Guide
13
Installing the Chassis
Installing a 4 (RU) Chassis in a Four-Post Rack
Summary of Contents for Nexus 3400-S
Page 6: ...Cisco Nexus 3400 S Hardware Installation Guide vi Contents ...
Page 8: ...Cisco Nexus 3400 S Hardware Installation Guide viii Preface Related Documentation ...
Page 14: ...Cisco Nexus 3400 S Hardware Installation Guide 6 Preparing the Site Dust and Contaminants ...
Page 26: ...Cisco Nexus 3400 S Hardware Installation Guide 18 Installing the Chassis Starting the Switch ...
Page 42: ...Cisco Nexus 3400 S Hardware Installation Guide 34 Replacing Modules Replacing a CPU Module ...
Page 62: ...Cisco Nexus 3400 S Hardware Installation Guide 54 Spare Parts Table Spare Parts Table ...


