Step 4
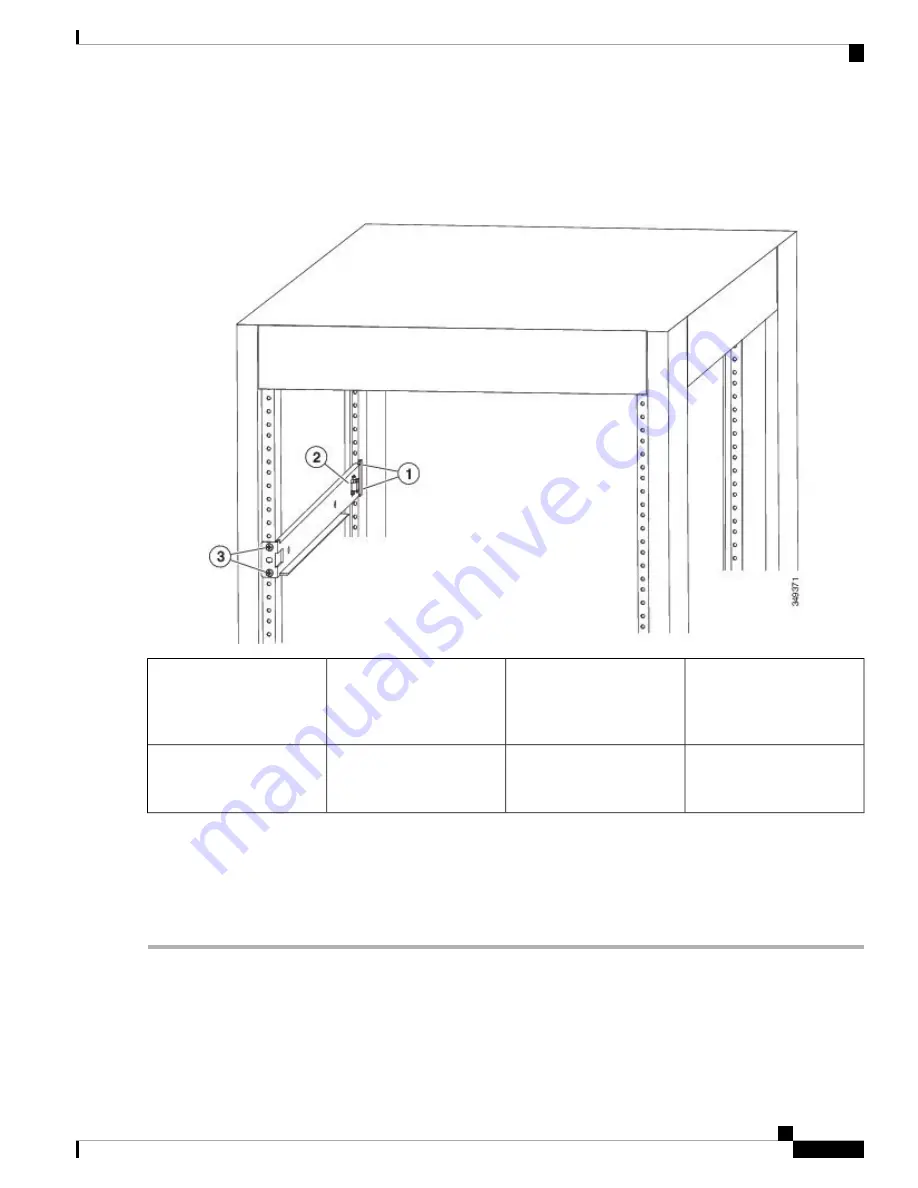
Slide the other half of the bottom-support rail onto the attached half of the rail set and use two customer supplied screws
(typically M6 x 10 mm screws) to secure that portion to the vertical mounting rails on the rack. Tighten each screw to
the appropriate torque setting for the screws (for M6 x 10 mm screws, use 40 in. lbs [4.5 N·m] of torque).
Figure 1: Positioning an Expanding Bottom-Support Rail Set
2 screws holding the front
end of the bottom-support
bracket to the front side of
the rack
3
2 screws holding one end of
the bottom-support bracket
to the rear of the rack
1
Chassis stop on the
expanding bottom-support
bracket
2
Step 5
Repeat Steps 2 and 3 to attach the other expanding bottom-support rails to the other side of the rack.
Check the two installed bottom support rails to be sure that both have their chassis stops by the same aisle
(either both by the hot aisle or both by the cold aisle) and that both rails are level and level with each other. If
they are not level, adjust the higher rail down to the level of the lower rail.
Note
What to do next
You are ready to install two front-mount brackets on the chassis.
Cisco Nexus 93360YC-FX2 NX-OS Mode Switch Hardware Installation Guide
27
Installing the Chassis
Attaching the Bottom-Support Rails to the Rack


