Step 1
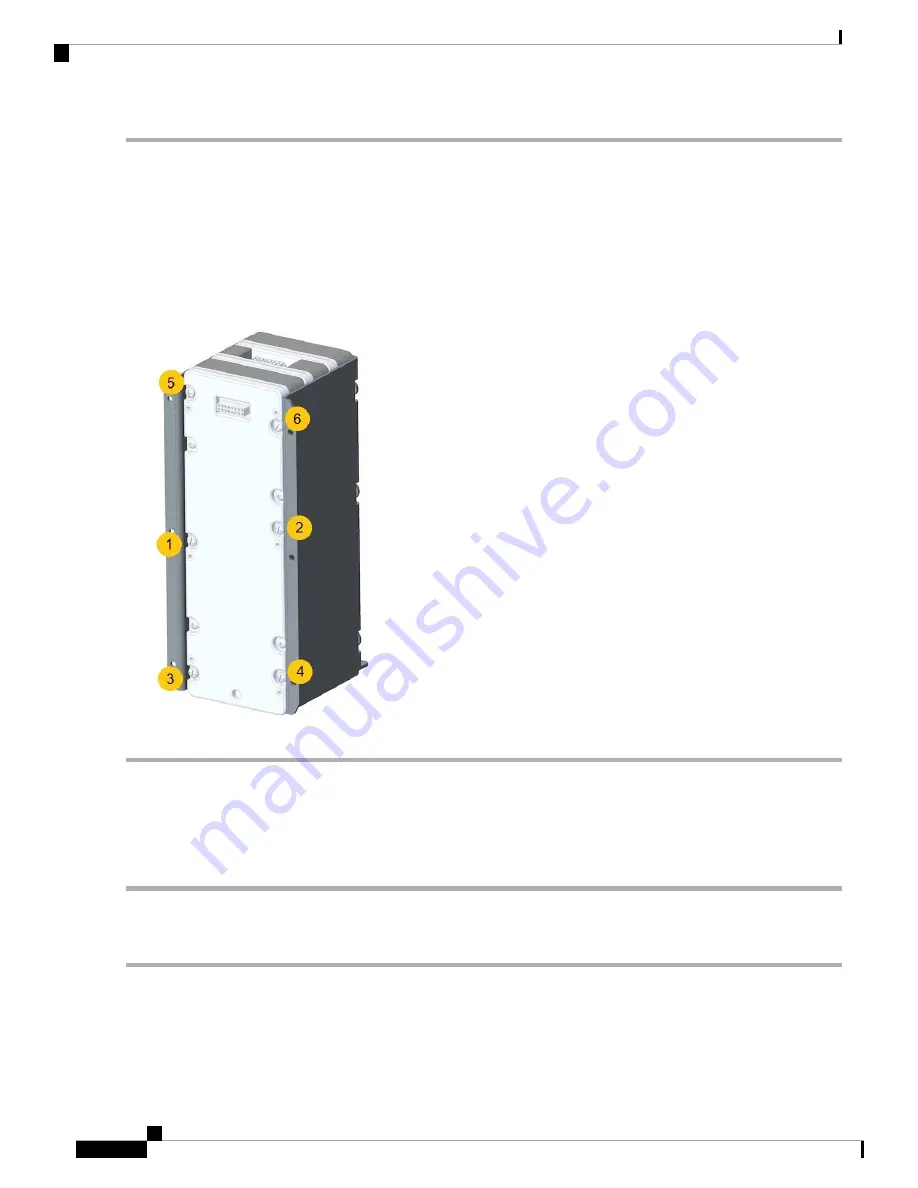
To install the first BBU Module, line up the BBU pin with the BBU cage pin notch, then torque the six captive screws
to 7-9 in-lbs with a #1 Phillips screwdriver in sequence as shown in the following figure.
Step 2
To install a second BBU module, line up the BBU alignment pin with the BBU alignment hole, and press the plug and
socket connectors together. Torque the six captive screws to 7-9 in-lbs with a #1 Phillips screwdriver in sequence as
shown in the following figure.
Step 3
To install a third BBU module, line up the BBU alignment pin with the BBU alignment hole and press the plug and socket
connectors together. Torque the six captive screws to 7-9 in-lbs with a #1 Phillips screwdriver in sequence as shown in
the following figure.
Removing BBU Modules from the BBU Cage
To remove BBU modules from the BBU cage, you must start with the last BBU module and work inward
towards the back of the BBU cage.
Step 1
Loosen the 6 captive screws using a #1 Phillips screwdriver and pull off the BBU module.
Step 2
Proceed to the next BBU module until all modules are removed.
Attaching BBU Cage to the Faceplate
Follow these steps to attach the BBU cage to the faceplate:
Installing Battery Backup Units
10
Installing Battery Backup Units
Removing BBU Modules from the BBU Cage


