6
Mounting Options
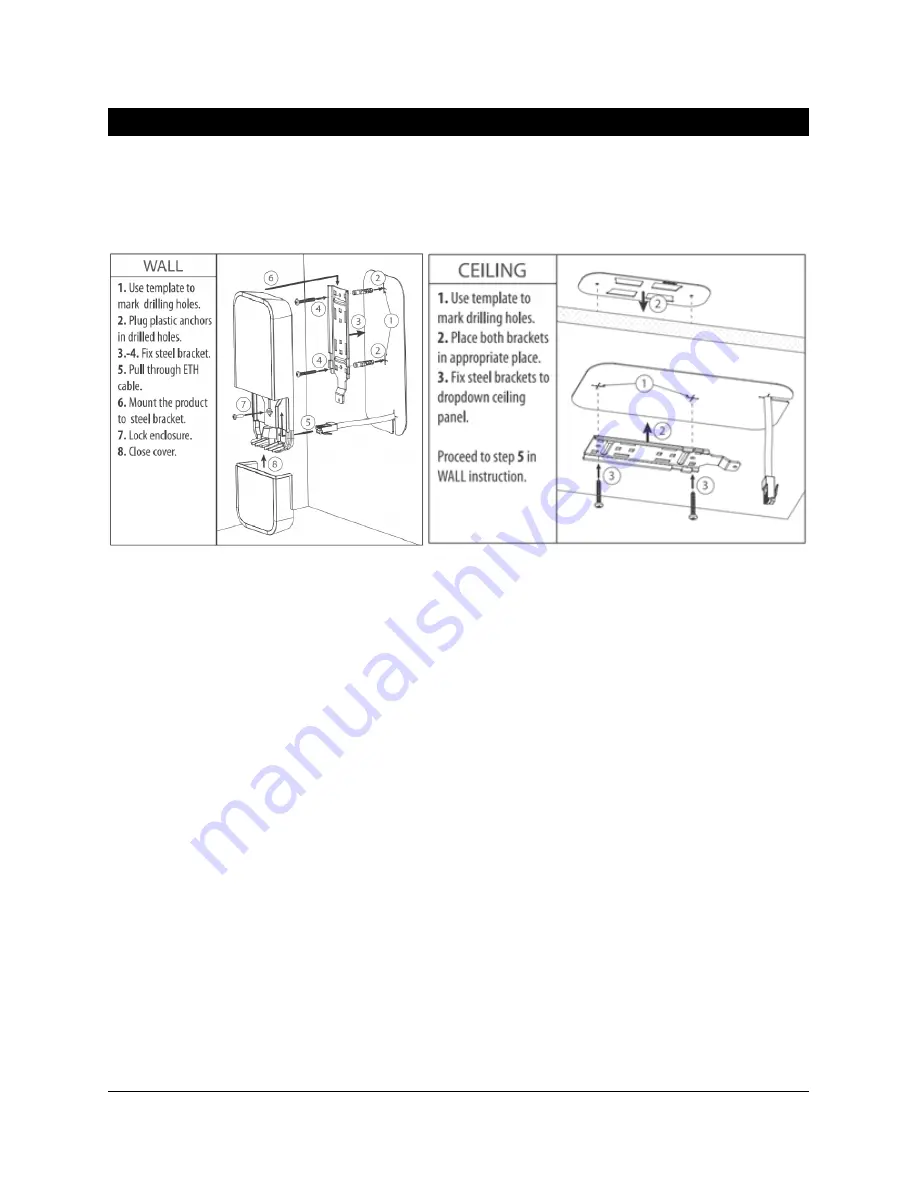
CIS access points provide flexible mounting options. Mount it on a wall, ceiling, or pole to broadcast your
wireless network in all directions.
Detailed Steps
1.
Use the template (included in the box) to mark the location of the screw holes.
2.
If mounting to a wall, use the included plastic anchors.
3.
If mounting to a ceiling, place the steel plate on the other side (if possible) for reinforcement and
thread the screws through it.
4.
Use the included screws to attach the mounting plate to the wall or ceiling.
5.
Punch out the square hole in the bottom section of the access point. Run the Ethernet cable
through the hole.
6.
Attach the access point to the mounting bracket. Align the tracks on the bracket, then slide the
access point until it is held in place.
7.
Thread the included screw through the center of the access point as in the diagram above.
Tighten the screw to secure the access point to the mounting bracket.
8.
Connect the Ethernet cable to ETH1. Close the cover and tighten the screw on the bottom to keep
it in place and prevent access.


