background image

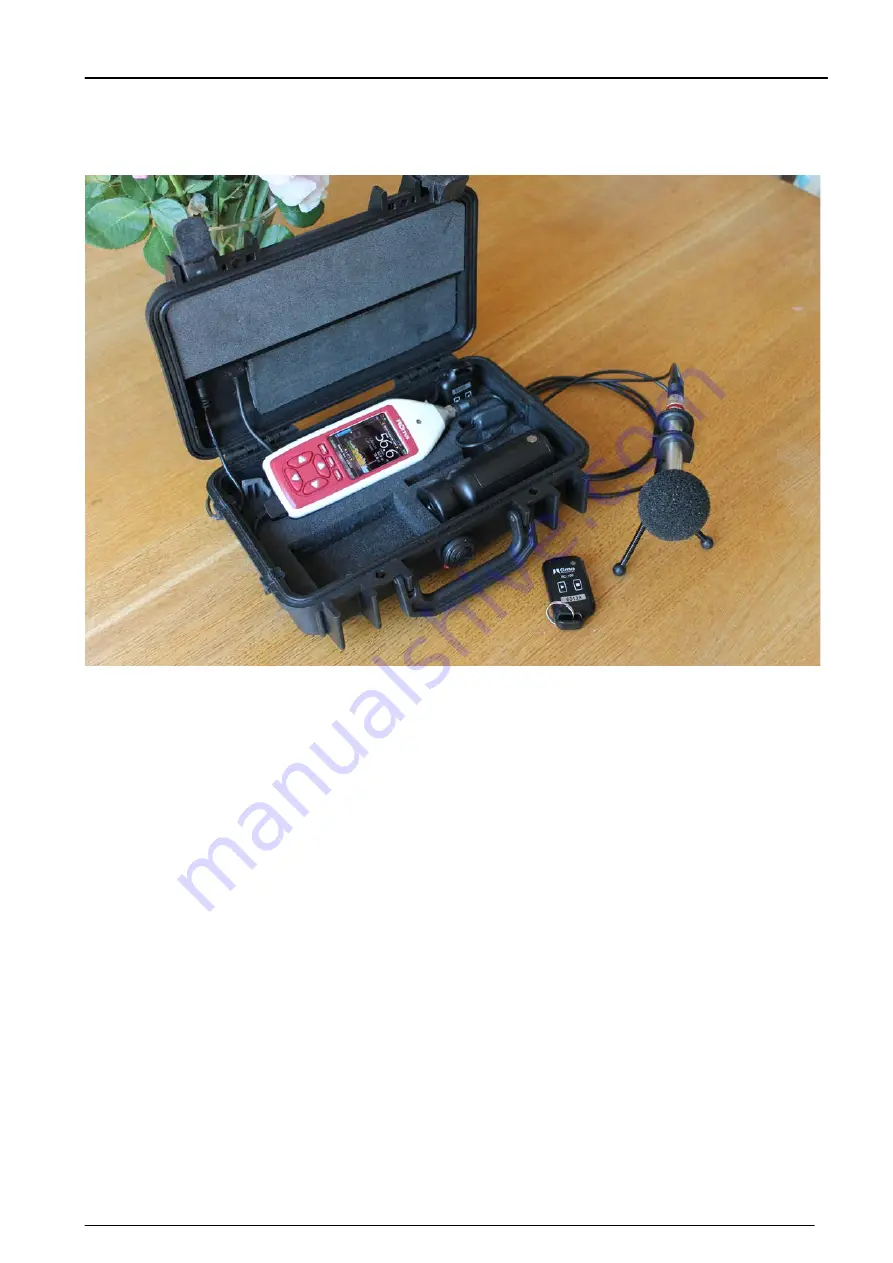
CK:199 Trojan

2

 Noise Nuisance Recorder User Manual Guide 

Page 5 

Introduction 

The Trojan

2

 is an advanced noise nuisance recorder that has been designed to be 

simple to both setup and operate. 

The system features a precision data logging sound level meter which records both the 
noise levels and audio recordings over long periods of time. 

Once the equipment is installed and setup, the user has no control over the operation of 
the sound level meter which will measure and store noise levels for up to 10 days in a 
single session. 

The only interaction needed by the user is to start and stop the audio recordings using 
the standard wireless remote control or the optional wired remote control. The user 
should also ensure that continuous power is provided to the unit. 

When the remote control is activated, the instrument will start to record audio and will 
continue to do so until the stop button is pushed on the remote control. 

If the user forgets to press stop, the instrument will end the audio recording after 5 
minutes, whilst the measurement of noise levels continues. 

The system also features a pre and post trigger system that allows the audio recordings 
to include 30 seconds of information from before and after the user starts and stops the 
recording. Note that the instrument must have been measuring for 30 seconds before 
the full pre-trigger is available. 

Summary of Contents for CK:199

Page 1: ...CK 199 Trojan2 Noise Nuisance Recorder User Manual Guide Page 1 CK 199 Trojan2 Noise Nuisance Recorder User Manual ...

Page 2: ...the NoiseTools Logo and the Noise Hub Logo are either registered trademarks or trademarks of Cirrus Research plc in the United Kingdom and or other countries Microsoft and Windows are registered trademarks of Microsoft Inc All other trademarks acknowledged Updates In the interests of continuous product improvements Cirrus Research plc reserves the right to make changes to product specifications wi...

Page 3: ...igger Post Trigger 11 Ending a measurement 11 Packing away the instrument 12 Downloading data to the NoiseTools software 13 Connecting to a PC 13 Downloading measurements 13 Selecting measurements 14 Viewing a measurement 15 Selecting an audio recording 15 Replaying an audio recording 16 Appendix 1 Configuring the sound level meter for noise nuisance measurements 18 Appendix 2 Instrument layout 21...

Page 4: ... instrument is used as a general reference for the sound level meter or Trojan Noise Nuisance Recorder remote control for the RC 199 Remote Control Unit and calibrator for an acoustic calibrator This manual describes the recommended method of operation of use for the instrument and any described accessories Throughout this manual icons and symbols may be used to highlight important information and...

Page 5: ...and stop the audio recordings using the standard wireless remote control or the optional wired remote control The user should also ensure that continuous power is provided to the unit When the remote control is activated the instrument will start to record audio and will continue to do so until the stop button is pushed on the remote control If the user forgets to press stop the instrument will en...

Page 6: ...control is pressed or the Start button on the keypad is pressed if this is sooner restart measuring and storing noise data This reduces the risk of data being lost when power is removed from the system All of the measurements are stored directly to a high performance memory card which is internal to the system The measurements are stored continuously which prevents data loss and ensures that the d...

Page 7: ...tch on calibrator o Press Calibrate on sound level meter Wait for calibration cycle o Remove acoustic calibrator Take care o Attach windshield Start measurement o Press start key on sound level meter Starting Stopping audio recordings o Use the remote control to start stop audio recordings Stop measurement o Press the Stop key on the sound level meter o Press the Exit button on the sound level met...

Page 8: ...e case Connecting the microphone preamplifier The microphone and preamplifier are stored inside the case next to the sound level meter Carefully remove the microphone preamplifier from the case and connect to the microphone extension cable Take care when connecting the cable to the preamplifier The socket and plug will only connect in one orientation and care should be taken to ensure that the plu...

Page 9: ...within 10 minutes the instrument will automatically start itself and will begin to record noise levels Check the instrument clock All of the noise measurements and audio recordings made by the Trojan are stamped with the current time and date It is therefore important that the internal clock in the instrument is set correctly At the bottom of the main screen above the three soft keys is the curren...

Page 10: ...surement To start a new measurement press the Start key on the sound level meter The display will change a red spinning indicator will be shown in the top left hand corner This shows that the instrument is now measuring and storing noise levels The main screen will now show the overall LAeq as the large number with the current 1 second LAeq and LAFmax shown below The graph will change colour from ...

Page 11: ...tion The measurement of noise levels will continue as normal Stopping a recording To stop an audio recording press the Stop button on the Remote Control The Record indicator will flash blue and then go out The audio recording has now stopped The sound level meter will continue to measure and store the noise levels Pre Trigger Post Trigger The Trojan provides a Pre Trigger and Post Trigger function...

Page 12: ...til the instrument has switched off Disconnect the mains power supply from the socket The microphone and preamplifier can be stored in the case along with the wireless remote control units This will protect the microphone from damage during transit and storage To remove the preamplifier from the cable carefully loosen the larger locking ring until the cable can be removed Do not attempt to twist o...

Page 13: ...splay and view measurements as well as how to listen to an audio recording Connecting to a PC Data is downloaded from the sound level meter via a USB cable which is fitted to the unit A USB cable is fitted to the Trojan to allow data to be downloaded without removing the instrument from the case The NoiseTools software should be installed and running before connecting the Trojan2 to the PC Connect...

Page 14: ...en After Download box This will automatically open the measurement after it has been downloaded Select the Download Time History and Download Audio boxes Measurements can be tagged with a Place Person or Project This can be used for example to store a set of different measurements from the same property or location for easy reference To allocate one of these tags click the box and any that have be...

Page 15: ...ation essential for Noise Nuisance provided The screen shows the overall noise levels measured for the entire period along with a noise profile of the measurement highlighted in yellow below and any audio recordings shown below the noise profile highlighted in red below Selecting an audio recording To replay and listen to any of the audio recordings click on the recording and the display will move...

Page 16: ... Page 16 Click on the highlighted audio recording to zoom into the time around the recording Replaying an audio recording To listen to the recording click on the loudspeaker icon highlighted below and press the play button The audio recording will play back ...

Page 17: ...CK 199 Trojan2 Noise Nuisance Recorder User Manual Guide Page 17 To view the entire measurement right click on the graph and select Zoom All to view the whole measurement ...

Page 18: ...nce measurements The sound level meter in the Trojan2 Noise Nuisance Recorder can be configured to meet the needs of each user In addition to the standard configuration options there are four that are specific to the Trojan2 Please review these settings before deploying the unit In most cases the default settings can be used ...

Page 19: ...ior to the time when the Start button was pressed Audio Post Trigger Time This determines the amount of audio recording that is stored after the Stop button has been pressed Max Audio Duration This determines the maximum duration of a single audio recording and can be used to reduce the amount of audio stored when the unit is deployed for long periods ...

Page 20: ...at timer can be set to 168 hours 24 hours x 7 days which will result in each file being a maximum of 7 days in length The instrument can store up to 30 days of data and the repeat timer allows this to be broken into smaller more manageable sections The single timer option allows the instrument to be set to measure for a set period and then to stop For example setting the single timer to 96 hours w...

Page 21: ...CK 199 Trojan2 Noise Nuisance Recorder User Manual Guide Page 21 Appendix 2 Instrument layout ...

Page 22: ...ed remote control This is connected to the sound level meter via the 3 5mm jack socket on the bottom of the instrument and through the Wired Handset Cable Slot as shown on page 21 Please note that the wired handset will override any wireless remote control units which cannot be used at the same time The power measurement and recording LED s on the lid will operate as normal ...

Page 23: ...wn in the diagram on page 21 Inside this hole is a small switch which must be pressed when carrying out the programming of the remote control unit as described below Use a small device such as a paper clip or other blunt device with a diameter of less than 1mm and length of end over 4mm to gently action this switch When you press the switch it will move only a small distance but you will feel a cl...

Page 24: ...he switch is released 10 Push again The Blue LED will flash when the micro switch is pushed then four times when the switch is released 10 Push the RECORD button on the RC 199 Remote Control The Blue LED will then illuminate Press the RECORD button again The Blue LED will then go out and then flash once to indicate learning is complete for RECORD 11 Repeat the above procedure for each new transmit...

Page 25: ...ollowing equipment manufactured after 1st January 2013 CK 199 Trojan2 Noise Nuisance Recorder CR 199 Sound Level Meter CR 515 Acoustic Calibrator Along with their standard accessories According to EMC Directives 93 68 EEC meet the following standards EN 61326 1 2006 EMC Generic emission standard for residential commercial and light industrial environments EN 61326 1 2006 EMC Generic immunity stand...

Page 26: ...calibration and service centre then the initial 12 month warranty is extended by a further 12 months with the same conditions for up to 15 years in total 3 If a product has not been calibrated annually by Cirrus Research or an authorised calibration and service centre then you may buy back into the warranty scheme for a small fee plus the cost of calibration This can only be done once during the l...

Page 27: ...also available from the Internet Web site at the address shown below United Kingdom Cirrus Research plc Acoustic House Bridlington Road Hunmanby North Yorkshire United Kingdom YO14 0PH Tel 44 0 1723 891655 Email sales cirrusresearch com Website www cirrusresearch com Germany Cirrus Research GmbH Arabella Center Lyoner Straße 44 48 60528 Fankfurt am Main Deutschland Tel 49 0 69 95932047 Email vertr...

Reviews: