background image

8.0  MAINTENANCE

R599782 - Blackwing Four User Manual

35 

Tighten the screws of the lamp unit.

Attach the lamp cover and fasten the two lamp trap screws.

Resetting Lamp Time

After 

installing a new lamp, reset the lamp time into the OSD menu. 

a) Insert plug into the power outlet

b) When the projector is in standby mode (red STANDBY/ON led), use the remote control and press sequentially
the [BACK] - [OK] - [HIDE] within 1 second interval then [DOWN] for at least 2 seconds.

c) The sequence is successful if the STANDBY/ON and LAMP leds blink alternately for 3 seconds. 

8.4

Cleaning and Replacing the Dust Filters

The filters must be cleaned regularly to allow an efficient air intake. Otherwise, dirt may enter the unit and
appear on the screen, preventing you from enjoying the video fully. If dirt has entered the unit or if you need
information about the filter, please consult your authorized dealer. A filter cleaning warning appears every
500 hours.

Pull out the plug from the power outlet

Pull out the power plug from the outlet while the projector is in standby mode.

Remove the filters

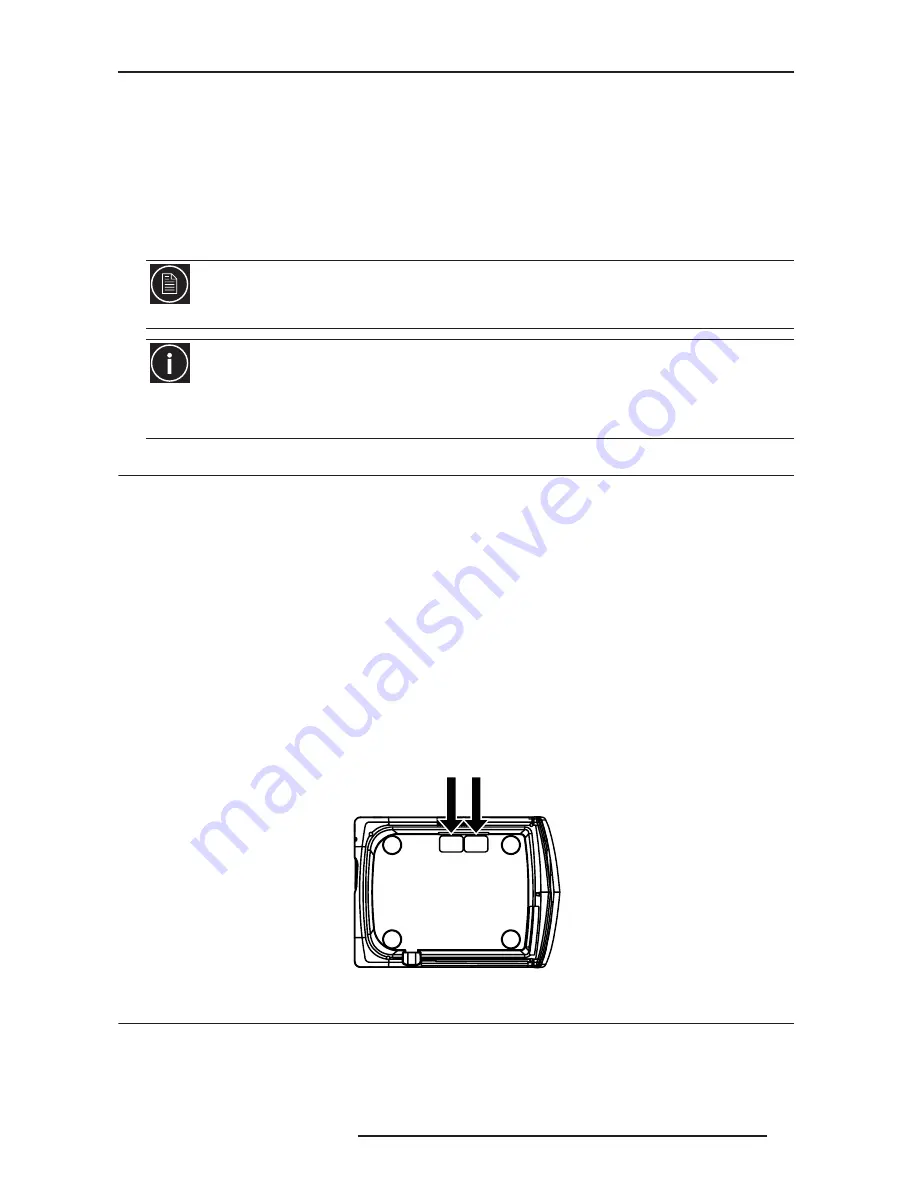
Push up and lift the claw of the filters, pull out the filters.

Clean the filters

Clean the filters with water and dry them, avoiding direct sunlight. In extremely soiled cases, use of a neutral
detergent is recommended.

Reinstall the filters

Insert the filters in their original positions and make sure that the claws are firmly inserted.

Clean the Dust Filters every 500 hours.

8.5

Troubleshooting

T

O


ENSURE


THE


LAMP


TIME


HAS


BEEN


RESET

The lamp time can be checked via the Lamp hours item of the Information


menu.

C

AUTION

 D

URING

 R

ESET

 W

ORK

Reset the lamp time only when you have replaced the lamp.
Never reset it when the lamp is still in use. Otherwise, the approximate standard for gauging replacement time may
be inaccurate, lamp performance may deteriorate and lamp blowout may occur.

Dust Filters

Summary of Contents for Black Wind Four R599782

Page 1: ......

Page 2: ...incurred during transport as well as for material and manufacturing faults Cineversum must be informed immediately in writing of any complaints If the purchaser or third party caries out modifications or repairs on goods delivered by Cineversum or if the goods are handle incorrectly in particular if the systems are commissioned operated incorrectly or if after the transfer of risks the goods are su...

Page 3: ... the correct lens shift 10 Adjust the picture Focus 12 Adjust the picture Zoom 12 3 0 REMOTE CONTROL UNIT RCU 13 3 1 General view 13 3 2 Loading and replacing batteries 13 3 3 How to use the remote control unit 14 4 0 GETTING STARTED 15 4 1 General View 15 Front side 15 Rear side 15 Input Panel side 15 4 2 Connecting the Power Cord 16 4 3 Operating LEDs 17 4 4 Operating and Navigation Buttons 18 5...

Page 4: ...ormation Menu 30 Input Source 30 Source 30 Resolution 30 H Frequency 30 V Frequency 30 Deep Color 30 Lamp Time 30 6 8 Expert Calibration 30 7 0 ANAMORPHIC LENS 31 7 1 Optional 2 35 CineMax and 2 35 THEATRE Concept 31 7 2 Using the Remote Control Unit 31 7 3 2 35 CineMax and 2 35 CineMax PRO options 32 7 4 2 35 THEATER Concept 32 8 0 MAINTENANCE 34 8 1 Clean Dirt on the Cabinet 34 8 2 Dirt on the L...

Page 5: ... other rules in your country for the treatment of old electrical and electronic equipment About the installation place Do not install the projector in a place that cannot support its weight securely If the installation place is not sturdy enough the projector could fall or overturn possibly causing personal injury 1 2 Important safeguards Electrical energy can perform many useful functions This un...

Page 6: ...uch dangerous voltage points or short out parts that could result in a fire or electric shock Never spill liquid of any kind on the product Do not attempt to service this product yourself as opening or removing covers may expose you to dangerous voltages and other hazards Refer all service to qualified service personnel Unplug this product from the wall outlet and refer service to qualified service p...

Page 7: ...he equipment Note This equipment has been tested and found to comply with the limits for Class B digital devices pursuant to Part 15 of the FCC Rules These limits are designed to provide reasonable protection against harmful interference in a residential installation This equipment generates uses and can radiate radio frequency energy and if not installed and used in accordance with the instructio...

Page 8: ...t allow projection under the following conditions Doing so may cause fire or malfunction of the unit Projection with the unit laid on sides Projection with the unit installed in an unreasonable angle Avoid using this unit at an angle of more than 15 horizontally and 5 vertically Doing so may cause unevenness in the color or shorten the lamp life Projection at a location that blocks the air inlets o...

Page 9: ...aler or specialist to perform mounting Do not mount at places that may be subjected to vibration and shock Depth of the screw holes A is 22 mm Do not use long screws as you may damage inside the projector Install at a safe place in case this unit or a part of it may drop If the light source lamp is broken small pieces of glass from the mesh of the filter may appear outside the unit Regardless wheth...

Page 10: ...ct Ratio 16 9 Projection Screen Height Aspect Ratio 16 9 Blackwing Four Projecting Distance minimum maximum 50 1270 mm 43 6 1107 mm 24 5 623 mm 151 cm 305 cm 60 1524 mm 52 3 1328 mm 29 4 747 mm 178 cm 366 cm 70 1778 mm 61 0 1550 mm 34 3 872 mm 209 cm 428 cm 83 2108 mm 72 3 1837 mm 40 7 1034 mm 251 cm 507 cm 92 2337 mm 80 2 2037 mm 45 1 1146 mm 279 cm 562 cm 100 2540 mm 87 2 2214 mm 49 0 1245 mm 30...

Page 11: ...n The Blackwing Four projector has motorized vertical and horizontal shifts Browse into the Menu to the Lens Control setting into the Installation menu select the shift adjustment Or use the direct access button on the Remote Control Unit LENS to make the lens control adjustment You can use self generated test pattern of the projector or an external pattern from a calibration DVD by example by set...

Page 12: ...s the Ok button to access the Zoom adjustment Use the up and down buttons to adjust the picture size until the screen is completely filled Select the Zoom adjustment and resize the picture using Up and Down buttons BACK TEST LIGHT ASPECT HIDE PC HDMI 1 VIDEO HDMI 2 S VIDEO COMP LENS STAND BY MENU CINEMA 3 USER2 THX PICTURE MODE INPUT CINEMA 1 CINEMA 2 NATURAL STAGE DYNAMIC USER1 ON LENS BACK TEST L...

Page 13: ... in the gap at the bottom of the remote control and press the cover until it is firmly closed BACK TEST LIGHT ASPECT HIDE HDMI 1 VIDEO HDMI 2 S VIDEO COMP LENS STAND BY MENU CINEMA 3 GAMMA C TEMP USER2 LENS AP PIC ADJ PICTURE MODE INPUT CINEMA 1 CINEMA 2 NATURAL STAGE DYNAMIC USER1 ON Power On button Select Active Input Display Menu Stand By button Aspect Ratio Hide Display Back to previous menu Na...

Page 14: ...to fire or recharge them if they are not design to Remove the batteries if the remote control is not to be used for a prolonged period Use manganese batteries wherever possible Do not use rechargeable batteries NOTICE If the remote control has to be brought closer to the projector to operate it means that the batteries are wearing out When this happens replace the batteries Insert the batteries acc...

Page 15: ...ore details Operating and Navigation buttons described in section 4 4 page 18 Lamp trap see Procedure for Lamp Replacement page 34 for more details about lamp replacement Input Panel side Main Power connect the power cord as shown below Input Panel connect your video source to the correct input Air Inlet Front IR sensor Optical Lens Back IR sensor Operating LEDs Lamp trap Operating buttons Main Po...

Page 16: ...nce the power consumption of this unit is high insert the power plug directly into a wall outlet When not using devices remove the power plug from the wall outlet Do not use power cords for connection other than specified Do not use a power voltage different from that which is indicated Do not cut tear or modify the power cords Also do not place a heavy object on heat or stretch the power cords as ...

Page 17: ...ate mode but HIDE is ON Press again on HIDE button to obtain a picture 4 blinking red Yes Unit is in cooldown mode switching off 5 6 orange Lamp time has reached 2900 hours prepare to replace the lamp before 3000 hours CAUTION When in Cool Down mode do not pull out the plug from the outlet Also do not block the air inlets exhaust vents by standing the projector on its end or laying it on its side ...

Page 18: ... video source to an amplifier This unit features a 12 Volt trigger output that can be used to control external device in On Off mode or together with an optional anamorphic lens systems Button Description Hide display To temporary hide the picture Input source To switch input source Power button To turn On or Off the projector Up down left right To navigate into On Screen Display OSD Menu OK Enter ...

Page 19: ...deo camera YPbPr or RGB or SCART EU DVD Player HDTV Receiver Game Console SD or HD DVB T receiver Multimedia box Analog Camera In order to use a SCART device Europe on the Component input you must use cable sold separately and configure it into the projector menu Make sure to use a certified HDMI cable especially when the distance between the different devices are longer than 5 meters If it is the c...

Page 20: ...o RGB Sync cable Once connected select the COMP input as active input Then browse into the projector menu to Input Signal COMP and select SCART option CAUTION Prior to connecting any device to this unit switch the projector in standby mode Never connect a HDMI source to this unit when the projector is in operate mode The HDMI termination is a self powered connection and can cause electric discharg...

Page 21: ...erts Stage bright lightning Dynamic User1 User2 TH PRO Contrast 50 50 Brightness 50 50 Color 50 50 Tint 50 50 Color Temp 5800K 6500K 7500K 9300K High Bright Custom1 Custom2 Custom3 Gamma Normal A B C D Custom1 Custom2 Custom3 Advanced Sharpness 0 100 Detail Enhancement 50 50 Noise Reduction SD only DNR 0 16 MNR 0 16 BNR On Off CTI SD only Off Low Mid High Color Management Off Custom1 Custom2 Custo...

Page 22: ...y Auto Alignment Tracking Phase Picture position Hor Vert Picture Position Horizontal Vertical Aspect Video only 4 3 16 9 Zoom Aspct Computer only Auto Just Full V stretch On Off Over Scan SD only 2 5 On Off Mask HD only 2 5 5 Off Film Mode only 480i 576i 1080i Auto Film Off Installation Lens Control Focus Zoom Shift Test Pattern On Off Lock On Off Pixel Adjust horiz Red 1 7 horiz Green 1 7 horiz ...

Page 23: ...g 5sec Off Source Display active input On Off Logo On Off Language Select between 12 languages Function Lamp Power Normal High Trigger Off On Power On Vstretch Test Pattern Select between 6 Test Patterns Off Timer 1 hour 2 hours 3 hours 4 hours High Altitude Mode On Off Information Input Image Connector Input Source name PC Resolution PC H Freq PC V Freq Deep Color Depth Lamp use ...

Page 24: ...saturation levels Adjust the Color value between 50 and 50 Tint The hue function is used to adjust the color tint to obtain true color reproduction Adjust the Tint value between 50 more red and 50 more green Color Temperature Color temperature stands for the spectral properties of a light source Low color temperature implies warmer ambiance more yellow red while high color temperature implies a co...

Page 25: ...nd in compressed digital video signals such as television broadcast or encoded movies Adjust the MNR value from 0 up to 16 to reduce the typical broadcast picture mosquito noise BNR Block Noise Reduction uses a large portion of the picture to reduce the digital noise this ensures a higher quality filter Adjust the BNR value to On or Off 6 2 0 4 CTI SD video only Color Transition Improvement Set it ...

Page 26: ...om a European SCART source Video S Video This menu is available if the selected active input is either Video or S Video 6 3 0 1 NTSC Setup level This function can adjust the black level of the signal to 7 5 IRE instead of 0IRE 7 5 IRE is widely used for NTSC standard 6 3 0 2 Color System This function allows a manual selection of the color system to be used between NTSC NTSC4 43 PAL PAL M PAL N an...

Page 27: ...he screen height or the screen base which ever happens first Just is a 1 1 mode pixel to pixel mapping no scaling Full Stretch the picture full screen Aspect Ratio applied to PC signals V Stretch for Video sources This setting is available only for SD and HD signals If you enable this function the original picture is stretched to SDTV 4 3 full frame SDTV 4 3 with black bands SD or HD SOURCE ASPECT ...

Page 28: ...lm Mode or set it to Off to disable it This function is only available for interlaced input signals 480i 576i and 1080i 6 4 Installation Menu Lens Control This menu gives access to the control of the lens Browse into this menu to adjust 6 4 0 1 Focus Adjust the lens focus to obtain a clear picture 6 4 0 2 Zoom Adjust the lens zoom to fill the screen with the picture 6 4 0 3 Shift Adjust lens shift ...

Page 29: ...ays display menu Line Display 5sec Display the input settings for 5 seconds after input selection Off Don t display Source Display On Display the source of the input signals after input selection Off Don t display Logo On Display logo during startup for 5 seconds Off Don t display Language Choose the OSD language between English Japanese German Spanish Italian French Portuguese Dutch Swedish Norve...

Page 30: ...Information Menu Input Source Displays the active video input Source Displays the type of the current video input signal If PC input is selected this item cannot be displayed Resolution If the active input is PC input its resolution is displayed H Frequency In the case of PC signal the horizontal frequency is displayed V Frequency In the case of PC signal the vertical frequency is displayed Deep C...

Page 31: ...ed Constant Image Width scaler Dedicated menu to program the 12V Trigger output 7 2 Using the Remote Control Unit Blackwing Four RCU and quick access to THEATRE Mode features ASPECT ratio button When you press sequentially the ASPECT button the aspect mode rotation is 4 3 16 9 Zoom then back to 4 3 Select active input Select the correct Aspect Ratio BACK TEST LIGHT ASPECT HIDE HDMI 1 VIDEO HDMI 2 ...

Page 32: ...atio changes on the same input To obtain the correct aspect ratios choose between V Stretch On for widescreen movies format 2 35 1 and aspect ratio for HDTV native format 16 9 You can also use the Remote Control Unit by pressing the ASPECT button to switch between V Stretch On to 4 3 as described below To switch forth and backward press twice the ASPECT button on the RCU as described below 7 4 2 3...

Page 33: ...o On Anamorphic input V Stretch On When selecting a widescreen input 2 35 1 2 37 1 or 2 40 1 the original aspect ratio of the source is larger than 16 9 you can see black bars on the top and the bottom of the screen Select V Stretch On for this input in the menu Input Signal V Stretch On The Anamorphic Lens is automatically placed in front of the projector to restore the correct picture aspect rat...

Page 34: ...earlier If the image is dark or color tone abnormal replace the lamp as soon as possible You can also check the accumulated hours of usage Please refer to Lamp Time in the Information menu When the lamp usage time reaches 2900 hours The Lamp replacement message will be displayed on the screen the next three projection starts Press the BACK button to clear the display Procedure for Lamp Replacement...

Page 35: ...ut the filter please consult your authorized dealer A filter cleaning warning appears every 500 hours Pull out the plug from the power outlet Pull out the power plug from the outlet while the projector is in standby mode Remove the filters Push up and lift the claw of the filters pull out the filters Clean the filters Clean the filters with water and dry them avoiding direct sunlight In extremely soiled ...

Page 36: ...Supply failed 11 2 times Cooling fans stop 12 3 times Internal thermal sensor detects overheating 13 4 times External thermal sensor detects overheating 14 blinking orange 1 time Startup or drive circuits failed 15 2 times Communication with drive circuit failed 16 3 times Scaler circuit failed ABOUT WARNINGS AND COOL DOWN MODE After projection or when a warning occurred cases 7 16 the unit will g...

Page 37: ...on 2 RxD data PC Projector 3 TxD data Projector PC 5 GND ground 1 4 6 9 N C Header Unit ID Command Data EoD 1 byte 89h 01h 2 bytes at least 1 byte 0Ah Header 21h Operating command PC Projector 3Fh Reference command PC Projector 40h Response command Projector PC 06h ACK Projector PC Unit ID Fixed to 89 h 01h Command 2 bytes See the list of the available commands below If Command code is 52h 43h the...

Page 38: ...32h Set value to 2 0 33h Set value to 2 1 34h Set value to 2 2 35h Set value to 2 3 36h Set value to 2 4 37h Set value to 2 5 38h Set value to 2 6 Header 21h Command Data Description Power ON 52h 43h 37h 33h 30h 35h Switch the unit ON Power OFF 52h 43h 37h 33h 30h 36h Switch this unit into Stand by mode Switch input 52h 43h 37h 33h 30h 38h Switch to next input 37h 33h 34h 36h Switch active input t...

Page 39: ...1h Set Color Temperature to 9300K 37h 33h 35h 32h Set Color Temperature to High Bright 37h 33h 35h 33h Set Color Temperature to Custom1 37h 33h 35h 34h Set Color Temperature to Custom2 37h 33h 35h 35h Set Color Temperature to Custom3 Color Management 52h 43h 37h 33h 36h 30h Set Color Management to Off 37h 33h 36h 31h Set Color Management to Custom1 37h 33h 36h 32h Set Color Management to Custom2 3...

Page 40: ...h 33h Shift the picture to the right using lens shift Lens Shift Left 52h 43h 37h 33h 34h 34h Shift the picture to the left using the lens shift Lens Focus 52h 43h 37h 33h 33h 31h Focus far Lens Focus 52h 43h 37h 33h 33h 32h Focus near Lens Zoom T 52h 43h 37h 33h 33h 35h Zoom Tele Lens Zoom W 52h 43h 37h 33h 33h 37h Zoom Wide You want to Command to send Check the connection send 21h 89h 01h 00h 00...

Page 41: ... 60 1024 x 768 48 363 60 004 65 000 H V 1344 x 806 WXGA 60 1280 x 768 47 760 60 000 79 998 H V 1675 x 796 WXGA 60 1440 x 900 55 919 59 999 106 470 H V 1904 x 932 SXGA 60 1280 x 1024 63 981 60 020 108 000 H V 1688 x 1066 WSXGA 60 1680 x 1050 65 222 60 002 147 140 H V 2256 x 1087 WUXGA 60 1920 x 1200 74 038 59 950 154 000 H V 2080 x 1235 Designation Resolution fh kHz fv Hz Dot MHz Polarity Total dot...

Page 42: ... x 1050 64 740 59 950 101 000 H V 1560 x 1080 WSXGA 60 1680 x 1050 65 222 60 002 147 140 H V 2256 x 1087 1920 x 1080 60 1920 x 1080 67 500 60 000 148 500 H V 2200 x 1125 MAC 13 640 x 480 35 000 66 667 30 240 H V 864 x 525 MAC 16 832 x 624 49 107 75 087 55 000 H V 1120 x 654 MAC 19 1024 x 768 60 241 74 927 80 000 H V 1328 x 804 ...

Page 43: ... NTSC 4 43 PAL N PAL M PAL60 SECAM S Video Input NTSC NTSC 4 43 PAL N PAL M PAL60 SECAM Component Input YPbPr 480i p 576i p 720p50 60 1080i50 60 VGA Sub D15 VGA 60 85Hz SVGA 56 85Hz XGA 60 85Hz SXGA 60Hz WSXGA 60Hz 1920x1080 60Hz H V HDMI 1 Input 480i p 576i p 720p50 60 1080i50 60 1080p24 50 60 VGA 60Hz SVGA 60Hz XGA 60Hz WXGA 60Hz SXGA 60Hz WSXGA 60Hz WUXGA 60Hz HDMI 2 Input 480i p 576i p 720p50 ...

Page 44: ...ELLANEOUS 44 R599782 Blackwing Four User Manual Dimensions Contact Information TEC Cineversum 7 rue La CAILLE 75017 Paris FRANCE Web www cineversum com 386 mm 15 2 522 mm 20 6 386 mm 15 2 202 mm 8 0 522 mm 20 6 ...

Page 45: ...9 0 MISCELLANEOUS R599782 Blackwing Four User Manual 45 ...

Page 46: ...9 0 MISCELLANEOUS 46 R599782 Blackwing Four User Manual ...

Page 47: ...9 0 MISCELLANEOUS R599782 Blackwing Four User Manual 47 ...

Page 48: ......

Reviews: