


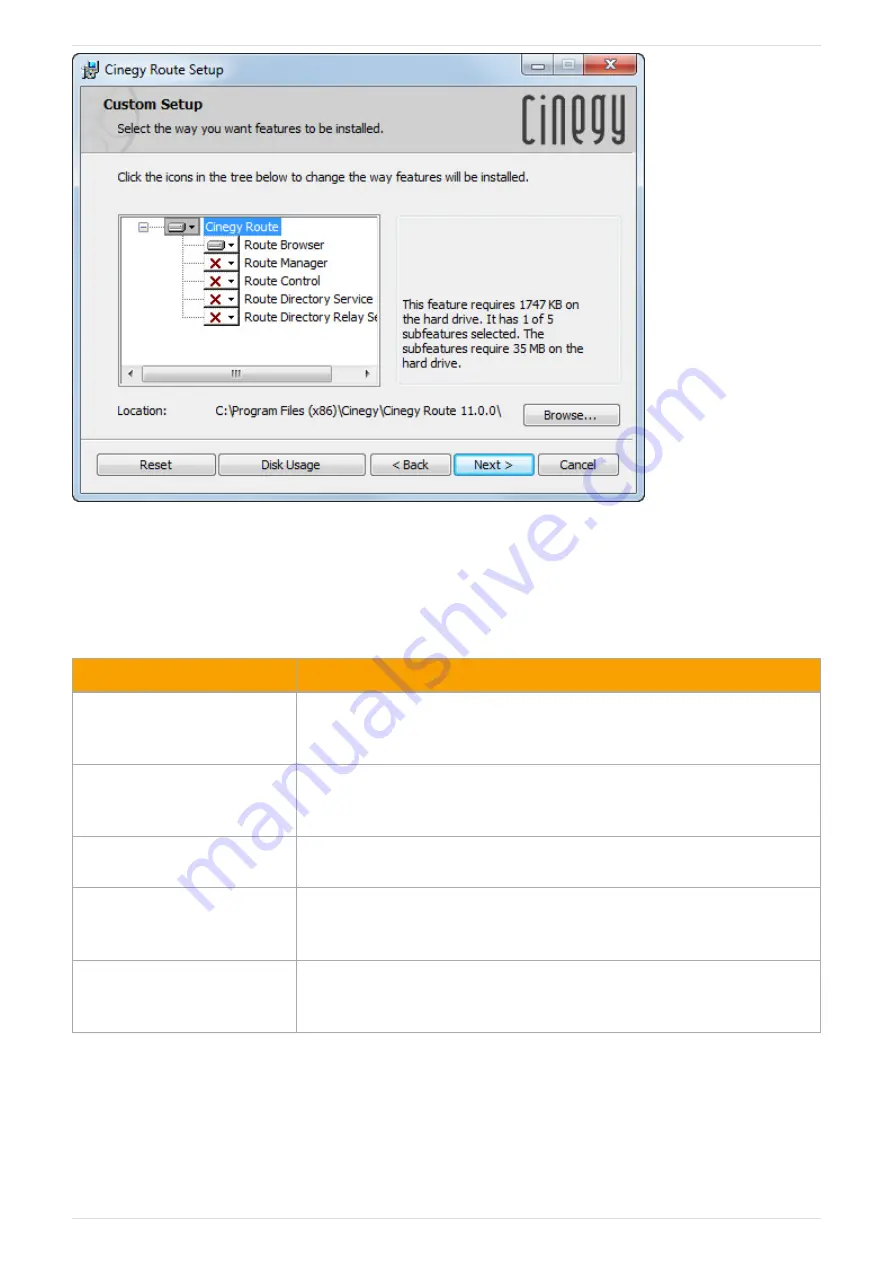
Press the "Browse" button to change the installation folder, if needed.
Select the components you want to be installed by clicking on the corresponding icon in the components tree and choosing
the status for the tool.
Refer to the following table to get quick information about the tools:
Component
Description
Route Browser
Automatically resolves the video streams names registered by Route Directory Service
to the RTP/UDP URLs. Installation also enables browsing registered video streams and
choosing them from Cinegy Air control panel.
Route Manager
Allows user to organize and set up physical sources and virtual destination groups
used for managing and securing IP streams and channels registered by Route
Directory Service.
Route Control
Used for switching sources of the virtual destinations with the ability to preview the
incoming video for each virtual destination in real-time.
Route Directory Service
Registers and maintains records of video streams and virtual destination mappings.
The server running this service is used by all Route-aware client applications to
exchange data.
Route Directory Relay Service
Tracks changes in Route Directory Service and sends them to the broadcast clients via
multicast transmission. Not required to be installed, and needed for larger-scale
deployments only.
Having selected the tools for installation, press the "Next" button to begin the installation. A progress bar will show the
progress of the installation process.
Together with the selected Cinegy Route components, the following utilities are installed by default: NetCaptureGUI,
NetPlayGUI, and NetSendGUI.
Page 6 | Document version: e23d164


