Studio Force II User Manual V1.1
11
Aug. 2019
www.chroma-q.com
2.6. Main Menu
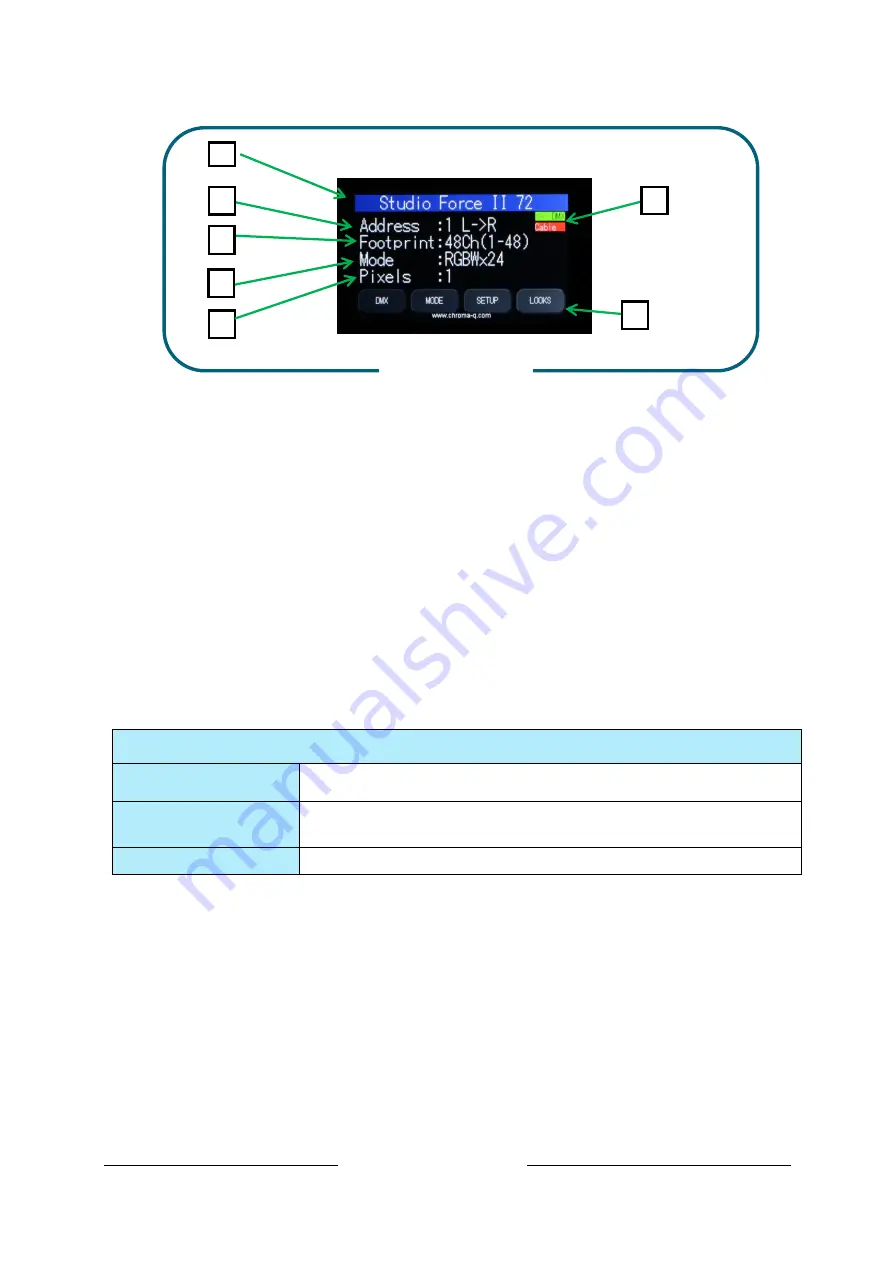
Once the unit is powered up, the touch screen LCD display shows the Main Menu with:
1. The model name
2.
Address
: The DMX starting address and orientation
3.
Footprint:
number of DMX slots used in the current configuration
4.
Mode:
current assigned control mode
5.
Pixels:
Current dedicated pixels (or grouping) as per selected grouping & control mode
6.
Data Signal/Source Indicator:
Current input status (DMX cable/DMX wireless/No data cable/No
data Wireless)
7.
Configuration option buttons:
Operational and control changes can be made by selecting any of
the four configuration option buttons shown in the picture above to access DMX (address), Mode,
Setup and preset Looks operation.
L
→
R shows LED pixels will be controlled beginning at left, going towards right. This can be reversed by
choosing R
→
L in the Mode Menu options.
Note:
The “Left” side of the fixture is
at power/dmx IN;
the “Right” side is
at power/dmx out.
The LCD is backlit when the main menu is accessed and will turn off when left undisturbed for 5 seconds.
Data Signal Indicator- Shows the presence and status of DMX signal
No Data
- appears when the fixture is set at a DMX controllable mode and is not
connected to an external DMX source/ console.
> > >DMX
- appears when the fixture is set at a DMX controllable mode and is
receiving a DMX signal from an external DMX source/ console.
DMX > > >
-appears when the fixture is set at Master and is outputting a DMX data signal.
Table 4 (Data Signal Indicator)
Figure 7 (Home Screen)
1
2
4
3
5
6
7


