


Upgrade Instructions for GSeries Software version 02.03
Page 3 of 5
(FW P/N 001-112143-03 Rev 2)
Stage 3 – Set up network connection to the projector
An Ethernet connection is required between the computer and projector.
15.
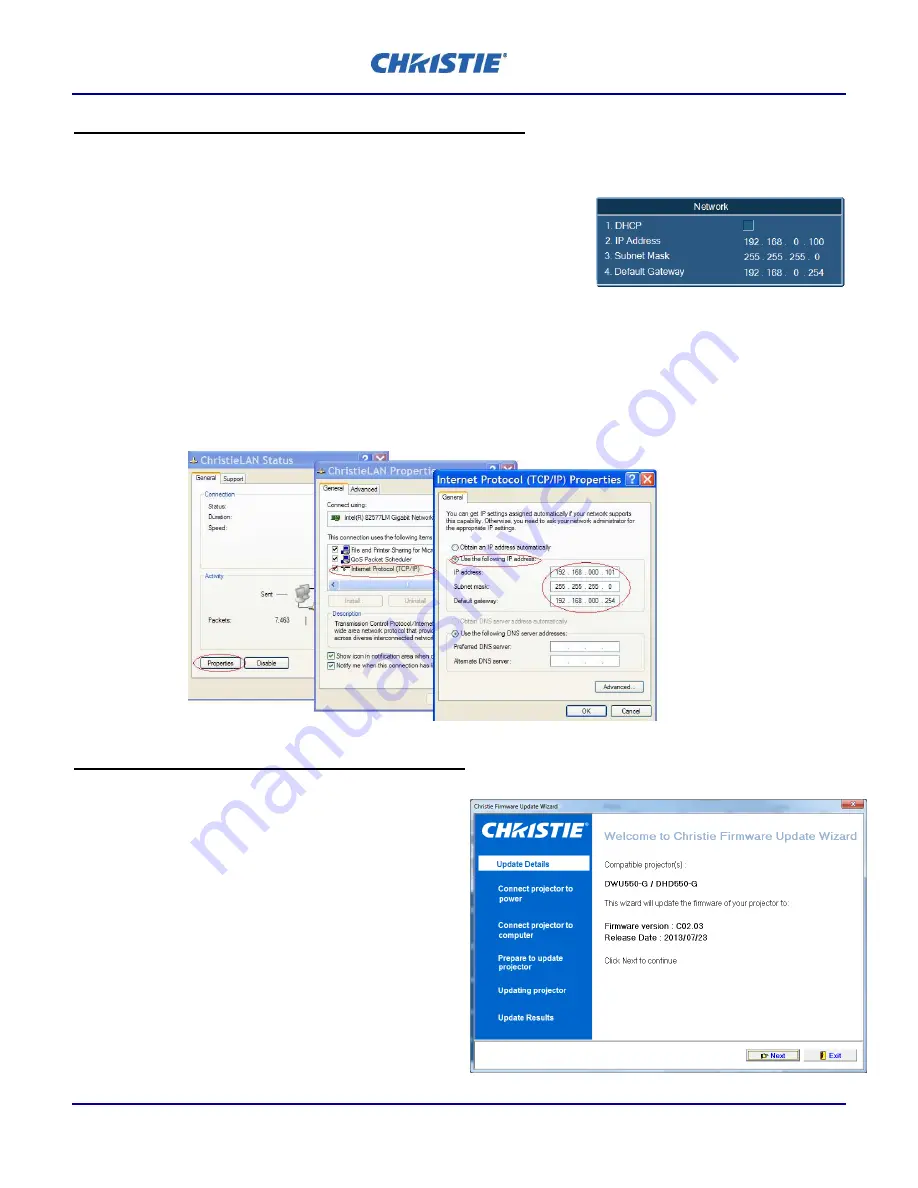
In the projector’s menu Configuration->Communications->Network:
-
Deselect DHCP (switch it off)
-
Wait approximately 45 seconds for the Network Settings to take
effect (i.e. until the menu settings are no longer grayed out)
16.
Connect the projector and the PC.
-
A direct RJ45 connection is recommended.
-
If the connection is through a switch or router, ensure that there are no duplicate IP addresses for any
equipment connected via the switch.
-
Default settings that work are: (Other settings may be used)
•
Projector IP address 192.168.0.100
•
Computer IP address 192.168.0.101
•
Subnet Mask on both 255.255.255.0
Stage 4 – Upgrade Main FW to version C02.03
The RJ45 connection (as described in Stage 3) is required
between the computer and projector.
17.
Start with the projector AC switch off.
18.
Start the upgrade wizard from the desktop icon.
“
Christie GSeries C02.03 System FW LAN Update
Wizard
”
19.
Confirm it is the correct firmware for the projector
model.
20.
Turn the projector on and wait until the Source
message box is displayed on the bottom left of the
image.
21.
Follow the instructions in the Upgrade Wizard. The


