45
Image Adjustment
Image Adjustment
Move the pointer to one of the followings with the Point
buttons (
e
,
d
,
7
, and
8
) or the Control pad and press the
SELECT button.
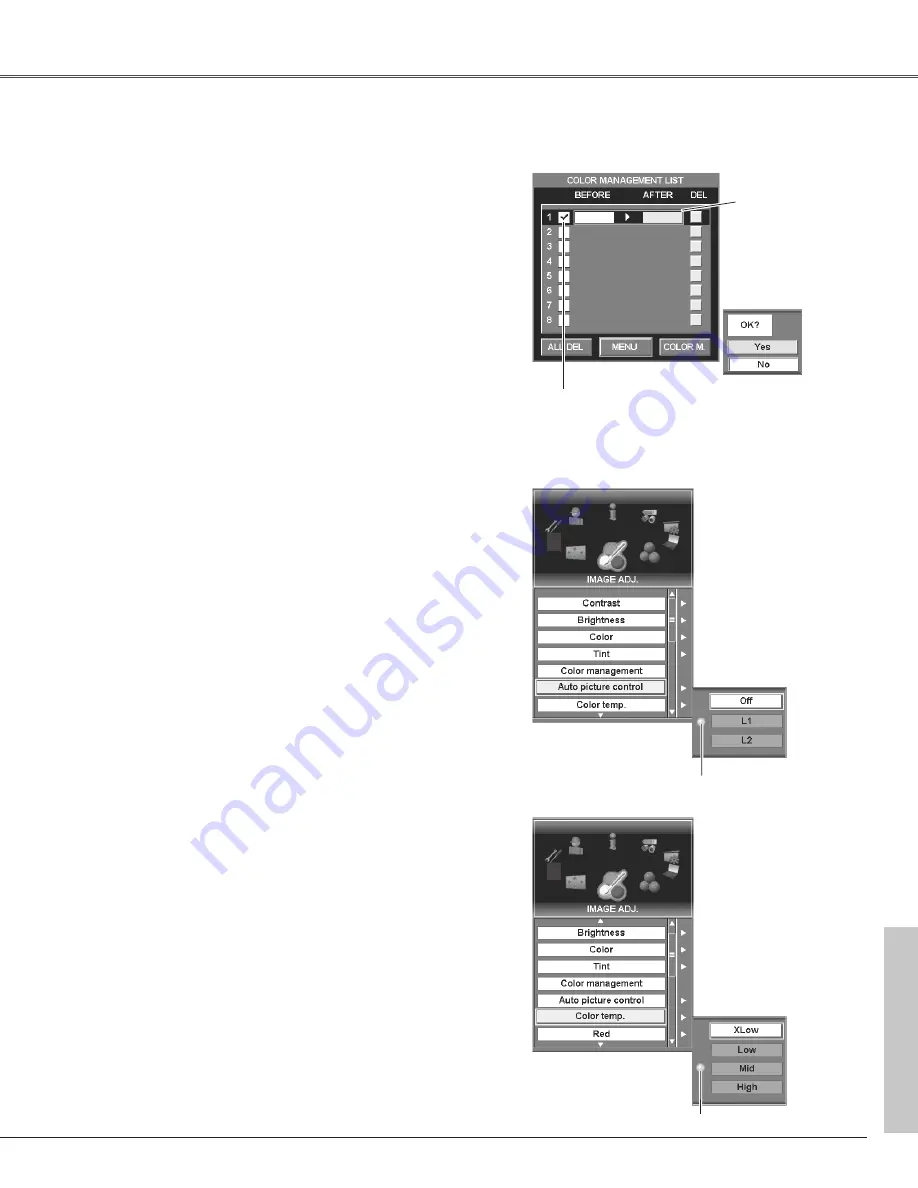
LIST.............displays Color Management List window to store
the adjustment data.
COLOR.M ..returns to the previous image with the Color
management pointer.
MENU .........displays a confirmation dialog box. Select [Yes] to
return to the menu display.
Color management list
After selecting LIST on the Color selection window, Color
Management List will appear. Move the pointer to one of the
followings with the Point buttons (
e
,
d
,
7
,and
8
) or the
Control pad and press the SELECT button.
ALL DEL......deletes all the data on the list.
MENU .........displays a confirmation dialog box. Select [Yes] to
return to the menu display.
COLOR M...returns to the previous image with the Color
management pointer.
Press the CANCEL button to exit the Color management mode.
M o v e t h e p o i n t e r
t o t h e s e l e c t e d
color and press the
SELECT button.
T h e c o n f i r m a t i o n
dialog box appears.
Color management list
Clear the check mark with the
SELECT button not to apply
the adjusted color to the
projected image.
Soften or sharpen the image with the Point buttons (
e
and
d
) or
the Control pad. (From 0 to 15.)
Sharpness
Lighten or deepen green tone of the picture with the Point
buttons (
e
and
d
) or the Control pad. (From 0 to 63.)
Green
Lighten or deepen blue tone of the picture with the Point buttons
(
e
and
d
) or the Control pad. (From 0 to 63.)
Blue
Auto picture control
With this function enabled, the projected image will be easier to
see by emphasizing black of the picture. Select one from the
following settings:
Off ······disabled
L1 ······ emphasizes black of the picture.
L2 ·······emphasizes black of the picture greater than L1.
Lighten or deepen red tone of the picture with the Point buttons
(
e
and
d
) or the Control pad. (From 0 to 63.)
Red
Color temp.
Select a level from among XLow, Low, Mid and High with the
Point buttons (
e
and
d
) or the Control pad and the SELECT
button.
Select [Yes] to
return to the
menu display.
The setting selected.
The setting selected.
✔
Note:
If either value of Red, Green, and Blue is adjusted, “Adj.” will be selected in Color
temp. automatically.
Summary of Contents for 103-005001
Page 1: ...Projection lens is optional User s Manual 103 005001 LX66A...
Page 82: ...82 Appendix...
Page 83: ...83 Appendix Appendix...


