background image

welcome

Thank you for buying a Chord product.

Before you start to enjoy using to your Chord product, please take a couple of

minutes to read how to connect your audio equipment and loudspeakers to your 

pre-amplifier or integrated amplifier and how to maximise your listening experience.

user guide for

pre-amplifiers

CPA 2200

CPA 3200E

CPA 4000E

integrated amplifiers

CPM 2600

CPM 3300

1

Summary of Contents for CPA 2200

Page 1: ...CHORD Pre amplifiers and integrated amplifiers...

Page 2: ...roduct please take a couple of minutes to read how to connect your audio equipment and loudspeakers to your pre amplifier or integrated amplifier and how to maximise your listening experience user gui...

Page 3: ...plifiers CPM 2600 CPM 3300 Chord s integrated amplifiers are based on a combination of our highly successful pre amplifiers and power amplifiers together with a few features of their own The power amp...

Page 4: ...talled unbalanced inputs on all Chord equipment thus enabling you to mix Chord and other manufacturer s equipment Balanced inputs carry twice the strength of signal of unbalanced inputs and are able t...

Page 5: ...terminal Connect the black wire to the live terminal Connect the green to the earth terminal earthing issues in Europe In some European countries a hum may occur if your integrated pre amplifier is c...

Page 6: ...n your power amplifier and connect Left O P 1 to Left IN on your power amplifier 2 On your remote control press PRE and then O P 1 to select output 1 if you want to bi amp Bi amping is a technique whe...

Page 7: ...o Right IN on your power amplifier and connect Left O P 1 to Left IN on your power amplifier 2 On your remote control press PRE and then O P 1 to select output 1 if you want to bi amp Bi amping is a t...

Page 8: ...phone mode automatically mutes your loudspeakers Heaphone mode also prevents any volume control from automatically unmuting your loudspeakers to turn off headphone mode 1 Press the SET button several...

Page 9: ...emote control press PRE and then O P 1 to output the signal to your loudspeakers Note The WBT rhodium plated 4mm speaker binding posts will accept 4mm banana plugs WBT 0645 or WBT 0644 or 6mm spades W...

Page 10: ...elled Right and Left O P 1 2 Use RCA style connectors to connect Right O P 2 to the Right IN on your power amplifier and connect Left O P 2 to the Left IN on your power amplifier 3 Connect the outputs...

Page 11: ...ected to a separate phono head amplifier like the Chord Phono Stage before connecting to this product D 1 D 2 OUT O D 1 D 2 D 1 D 2 V R D 1 D 2 D V R OUT O T2 T1 IN T2 T1 D D 1 D 2 D 1 D 2 V OUT T con...

Page 12: ...but not both 1s or both 2s at the same time Note All record players need to be connected to a separate phono head amplifier like the Chord Phono Stage before connecting to this product PUSH 1 3 2 PUS...

Page 13: ...t bus is bus A and this is the one you would use to choose your inputs in everyday operation The advantage of having two buses is that it allows for two tape recorders to tape different inputs simulta...

Page 14: ...ns 2 When the fault has been rectified the integrated amplifier can be switched on and will power up as usual You should wait at least two minutes before turning the integrated amplifier on again at t...

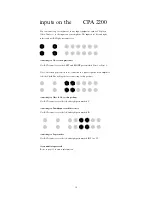
Page 15: ...display with figures from 0 to 98 choosing your output 1 Press O P 1 if your output is connected to O P 1 on the back of your integrated amplifier 2 Press O P 2 if you are using the line output from O...

Page 16: ...15 CHORD MUTE O P 1 O P 2 OP 1 2 VIDEO RADIO BUS B DISC1 DISC2 TAPE1 VIDEO RADIO BUS A DISC1 DISC2 TAPE2 PRE SYSTEM CONTROLLER BAL VOLUME Bus A controls Tape 2 Bus B controls Tape 1...

Page 17: ...e 1 output The display will show 3 Press the volume button marked to increase the gain to x1 5 The display will show 4 Repeat steps 2 and 3 to increase the gain to x1 75 and repeat these steps once ag...

Page 18: ...use the cloth to gently clean your amplifier changing the batteries in the remote control Simply undo the four small cross head screws on the side of your remote control You may need to run a sharp k...

Page 19: ...s Check that you ve earthed the unit The interconnects need to be properly screened and placed away from mains cables Interference can be reduced by using balanced inputs and outputs instead of RCA ph...

Page 20: ...mplifier inputs outputs inputs O P2 O P1 LF HF LF HF outputs inputs outputs speakers power amplifier integrated amplifier inputs outputs inputs O P2 O P1 LF HF LF HF Figure 1 Bi amping for a pre ampli...

Page 21: ...o yes yes yes Tape 1 yes yes yes Tape 2 yes yes yes outputs balanced XLR O P 1 2 2 pairs 2 pairs 2 pairs unbalanced RCA 1 1 1 unbalanced RCA 2 for tape 2 for tape 2 for tape 2 headphone frequency rang...

Page 22: ...Radio yes yes Tape 1 yes yes Tape 2 yes yes outputs 1 1 pair WBT speaker binding posts as CPM 2600 2 RCA unbalanced pre amp out 2 for tape RCA unbalanced frequency range 2 5Hz 80kHz 3dB 2 5Hz 80kHz 3d...

Page 23: ...Chord Electronics Limited The Pumphouse Farleigh Lane East Farleigh Kent ME16 9NB Tel 44 0 1622 721444 Fax 44 0 1622 721555 Email sales chord softnet co uk Web www chordelectronics co uk...

Reviews: