Installation Instructions
K2P Series
9
WARNING:
Only remove display from mount when the
display can be lifted up from the mount! DO NOT remove
display unless the display is in the upright position! See
Display Removal section for details.
2.
Carefully place display face down on protective surface.
3.
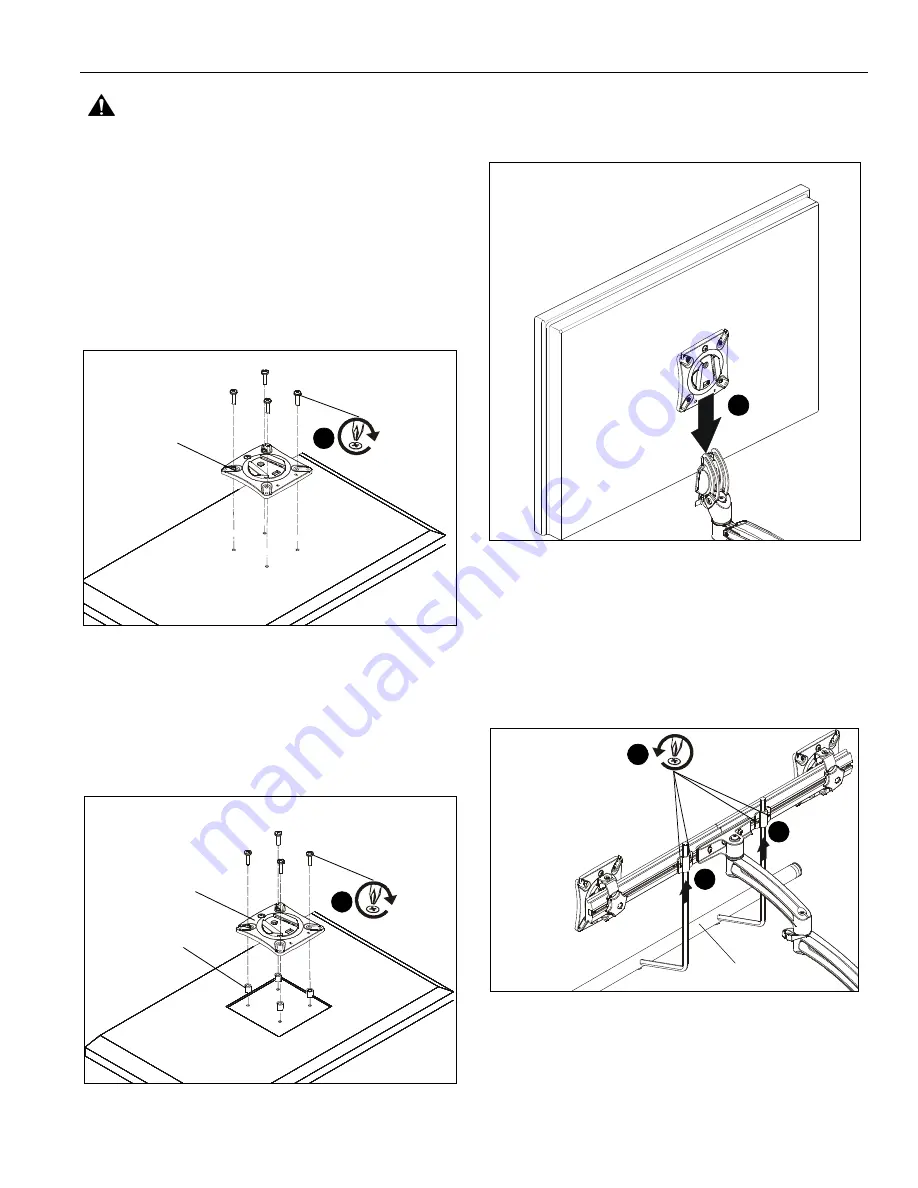
Connect faceplate to display
For flush mounting hole installation:
•
Using Phillips screwdriver, carefully install four
M4x14mm screws (B) through corresponding
holes on faceplate and into the mounting holes on
the display. (See Figure 6)
Figure 6
For recessed mounting hole installation:
•
Place four spacers (D) on top of mounting holes
on back of display. (See Figure 7)
•
Using Phillips screwdriver, carefully install four
M4x25mm screws (C) through corresponding
holes on faceplate, spacers (D) and into the
mounting holes on the display. (See Figure 7)
Figure 7
4.
Position display with faceplate attached above mount. (See
Figure 8)
5.
Slide faceplate onto mounting head until quick release tab
clicks into place. (See Figure 8)
Figure 8
Handle Installation (K2P22H models only)
1.
Loosen four screws securing handle brackets to K2P22H
array. (See Figure 9)
2.
Install uprights of handle (J2) into handle brackets located
on the back of K2P22H array. (See Figure 9)
Figure 9
(B) x 4
quick release
faceplate
(for flush mounting holes)
3
(for recessed mounting holes)
(C) x 4
(D) x 4
quick release
faceplate
3
5
2
2
(J2)
1
x 4


