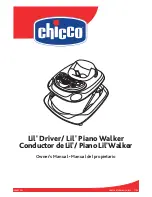
Chicco 67648800070 - DJ Baby Walker Owner'S Manual Download Page 2

2

WARNING

For your child’s safety, read these instructions carefully and keep them 

for future reference.  The child may be hurt if you do not follow these 

instructions.  

• Before use, check that the product 

  and all of its components have not 

  been damaged during 

  transportation.  Check regularly that 

  the product is not broken or 

  damaged.  If the product is broken 

  or damaged, keep out of reach of 

  children.

• The product must only be assembled 

  by an adult.  For the correct 

  assembly of the product, please refer 

  to the following instructions.

• 

STAIR HAZARD:

 Avoid serious injury

  or death.  Block stairs/steps securely 

  before using walker.

• 

WARNING:

 The child will be able to 

  reach further and move rapidly when 

  in the walking frame:

• When using the walker ensure that 

  the child cannot access stairs, 

  uneven surfaces, slopes or unstable 

  floors, swimming pools or other 

  sources of water.  Only use the baby 

  walking frame on flat, stable 

  surfaces.

• Never leave child unattended.  

  Always keep child in view while in 

  walker.

• Do not use the walker frame near 

  sources of heat or cookers.

• Keep hot drinks, electrical appliances  

  and other sources of danger at a safe

  distance, away from the child’s    

  reach.

• Prevent collisions with glass in doors,  

  windows and furniture.

• This walker frame is intended to be 

  used by children who can sit  


  unaided, approximately 6 months  

  old.  It is not intended for children  

  weighing more than 26.5 lbs, or able  

  to walk unassisted.

• To use the walker safely, the child’s  

  height must not exceed 33.5".

• It is recommended to use the walker  

  frame for short periods of time (less  

  than 20 minutes).

• Do not use the walker frame if any  

  components are broken or missing.

• Do not use replacement parts    

  other than those approved by the  

  manufacturer or distributor.

• 

Strangulation Hazard:

 Do not use  

  laces or ties to attach play tray.

• Keep all plastic bags and any other 

  packaging away from the reach 

  of children to prevent the risk of   

  suffocation.

• Do not leave the walker frame    

  exposed to bad weather conditions  

  or direct sunlight.

• Do not use the walker frame at  

  temperatures below 41 degrees   

  Fahrenheit.

• Clean brake pads regularly to    

  maintain stopping performance.


Summary of Contents for 67648800070 - DJ Baby Walker

Page 1: ...Lil Driver Lil Piano Walker ConductordeLil PianoLil Walker Owner s Manual Manual del propietario IS0057 5ES 2011 ARTSANA USA INC 11 12...

Page 2: ...ld in view while in walker Do not use the walker frame near sources of heat or cookers Keep hot drinks electrical appliances and other sources of danger at a safe distance away from the child s reach...

Page 3: ...o siempre a la vista cuando est en el andador No use el andador cerca de fuentes de calor o cocinas Mantenga bebidas calientes aparatos el ctricos y otras fuentes de peligro a una distancia segura lej...

Page 4: ...ame A Andadorsicualquier B PaddedSeat B Asientoacolchado C RigidBackrest C Respaldor gido D FrontSwivelWheels D Ruedasgiratoriasdelanteras E RearFixedWheels E Ruedasfijastraseras A B C D E Components...

Page 5: ...5 F BrakePads F Almohadillasdefreno G LargeSpoiler G Spoilergrande H ElectronicPlayTrays H Jugueteselectr nico F G H Components Componentes...

Page 6: ...er Frameasshown Ensurethatthewheelsare firmlypushedallthewayintothesocket 1 D vueltaelandador Insertelasruedas giratoriasdelanterasenelhuecodelas esquinasdelanterasdelandadorcomose muestraenlafigura A...

Page 7: ...ace Thesnaplockshouldbe visiblethroughtheopening 2 Insertelasruedasfijastraserasenelhueco delapartetraseradelandadorcomose muestraenlafigura Aseg resedequelos cierresapresi ndelasruedassefijenensu lug...

Page 8: ...theBrakePads arefirmlypushedallthewayintoeachofthe sockets 3 Insertelasalmohadillasdefrenoenlos huecosubicadosalrededordelabasedel andadorcomosemuestraenlafigura Aseg resedequelasalmohadillasdefreno e...

Page 9: ...aybeforeeachusetomakesuretheseat positionislocked 4 Paraelevarelandador tiredelabandeja superiory simult neamente ejerzapresi n sobrelabaseinferiorhastaqueescucheun clic staeslaprimeraposici nfijadel...

Page 10: ...pontheRigidBackresttomakesureit isproperlyattached 5 Insertelasleng etasdelrespaldor gidoen lasranurasubicadasatr sdelaaberturadel asiento Devueltahaciaabajoelrespaldo r gidoypresionefirmementehastaqu...

Page 11: ...itionasshownandcannot bepulledbackthroughtheslot 6 Insertelasarandelaspl sticasdelasiento acolchadoenlasranurasqueseencuentran enelbordesuperiordelandador Pasela manopordebajodelabandejaytiredelas ara...

Page 12: ...emovethelargespoilerusing screwdriversorothertools 7 Insertelasleng etasdelaler ngrande enlasranurasubicadasatr sdelaabertura delasiento Devueltahaciaabajoelaler n grandeypresionefirmementehasta queen...

Page 13: ...ttached Note Batteriesarenotincluded 8 Introduzcaelbordedelabandeja electr nicadejuegoenlaaberturaparala bandejadelandadorcomosemuestraen lafigura Devueltahaciaabajolabandeja electr nicadejuegohastaqu...

Page 14: ...F Turnthesteeringwheeltorevtheengine G Pull Pushtohearfunnysounds H Pressleftturnsignaltohearmusic I Pressrightturnsignaltohearmusic BANDEJAELECTR NICADEJUEGO A Interruptordeselecci ndeactividad B Int...

Page 15: ...D E F H ELECTRONICPLAYTRAY A ActivitySelectorSwitch B Power VolumeSwitch C Spintohearrattle D Pressbuttontohearhornsound E Turnpagetohearmusic F Pressbuttontohearfunnysounds G Spintohearfunnysounds H...

Page 16: ...espejoretrovisorparaconfigurar elinterruptordeselecci ndeactividad A Desliceelinterruptordeencendido volumen B hastalaposici nvolumenbajo I oalto II A B 10A 10B 10B Slidetheactivityselectorswitch A to...

Page 17: ...yubiqueelpestillode liberaci n Presioneelbot nrojoylevante elpestillodeliberaci nazulparaaumentar odisminuirlaalturadelasiento Antesde colocarasuhijoenelandador presione labandejahaciaabajoparaasegura...

Page 18: ...elandador Labandejaalaalturacorrecta Traytoohigh Labandejademasiadoalta Tray too low La bandeja demasiado baja Tray at proper height La bandeja a la altura correcta Plateau la bonne hauteur Tray too h...

Page 19: ...o delandador Paselamanopordebajodela bandejadelandadoryubiqueelpestillode liberaci n Presioneelbot nrojoylevante elpestillodeliberaci nazul VerelPaso 11 paradisminuirlaalturadelasiento Disminuyalaaltu...

Page 20: ...mpcloth Alwaysdrythe metalpartstopreventtheformationofrustiftheWalkerhascomeintocontactwithwater Clean the electronic play tray with a soft dry cloth to avoid damaging the electronic circuit Protect t...

Page 21: ...andadorentreencontactoconelagua sequesiemprelaspartesdemetalparaevitarla formaci nde xido Limpie el juguete electr nico con un trapo seco y suave para evitar da ar el circuito electr nico Proteja al a...

Page 22: ...hebattery AlwaysremovethebatteriesiftheElectronicPlayTraywillnotbeusedforalongperiod Onlyusealkalinebatteriesofthesametypeorequivalenttothetyperecommendedforthe correctfunctionofthisproduct Nevermixne...

Page 23: ...mprelaspilasyherramientaslejosdelalcancedelosni os Siemprequitelaspilasusadasdelabandejaelectr nicadejuegoparaevitarunposibleescape delapila Saquesiemprelaspilasdeljuguetesinolovaausarduranteunlargope...

Page 24: ...info chiccousa com Bymail 1826WilliamPennWay Lancaster PA17601 Sitienepreguntasosugerenciassobreesteproducto ofaltaalgunadelas partes nodevuelvaesteproductoalatienda Comun queseconnosotrospor algunod...

Page 25: ...rorexperiencedradio TVtechnicianforhelp Advertencia Loscambiosomodificacionesnoaprobadosexpresamenteporlaparte responsabledelcumplimientopodr ananularlaautoridaddelusuarioparaoperarel equipo NOTA Este...

Page 26: ...www chiccousa com...

Reviews: