background image

02/04/2013 

PM 2946 7002 09   

Page 32 of 39 

26  Activating automatic restart after voltage failure 


This function allows the compressor to restart automatically after a power failure. 
This parameter, accessible in screen <

P.09

>, can only be modified after entering a code. Consult your supplier if this 

function is to be activated. 


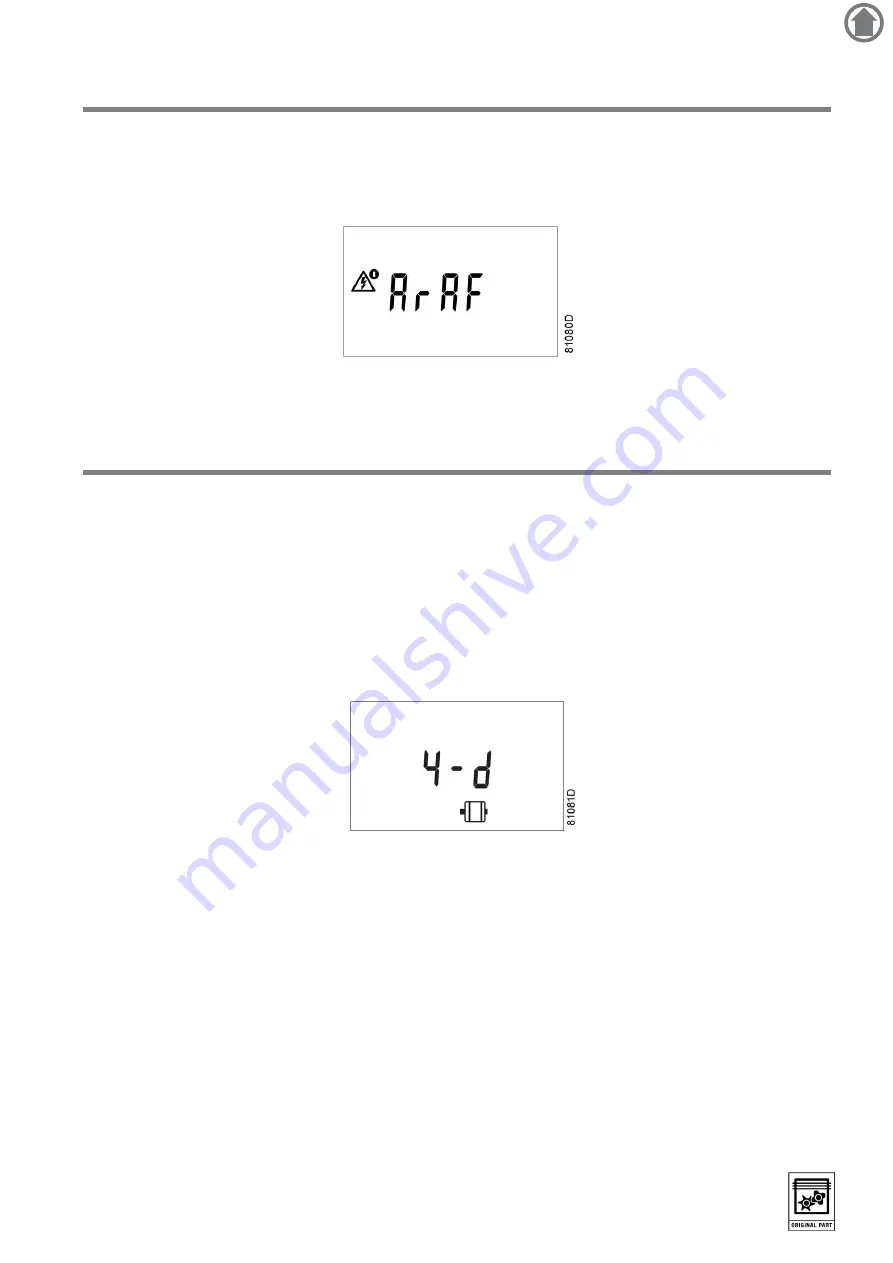
27  Selection between Y-D or DOL starting 


Starting from the Main screen: 

1. 

Press Scroll button (12) until <

P.10

> and the motor pictograph is shown. 

2. 

Press 

Enter

 button (13). 

The actually used starting mode is shown:  

  <

Y-D

> (star-delta) 

  <

doL

> (Direct-On Line) 

This parameter can only be modified after entering a code. Consult your supplier if the parameter is to be changed. 


1

Summary of Contents for ES 4000 STANDARD

Page 1: ... 1 3 General description 4 3 1 Introduction 4 3 2 Automatic control of the compressor 4 3 3 Protecting the compressor 4 3 3 1 Shut down 4 3 3 2 Shut down warning 5 3 4 Service warning 5 3 5 Automatic restart after voltage failure 5 4 Detailed description of the control panel 6 5 Icons used 7 5 1 Status icons 7 6 Main screen 9 7 Shut down warning 10 7 1 Description 10 7 2 Compressor element outlet ...

Page 2: ...between local remote or LAN control 24 19 Calling up modifying CAN address control 25 19 1 Calling up 25 19 2 Modifying the Node ID 26 20 Calling up modifying IP Gateway and Subnetmask 27 20 1 Calling up 27 20 2 Modification 28 21 Calling up modifying pressure band settings 29 21 1 Calling up the settings 29 21 2 Modification 30 22 Modifying the pressure band selection 30 23 Calling up modifying s...

Page 3: ...hanging the settings 36 33 Test screens 37 33 1 Display test 37 33 2 Safety valve test 37 33 3 Production test 37 34 Programmable settings 38 34 1 Parameters unloading loading pressures 38 34 2 Parameters fix speed drive 38 34 3 Protections 38 34 4 Service plan 38 34 5 Terminology 39 1 ...

Page 4: ... maximum number of motor starts are taken into account The controller stops the compressor whenever possible to reduce the power consumption and restarts it automatically when the net pressure decreases If the expected unloading period is to short the compressor is kept running to prevent too short stand still periods 3 3 Protecting the compressor 3 3 1 Shut down If the compressor element outlet t...

Page 5: ...reached 3 4 Service warning If the service timer exceeds a programmed value this will be indicated on the display to warn the operator to carry out some service actions 3 5 Automatic restart after voltage failure The controller has a built in function to automatically restart the compressor when the voltage is restored after voltage failure Provided the controller is in the automatic operation mod...

Page 6: ... the regulator 4 Warning symbol 5 LED Warning Is lit if a warning condition exists 6 Voltage symbol 7 LED Voltage on Indicates that the voltage is switched on 8 Service symbol 9 LED Service Is lit when service is needed 10 Start button This button starts the compressor Automatic operation LED 3 lights up The Elektronikon is operative 11 Stop button This button is used to stop the compressor Automa...

Page 7: ...ing the icon is rotating Motor stopped Running unloaded Running loaded Machine control mode Remote start stop LAN control Automatic restart after voltage failure Automatic restart after voltage failure is active Timer Active protection functions Emergency stop Service Service required Units Pressure unit Mega Pascal Pressure unit pounds per square inch Pressure unit bar Temperature unit 1 ...

Page 8: ...ercent The value shown must be multiplied by 10 to get the actual value The value shown must be multiplied by 100 to get the actual value The value shown must be multiplied by 1000 to get the actual value Motor overload Element outlet temperature Filter Drain Energy saving dryer Ambient temperature Dewpoint temperature 1 ...

Page 9: ... switched on the first screen is a test screen The next screen is the Main screen shown automatically The Main screen shows The compressor status by means of pictographs The air outlet pressure Always consult your supplier if the pressure on the display is preceded by a t 1 ...

Page 10: ...tion Programmable settings warning LED 5 starts blinking 1 Press the Scroll down button The screen shows the temperature at the compressor element outlet The screen shows that the temperature at the element outlet is 122 C It remains possible to scroll through other screens using the Scroll buttons up and down 12 to check the actual status of other parameters 2 Press button 11 to stop the compress...

Page 11: ... appear flashing 1 Press the Scroll button 12 until the actual dewpoint temperature appears Warning screen dewpoint temperature The screen shows that the dewpoint temperature is 9 C It remains possible to scroll through other screens using Scroll buttons 12 to check the actual status of other parameters 2 Press button 11 to stop the compressor Wait until the compressor has stopped 3 Switch off the...

Page 12: ...vel factory setting 120 C 248 F programmable the compressor will be shut down alarm LED 5 will flash automatic operation LED 3 will go out and the following screen will appear Main screen with shut down indication element outlet temperature The related pictograph will appear flashing 1 Press the Scroll button 12 until the actual compressor element temperature appears Shut down screen element outle...

Page 13: ...t down alarm LED 5 will flash automatic operation LED 3 will go out and the following screen will appear Main screen with shut down indication motor overload 1 Switch off the voltage 2 Remedy the trouble 3 After remedying and when the shut down condition has disappeared switch on the voltage 4 Restart the compressor 1 ...

Page 14: ...ervice timer is 4002 3 Press Scroll button 12 to scroll to d 1 The running hours symbol is shown 4 Press button 13 The actual reading of the service timer appears and is shown in hrs or x1000 hrs if the service timer value is higher than 9999 Example of running hours screen The longer interval service actions must also include the shorter interval actions In the example above carry out all service...

Page 15: ... screens Digital input screens Designation Related topic d in Digital input status d 1 Running hours hrs or x 1000 hrs See section Calling up running hours d 2 Motor starts x 1 or x 1000 See section Calling up motor starts d 3 Module hours hrs or x 1000 hrs See section Calling up module hours d 4 Loading hours hrs or x1000 hrs See section Calling up loading hours d 5 Load relay x1 or x 1000 See se...

Page 16: ...art after voltage failure P 10 Selection between Y D or DOL starting See section Selection between Y D or DOL starting P 11 Setting of load delay time See section Calling up modifying load delay time P 12 Setting of minimum stop time See section Calling up modifying minimum stop time P 13 Setting a password See section Activating password protection P 14 Remote pressure sensing See section Activat...

Page 17: ...02 04 2013 PM 2946 7002 09 Page 17 of 39 10 3 Menu flow Simplified menu flow 1 ...

Page 18: ... 19 Unit pressure 5 Running hours 20 Auto restart 6 Motor starts 21 Selection Y D DOL 7 Module hours 22 Load delay time 8 Loading hours 23 Minimum stop time 9 Load relay 24 Password settings 10 Service timer reading 25 Remote pressure sensing 11 Actual program version 26 Protections 12 LAN selection 27 Display test 13 Settings node ID 28 Safety valve test 14 IP settings 29 Production test 15 Press...

Page 19: ...roll button 12 The outlet temperature will be shown The screen shows that the outlet temperature is 82 C 1 Press Scroll button 12 For Full Feature compressors The dewpoint temperature will be shown The screen shows that the dewpoint temperature is 3 C 2 Press Scroll button 12 to scroll downwards or upwards through the screens 1 ...

Page 20: ...t used x1000 hrs and the value 11 25 the running hours of the compressor are 11250 hours 13 Calling up motor starts Starting from the Main screen 1 Press Scroll button 12 until d 2 is shown 2 Press Enter button 13 A screen similar to the following appears This screen shows the number of motor starts x 1 or if x1000 lights up x 1000 In the above example the number of motor starts is 10100 1 ...

Page 21: ...s The screen shows the unit used hrs and the value 5000 the regulator module has been in service during 5000 hours 15 Calling up loading hours Starting from the Main screen 1 Press Scroll button 12 until d 4 is shown 2 Press Enter button 13 A screen similar to the following appears The screen shows the unit used hrs or x1000 hrs and the value 1755 the compressor has been running loaded during 1755...

Page 22: ... relay Starting from the Main screen 1 Press Scroll button 12 until d 5 is shown 2 Press Enter button 13 This screen shows the number of unload to load actions x 1 or if x1000 lights up x 1000 In the above example the number of unload to load actions is 10100 1 ...

Page 23: ...mple shown the compressor has run 1191 hours since the previous service 17 2 Resetting the service timer After servicing see section Service warning the timer has to be reset 1 Scroll to register screen d 6 2 Press Enter button 13 The reading e g 4000 will appear 3 Press Enter button 13 4 If a password is set enter the password The icon will flash indicating that resetting is possible 5 Press Ente...

Page 24: ...lly selected control mode is shown LOC for local control rE for remote control LAn for LAN control To change 1 Press Enter button 13 2 If necessary enter the password see section Activating password protection The actually selected control mode is blinking 3 Use Scroll button 12 to change the control mode 4 Press Enter button 13 to program the new control mode or press Escape button 14 to cancel 1...

Page 25: ...ess the Enter button 13 to change this mode 5 Use the Scroll buttons 12 to select ON or OFF 6 Press Enter to program 7 When this function is ON use the Scroll buttons up or down 12 to see the node ID 8 If desired the user can change this ID by pressing the Enter button 13 The node ID value starts blinking 9 Use the Scroll buttons 12 to change the node ID 10 Press the Enter button 13 to program the...

Page 26: ...ing the channels the controller can act as a Mk IV controller a previous version of the controller To set the channels go to the screen where the node ID is visible 1 Press the Scroll button down 12 The following screen appears 2 Press the Enter button 13 to modify the setting The utmost left value will blink 3 Change this value by using the Scroll buttons 12 4 Press the Enter button 13 to confirm...

Page 27: ...e Main screen 1 Press Scroll button 12 until P 03 is shown 2 Press Enter button 13 The next screen shows that the function is ON or OFF 3 If ON press the Enter button 13 to modify it to OFF 4 Use the Scroll buttons Up or Down 12 to scroll between the items in this list IP for IP address Sub for Subnetmask GAtE for Gateway 1 ...

Page 28: ...ss the Enter button 13 2 If necessary enter the password The first digits are blinking 3 Use the Scroll buttons Up or Down 12 to modify the settings 4 Press Enter 13 to confirm 5 Modify the next digits the same way The standard IP address is set as 192 168 100 100 1 ...

Page 29: ...roll button 12 until P 04 is shown 2 Press Enter button 13 Pressure band 1 Pb 1 is shown on the display Button 12 can be used to scroll to pressure band 2 Pb 2 3 Press the Enter button 13 on the desired pressure band The load level of the selected pressure band appears Button 12 can be used to scroll to the unload level Loading pressure Unloading pressure 1 ...

Page 30: ... modify the pressure band selection a password may be required The active pressure band Pb 1 starts blinking 4 Press Scroll button 12 to modify the active pressure band 5 Press Enter button 13 to confirm or the Escape button 14 to cancel 23 Calling up modifying service timer settings Starting from the Main screen 1 Press Scroll button 12 until P 06 is shown 2 Press Enter button 13 the setting of t...

Page 31: ... Press Enter button 13 to program the new unit or press Escape button 14 to return to the parameter screen without changes 25 Calling up modifying unit of pressure Starting from the Main screen 1 Press Scroll button 12 until P 08 and the possible settings are shown Mpa psi bar 2 Press Enter button 13 The actually used unit is shown 3 Press Enter button 13 Unit starts blinking 4 Use the Scroll butt...

Page 32: ...ed after entering a code Consult your supplier if this function is to be activated 27 Selection between Y D or DOL starting Starting from the Main screen 1 Press Scroll button 12 until P 10 and the motor pictograph is shown 2 Press Enter button 13 The actually used starting mode is shown Y D star delta doL Direct On Line This parameter can only be modified after entering a code Consult your suppli...

Page 33: ...tons 12 to modify the value 5 Press the Enter button 13 to program the new value The minimum and maximum value depends on the parameters 29 Calling up modifying minimum stop time Starting from the Main screen 1 Press Scroll button 12 until P 12 and the motor pictograph is shown 2 Press Enter button 13 This screen shows the minimum stop time 20 and the unit s seconds 3 To modify this value press th...

Page 34: ...on 13 Password PASS appears on the screen 3 Press the Enter button 13 The screen shows the password status ON On OFF OFF 4 Press Enter button 13 to modify 5 Change the value with Scroll buttons 12 6 Select On 7 Press Enter button 13 8 Enter the new password 9 Press Enter button 13 to confirm 10 Enter the password again 11 Press Enter button 13 to confirm On appears on the display 12 Press Reset ke...

Page 35: ...aph shown with the protection screen indicates the purpose of the protection Possible combinations are Pr followed by a number and one of the next pictographs Pictograph Designation Pr shown with the pressure pictograph shows the pressure protections Pr shown with the element outlet temperature pictograph shows the element outlet temperature protections Pr shown with the dewpoint temperature picto...

Page 36: ...he element outlet temperature pictograph is shown 2 Press Enter button 13 The warning level for the high temperature warning level AL H and the high temperature shut down level Sd H become visible 3 Use Scroll keys 12 to move between the warning level AL and the shut down level Sd 4 Press the Enter button 13 to modify the value An optional password may be required The value starts blinking 5 Use t...

Page 37: ...ty valve test is provided The safety valves can only be tested after entering a code Consult your supplier if the safety valves are to be tested 33 3 Production test Test screen t 03 is only intended for production test If the Main screen shows following screen the controller is in production test mode How to solve 1 Use the Scroll buttons 12 and scroll to menu t 03 The screen shows 2 Press the En...

Page 38: ...ry time ARAVF sec 15 15 3600 Restart delay sec 0 0 1200 Communication time out sec 10 30 60 34 3 Protections Minimum setting Factory setting Maximum setting Compressor element outlet temperature shut down warning level C 50 113 119 F 122 235 246 Compressor element outlet temperature shut down level C 111 120 120 F 232 248 248 34 4 Service plan The built in service timer will give a Service warning...

Page 39: ...e shut down level changes to 96 C 204 F The recommended difference between the warning level and shut down level is 10 C 18 F Delay at shut down signal Is the time for which the signal must exist before the compressor is shut down If it is required to program this setting to another value consult your supplier Minimum stop time Once the compressor has automatically stopped it will remain stopped f...

Reviews: