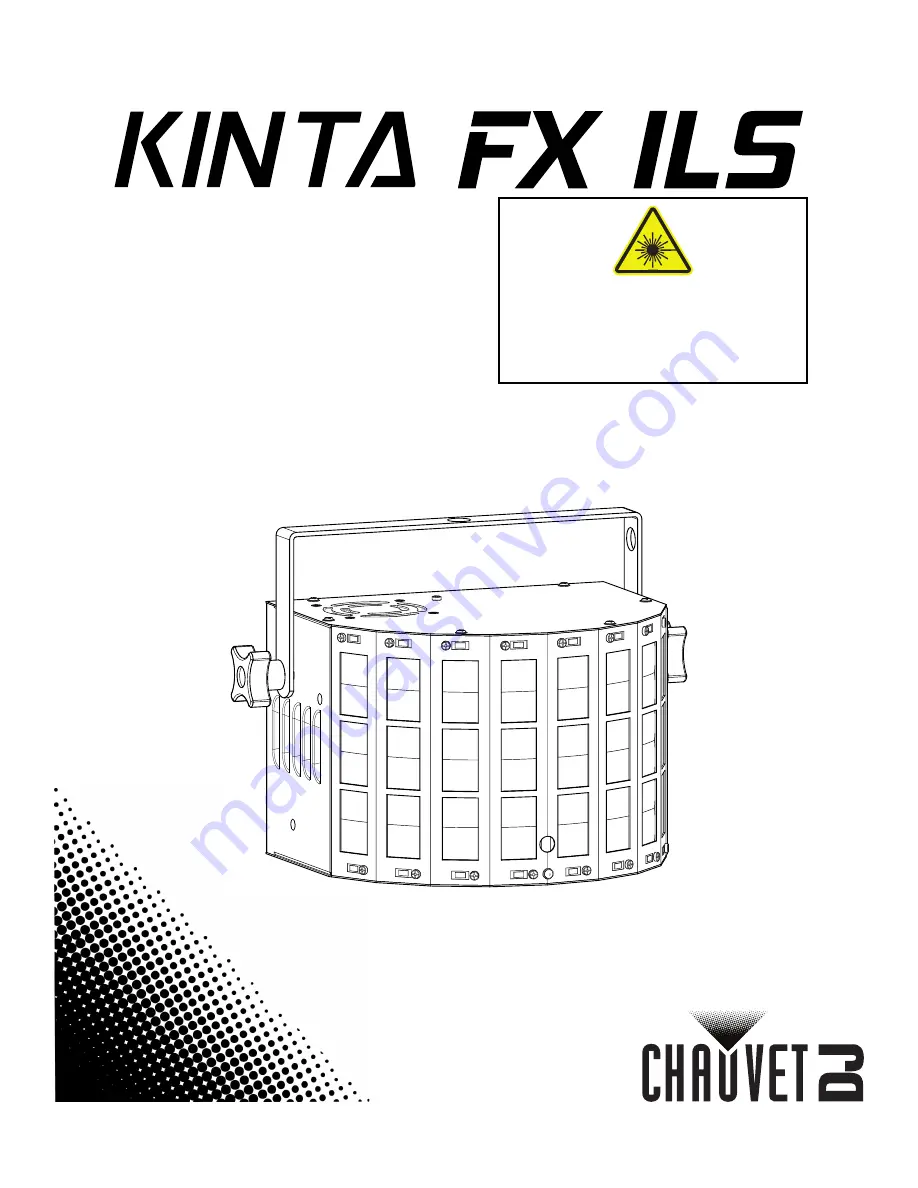
Chauvet DJ KINTA FX ILS User Manual Download Page 1

User Manual

English
Español
Français
Deutsch
Italiano
Nederlands

LASER LIGHT

AVOID DIRECT EYE EXPOSURE

CLASS 3R LASER PRODUCT

CLASSIFIED PER EN/IEC 60825-1: 2014

Complies with FDA performance standards for 

laser products except for deviations pursuant 

to Laser Notice No. 56, dated May 8, 2019.

Summary of Contents for KINTA FX ILS

Page 1: ... Italiano Nederlands LASER LIGHT AVOID DIRECT EYE EXPOSURE CLASS 3R LASER PRODUCT CLASSIFIED PER EN IEC 60825 1 2014 Complies with FDA performance standards for laser products except for deviations pursuant to Laser Notice No 56 dated May 8 2019 ...

Page 2: ...mensions 7 3 Setup 8 AC Power 8 Fuse Replacement 8 Power Linking 8 Mounting 9 Orientation 9 Rigging 9 Proper Usage 9 Laser Interlock and Key 10 4 Operation 11 Control Panel Operation 11 Menu Map 11 Configuration DMX 11 DMX Personality and Starting Address 11 D Fi USB Connectivity 12 D Fi USB Compatibility 12 Configuration D Fi USB 12 D Fi USB DIP Switch Channels 12 DMX Channel Assignments and Valu...

Page 3: ...ontaje 28 Orientación 28 Colocación 28 Uso adecuado 28 Seguro y llave del láser 29 4 Funcionamiento 30 Funcionamiento del panel de control 30 Mapa de menú 30 Configuración DMX 30 Personalidad DMX y dirección de inicio 30 Conectividad D Fi USB 31 Compatibilidad D Fi USB 31 Configuración D Fi USB 31 Canales del conmutador DIP del D Fi USB 31 Valores y asignaciones de canal DMX 32 Configuración Indep...

Page 4: ... Connexion électrique 46 Installation 47 Orientation 47 Suspension 47 Utilisation Adéquate 47 Dispositif de verrouillage et clé 48 4 Fonctionnement 49 Fonctionnement du Panneau de Commande 49 Plan du menu 49 Configuration DMX 49 Personnalité DMX et adresse de départ 49 Connectivité D Fi USB 50 Compatibilité USB D Fi 50 Configuration D Fi USB 50 Canaux de commutation DIP USB D Fi 50 Affectation de ...

Page 5: ...e 65 Montage 66 Montagerichtung 66 Hängende Montage 66 Bestimmungsgemäße Verwendung 66 Laser Verriegelung und Schlüssel 67 4 Betrieb 68 Betrieb des Bedienfeldes 68 Menüstruktur 68 Konfiguration DMX 69 DMX Persönlichkeit und Startadresse 69 D Fi USB Konnektivität 70 Kompatibilität mit D Fi USB 70 Konfiguration D Fi USB 70 D Fi USB DIP Schalter Kanäle 70 DMX Kanal Zuordnungen und Werte 71 Konfigurat...

Page 6: ...ontaggio 86 Orientamento 86 Allestimento 86 Uso corretto 86 Interblocco e chiavetta laser 87 4 Funzionamento 88 Funzionamento del pannello di controllo 88 Mappa menu 88 Configurazione DMX 88 Caratteristiche DMX e indirizzo iniziale 88 Connettività D Fi USB 89 Compatibilità USB D Fi 89 Configurazione D Fi USB 89 Canali microinterruttori D Fi USB 89 Assegnazioni e valori dei canali DMX 90 Configuraz...

Page 7: ... 104 Montage 105 Oriëntatie 105 Opbouw 105 Correct gebruik 105 Vergrendeling en sleutel 106 4 Werking 107 Werking van het bedieningspaneel 107 Menu Map 107 Configuratie DMX 107 DMX persoonlijkheid en startadres 107 D Fi USB connectiviteit 108 D Fi USB compatibiliteit 108 Configuratie D Fi USB 108 D Fi USB DIP Switch kanalen 108 DMX kanaaltoewijzingen en waarden 109 Configuratie zelfstandig 110 Voo...

Page 8: ...e al comprador original del producto y no es transferible Para ejercer los derechos que otorga esta garantía usted debe proporcionar una prueba de compra en forma de un recibo de compra original expedido por un distribuidor autorizado donde figure el nombre del producto y la fecha de compra NO EXISTEN OTRAS GARANTÍAS EXPRESAS NI IMPLÍCITAS Esta garantía le otorga derechos legales específicos Es po...

Page 9: ...ni e limitazioni riportate nella garanzia integrale limitata sul proprio sito Web Tale garanzia si applica soltanto all acquirente originario del prodotto e non può essere trasferita Per esercitare i propri diritti secondo i termini della presente garanzia è necessario fornire prova dell acquisto sotto forma di ricevuta o fattura originale di un distributore autorizzato che riporti chiaramente il ...

Page 10: ...ver Chauvet has no obligation to make and does not commit to make any such revisions Download the latest version from www chauvetdj com Intellectual Property The works of authorship contained in this manual including but not limited to all design text and images are owned by Chauvet Copyright 2022 Chauvet Sons LLC All rights reserved Electronically published by Chauvet in the United States of Amer...

Page 11: ... 20 in 50 cm from adjacent surfaces Be sure that no ventilation slots on the product s housing are blocked Never connect the product to a dimmer Make sure to replace the fuse with another of the same type and rating Always use the mounting bracket to carry the product Do not switch the product on off in short intervals This will reduce the laser diode life Do not shake this product Avoid brute for...

Page 12: ...first reading and understanding all the safety and technical data in this manual ALWAYS set up and install all laser effects so that any laser light is at least 3 meters 9 8 feet above the floor on which people are standing See the Proper Usage section of this manual After setup and prior to public use test the lasers to ensure they are functioning properly Do not use the product if any defect is ...

Page 13: ...Association www ilda com Laser Classification Class 3R Red Laser Diode Wavelength Optical Power 650 nm 100 mW Green Laser Diode Wavelength Optical Power 520 nm 30 mW Beam Diameter 5 mm at aperture Pulse Data All pulses 4 Hz 0 25 sec Divergence each beam 2 mrad Divergence total light 160 degrees Laser Power of Each Beam from Aperture 5 mW LASER APERTURE MODEL KINTAFXILS ITEM CODE 10051879 FUSE T 1 ...

Page 14: ... D Fi USB into the USB port Doing so may cause damage to the product DMX in out Fuse holder Power in Power out LED indicators Safety loop Strobe SMD LEDs x16 Laser output Microphone Sensitivity knob Kinta effect lenses x24 DMX Sound Auto Slave Display and control buttons MENU UP DOWN ENTER USB port IR sensor 7 4 in 187 mm 7 4 in 187 mm 10 3 in 261 mm ...

Page 15: ...ys connect the product to a protected circuit a circuit breaker or fuse Make sure the product has an appropriate electrical ground to avoid the risk of electrocution or fire To eliminate unnecessary wear and improve its lifespan during periods of non use completely disconnect the product from power via breaker or by unplugging it Never connect the product to a rheostat variable resistor or dimmer ...

Page 16: ... this purpose The bracket adjustment knobs allow for directional adjustment when aiming the product to the desired angle Only loosen or tighten the bracket knobs manually Using tools could damage the knobs Mounting Diagram Proper Usage This product is for overhead mounting only For safety purposes Chauvet recommends mounting lighting effect products on steady elevated platforms or sturdy overhead ...

Page 17: ...d and the key is turned to the ON position For the laser to function you MUST DO BOTH Insert the interlock Insert the key and turn it to the ON position If both are not performed the laser WILL NOT turn on For illustrative purposes only Always turn the key to the OFF position and remove it when leaving this product unattended to prevent accidents or injuries to third parties Insert the interlock I...

Page 18: ...e which defines the highest configurable address to 511 For information about the DMX protocol download the DMX Primer from www chauvetdj com To select the DMX personality and starting address do the following 1 Press MENU repeatedly until 2 Ch or 9 Ch shows on the display 2 Press ENTER 3 Use UP or DOWN to increase or decrease the starting address from d 1 511 4 Press ENTER Button Function MENU Se...

Page 19: ...the Kinta FX ILS 2 Use the Chart provided to set BOTH the Channel and then The Receiving or Transmitting option NOTE DIP Switch 5 is for Transmitting OR Receiving please choose carefully D Fi USB DIP Switch Channels WARNING DO NOT plug anything other than a D Fi USB into the USB port Doing so may cause damage to the product Once plugged in the D Fi USB will take over the product Wired DMX and manu...

Page 20: ...tic 7 color chase 4 Kinta effect strobe 000 005 No function 006 255 Kinta effect strobe slow to fast 5 Kinta effect motor 000 No function 001 127 Kinta effect motor indexing 128 255 Kinta effect motor speed slow to fast 6 SMD strobes program 000 009 No function 010 019 SMD strobes program 1 slow to fast 020 029 SMD strobes program 2 slow to fast 030 039 SMD strobes program 3 slow to fast 040 049 S...

Page 21: ...program follow the instructions below 1 Press MENU repeatedly until Snd shows on the display 2 Press ENTER 3 Use UP or DOWN to select the desired program from Snd1 7 see Colors and Programs 4 Press ENTER 5 Turn the music on and adjust the sound sensitivity knob until the product starts responding to the beat of the music 7 Laser color Ch 8 must be active for strobe 000 009 No function 010 049 Red ...

Page 22: ...green b000 255 blue U000 255 white or F 00 99 kinta effect strobe 4 Press ENTER to cycle to the next option 5 Repeat steps 3 and 4 until the product is set as desired C Effect P Snd Effect 1 Red 1 All effects 2 Green 2 Kinta and strobes 3 Blue 3 Kinta and laser 4 White 4 Laser and strobes 5 Red and green 5 Kinta only 6 Red and blue 6 Strobes only 7 Red and white 7 Laser only 8 Green and blue 9 Gre...

Page 23: ...ith the IRC 6 1 Press SOUND on the IRC 6 2 Press 1 7 to select the program see Colors and Programs Manual Control To manually select the kinta effect color with the IRC 6 1 Press the desired color from R red G green B blue or W white Strobe To set the strobe with the IRC 6 1 Press STROBE on the IRC 6 2 Press or to increase or decrease the strobe speed Black Out To black out the product with the IR...

Page 24: ...OWN to set the starting address to d 1 4 Press ENTER 5 Set the D Fi USB to receive on a specific channel 1 16 6 Plug in the D Fi USB 7 Finish setting and connecting all the slave products Master product 1 Set the master product to operate in standalone mode 2 Set the D Fi USB to transmit on the D Fi channel the slaves are receiving on 3 Plug in the D Fi USB ILS Mode ILS Integrated Lighting System ...

Page 25: ... the instructions below 1 Unplug the product from power 2 Wait until the product is at room temperature 3 Use a vacuum or dry compressed air and a soft brush to remove dust collected on the external surface vents 4 Clean all transparent surfaces with a mild soap solution ammonia free glass cleaner or isopropyl alcohol 5 Apply the solution directly to a soft lint free cotton cloth or a lens cleanin...

Page 26: ...roducts Fuse T 1 A 250 V T 1 A 250 V Power I O U S Worldwide UK Europe Power input connector IEC IEC Power output connector Edison IEC Power cord plug Edison U S Local Plug Type Power Wavelength Laser red 100 mW 650 nm Laser green 30 mW 520 nm Type Color Quantity Power Current Lifespan LED Red 1 7 5 W 2 4 A 50 000 hours LED Green 1 7 5 W 2 4 A 50 000 hours LED Blue 1 7 5 W 2 4 A 50 000 hours LED W...

Page 27: ...To submit a service request online go to www chauvetdj com service request Send the merchandise prepaid in its original box and with its original packing and accessories Chauvet will not issue call tags Clearly label the package with the RMA number Chauvet will refuse any product returned without an RMA number Before sending the product clearly write the following information on a piece of paper a...

Page 28: ...auvetlighting eu Brookhill Road Industrial Estate Pinxton Nottingham UK Website www chauvetdj eu NG16 6NT Voice 44 0 1773 511115 Fax 44 0 1773 511110 Chauvet Europe BVBA Address Stokstraat 18 Email BNLtech chauvetlighting eu 9770 Kruishoutem Belgium Website www chauvetdj eu Voice 32 9 388 93 97 Chauvet France Address 3 Rue Ampère 91380 Chilly Mazarin Email FRtech chauvetlighting fr France Website ...

Page 29: ...nguna persona o empresa sin embargo Chauvet no está en absoluto obligado a hacerlo así ni se compromete a realizar revisión alguna Descargue la última versión de www chauvetdj com Propiedad intelectual Las obras de autoría contenidas en este manual incluyendo pero sin limitarse a ellas todos los dibujos textos e imágenes son propiedad de Chauvet Copyright 2022 Chauvet Sons LLC Todos los derechos r...

Page 30: ...ada al menos a 20 50 cm de superficies adyacentes Asegúrese de que ninguna ranura de ventilación en la carcasa del producto queda bloqueada Nunca conecte el producto a un atenuador Asegúrese de reemplazar el fusible por otro del mismo tipo y categoría Use siempre el soporte de montaje para trasladar el producto No Apague Encienda el producto a intervalos cortos Esto acortará la vida del diodo láse...

Page 31: ...os niveles de láser a los que se tiene acceso si se abre la unidad pueden causar ceguera instantánea quemaduras en la piel e incendios DETÉNGASE Y LEA TODAS LAS NOTAS DE SEGURIDAD SOBRE EL LÁSER SIGUIENTES No ponga en funcionamiento el láser sin primero leer y comprender todos los datos técnicos y de seguridad de este manual Ubique e instale todos los efectos láser SIEMPRE de forma que toda la luz...

Page 32: ...se de la International Laser Display Association www ilda com Clasificación láser Clase 3R Longitud de onda alimentación óptica del diodo láser rojo 650 nm 100 mW Longitud de onda alimentación óptica del diodo láser verde 520 nm 30 mW Diámetro del haz 5 mm en la apertura Datos de pulso Todos los pulsos 4 Hz 0 25 s Divergencia cada haz 2 mrad Divergencia luz total 160 grados Potencia láser de cada ...

Page 33: ...o USB Si lo hace podría producir daños al producto LED SMD de estroboscopios x16 Lentes de efecto kinta x24 Puerto USB Sensor IR Indicadores LED DMX Sonido Auto Esclavo Pantalla y botones de control MENU UP DOWN ENTER Salida láser Porta fusibles Entrada de alimentación Micrófono Salida de alimentación DMX entrada salida Mando de sensibilidad Anilla de seguridad 7 4 187 mm 7 4 187 mm 10 3 261 mm ...

Page 34: ...de alimentación en cadena Conecte siempre el producto a un circuito protegido disyuntor o fusible Asegúrese de que el producto tiene una toma de tierra adecuada para evitar el riesgo de electrocución o incendio Para evitar un desgaste innecesario y alargar su vida útil desconecte complemente el producto de la alimentación mediante el interruptor o desenchufándolo durante los periodos en los que no...

Page 35: ...oporte permiten el ajuste direccional para dirigir el producto hacia el ángulo deseado Apriete y afloje los mandos de soporte únicamente con la mano Usar herramientas podría estropear los mandos Diagrama de montaje Uso adecuado Este producto es para montaje en alto solamente Por seguridad Chauvet recomienda montar los productos de efectos de iluminación sobre plataformas estables y elevadas o en s...

Page 36: ... insertados y la llave esté en la posición ON Para que el láser funcione debe HACER LAS DOS COSAS Insertar el seguro Introducir la llave y girarla a la posición ON Si no se realizan ambas acciones el láser NO se encenderá Solo a título ilustrativo Gire siempre la llave hasta la posición de OFF y sáquela cuando deje este producto sin vigilancia para evitar accidentes o lesiones a terceros Insertar ...

Page 37: ...ección más alta que se puede configurar es 511 Si no está familiarizado con el protocolo DMX descargue el Manual DMX de www chauvetdj com Para seleccionar la personalidad y dirección de inicio haga lo siguiente 1 Pulse MENU repetidamente hasta que aparezca en la pantalla 2 Ch o 9 Ch 2 Pulse ENTER 3 Use UP o DOWN para aumentar o disminuir la dirección de inicio de d 1 511 4 Pulse ENTER Botón Funció...

Page 38: ...a FX ILS 2 Utilice la tabla proporcionada para configurar AMBOS primero el canal y luego la opción de recepción o transmisión NOTA El conmutador DIP 5 es para transmitir o recibir piénselo bien antes de escoger Canales del conmutador DIP del D Fi USB ADVERTENCIA NO enchufe nada que no sea un D Fi USB en el puerto USB Si lo hace podría producir daños al producto Una vez conectado el D Fi USB tomará...

Page 39: ... función 006 255 Estroboscopio de efecto kinta lento a rápido 5 Motor de efecto kinta 000 Sin función 001 127 Indexado de motor de efecto kinta 128 255 Velocidad de motor de efecto kinta lento a rápido 6 Programa de SMD de estroboscopios 000 009 Sin función 010 019 Programa de estroboscopios 1 lento a rápido 020 029 Programa de estroboscopios 2 lento a rápido 030 039 Programa de estroboscopios 3 l...

Page 40: ...urar la velocidad del programa automático del Kinta FX ILS haga lo siguiente 1 Pulse MENU repetidamente hasta que aparezca S en la pantalla 2 Pulse ENTER 3 Utilice UP o DOWN para aumentar o disminuir la velocidad entre S 00 99 lento a rápido 4 Pulse ENTER 7 Color de láser C 8 debe estar activo para estroboscopio 000 009 Sin función 010 049 Rojo 050 089 Verde 090 129 Rojo y verde 130 169 Rojo y ver...

Page 41: ...Pulse ENTER 3 Utilice UP o DOWN para aumentar o disminuir el valor de la opción actual entre r000 255 rojo G000 255 verde b000 255 azul U000 255 blanco o F 00 99 estroboscopio de efecto kinta 4 Pulse ENTER para pasar a la siguiente opción 5 Repita los pasos 3 y 4 hasta que el producto esté configurado como deseado El producto solo responderá a bajas frecuencias en la música graves y percusión En m...

Page 42: ...ivo por sonido Para activar el modo activo por sonido con el IRC 6 1 Pulse SOUND en el IRC 6 2 Pulse 1 7 para seleccionar el programa consulte Colores y programas Manual Control Para seleccionar manualmente el color del efecto kinta con el IRC 6 1 Pulse el color deseado entre R rojo G verde B azul o W blanco Estroboscopio Para configurar el estroboscopio con el IRC 6 1 Pulse STROBE en el IRC 6 2 P...

Page 43: ...de inicio a d 1 4 Pulse ENTER 5 Configure el D Fi USB para recibir en un canal específico 1 16 6 Conecte el D Fi USB 7 Termine de configurar y conectar todos los productos esclavo Producto maestro 1 Configure el producto maestro para que funcione en modo Independiente 2 Configure el D Fi USB para transmitir en el canal D Fi en el que estén recibiendo los esclavos 3 Conecte el D Fi USB Modo ILS El ...

Page 44: ...trucciones siguientes 1 Desenchufe el producto de la alimentación 2 Espere a que el producto esté a temperatura ambiente 3 Use un aspirador o aire seco comprimido y un cepillo suave para quitar el polvo depositado en orificios de aireación externos 4 Limpie todas las superficies exteriores con una solución suave de limpiador de cristales sin amoniaco o alcohol isopropílico 5 Aplique la solución di...

Page 45: ...imentación EE UU Mundial UK Europa Conector de entrada de alimentación IEC IEC Conector de salida de alimentación Edison IEC Enchufe del cable de alimentación Edison EE UU Enchufe local Tipo Alimentación Longitud de onda Láser rojo 100 mW 650 nm Láser verde 30 mW 520 nm Tipo Color Cantidad Alimentación Intensidad Duración LED Rojo 1 7 5 W 2 4 A 50 000 horas LED Verde 1 7 5 W 2 4 A 50 000 horas LED...

Page 46: ...ción Para enviar una solicitud de servicio en línea vea www chauvetdj com service request Envíe la mercancía a portes pagados en su caja original y con su embalaje y accesorios originales Chauvet no expedirá etiquetas de devolución Etiquete el paquete claramente con el número de RMA Chauvet rechazará cualquier producto devuelto sin un número de RMA Antes de enviar el producto escriba claramente la...

Page 47: ...1C Email UKtech chauvetlighting eu Brookhill Road Industrial Estate Pinxton Nottingham UK Sitio web www chauvetdj eu NG16 6NT Voz 44 0 1773 511115 Fax 44 0 1773 511110 Chauvet Europe BVBA Dirección Stokstraat 18 Email BNLtech chauvetlighting eu 9770 Kruishoutem Belgium Sitio web www chauvetdj eu Voz 32 9 388 93 97 Chauvet France Dirección 3 Rue Ampère 91380 Chilly Mazarin Email FRtech chauvetlight...

Page 48: ...tte révision Cependant Chauvet n a aucune obligation de réaliser de telles révision sans non plus s engager à les réaliser Téléchargez la dernière version de ce manuel sur www chauvetdj com Propriété intellectuelle Les œuvres d auteur contenues dans ce manuel y compris mais sans s y limiter l ensemble des conceptions des textes et des images sont la propriété de Chauvet Copyright 2022 Chauvet Sons...

Page 49: ...l humidité Installez toujours cet appareil dans en endroit bien ventilé à au moins 20 pouces 50 cm des surfaces adjacentes Assurez vous qu aucune fente de ventilation sur le boîtier de l appareil ne soit obstruée Ne connectez jamais cet appareil à un gradateur Assurez vous de remplacer le fusible par un autre du même type Transportez ce produit uniquement au moyen de la poignée dont il est doté Me...

Page 50: ...SOUS Ne pas faire fonctionner le laser sans avoir lu et bien compris toutes les données techniques et de sécurité de ce manuel TOUJOURS configurer et installer tous les effets de laser afin que toute lumière laser soit à au moins 3 mètres 9 8 pieds au dessus du sol sur lequel les gens peuvent se tenir debout Voir la section Utilisation Adéquate de ce manuel Après l installation et avant l usage en...

Page 51: ...chage des laser peut être obtenue par l intermédiaire de l ILDA International Laser Display Association www ilda com Classification laser Classe 3R Longueur d onde alimentation optique de la diode laser rouge 650 nm 100 mW Longueur d onde alimentation optique de la diode laser vert 520 nm 30 mW Diamètre du faisceau 5 mm à l ouverture Données de pulsation Toutes les pulsations 4 Hz 0 25 sec Diverge...

Page 52: ... Le non respect de cette consigne peut endommager l appareil LED SMD stroboscopes x16 Microphone Lentillesd effet kinta x24 Port USB Capteur IR Indicateurs LED DMX Son Auto Esclave Écran et Boutons de contrôle MENU UP DOWN ENTER Sortie laser Entrée d alimentation Porta fusibile Molette de sensibilité Entrée sortie DMX Sortie d alimentation Anneaude sécurité 7 4 po 187 mm 7 4 po 187 mm 10 3 po 261 ...

Page 53: ...it protégé disjoncteur ou fusible Assurez vous que l appareil soit correctement mis à la terre pour éviter tout risque d électrocution ou d incendie Durant les périodes de non utilisation pour éviter tout usure inutile et pour prolonger la durée de vie déconnectez entièrement l appareil en le débranchant de l alimentation électrique ou en coupant le disjoncteur Ne connectez jamais l appareil à un ...

Page 54: ...fixation permettent d ajuster la position de l appareil lors de son positionnement à l angle désiré N utilisez aucun outil pour relâcher ou resserrer les molettes de la fixation En utiliser pourrait endommager les molettes Schéma de installation Utilisation Adéquate Cet appareil doit être monté en hauteur uniquement Pour des raisons de sécurité Chauvet recommande de monter vos éclairages sur une p...

Page 55: ...é soit tournée sur la position ON marche Pour que le laser fonctionne vous devez EFFECTUER CES DEUX ACTIONS Insérer le dispositif de verrouillage Insérer la clé et la tourner sur la position ON Si ces deux actions ne sont pas effectuées le laser NE PEUX PAS s allumer Uniquement à des fins d illustration Assurez vous de toujours positionner cette clé sur OFF et de la retirer quand vous laissez cet ...

Page 56: ...vous manque des informations sur le protocole DMX ou si vous souhaitez approfondir vos connaissances vous pouvez télécharger l introduction au DMX à l adresse www chauvetdj com Pour sélectionner la personnalité DMX et définir l adresse DMX de départ effectuez les actions suivantes 1 Appuyez sur la touche MENU de manière répétée jusqu à ce que l affichage indique 2 Ch ou 9 Ch 2 Appuyez sur la touch...

Page 57: ...trer CHACUNE de ces valeurs le canal puis l option de réception ou d émission REMARQUE L interrupteur DIP 5 permet la réception OU l émission Faites attention dans votre choix Canaux de commutation DIP USB D Fi ATTENTION NE branchez QUE des appareils D Fi USB sur le port USB Le non respect de cette consigne peut endommager l appareil Une fois branché le module D Fi USB prendra le contact de l appa...

Page 58: ...ope d effet kinta 000 005 Pas de fonction 006 255 Stroboscope d effet kinta lent à rapide 5 Moteur d effet kinta 000 Pas de fonction 001 127 Moteur d effet kinta indexation 128 255 Vitesse du moteur d effet kinta lent à rapide 6 Programme SMD stroboscopiques 000 009 Pas de fonction 010 019 Programme stroboscopiques 1 lent à rapide 020 029 Programme stroboscopiques 2 lent à rapide 030 039 Programme...

Page 59: ... fondu ou SnAP changement rapide 6 Appuyez sur la touche ENTER Vitesse du programme automatique Pour définit la vitesse du programme automatique du Kinta FX ILS procédez comme suit 1 Appuyez sur la touche MENU de manière répétée jusqu à ce que l affichage indique S 2 Appuyez sur la touche ENTER 3 Utilisez les touches UP ou DOWN pour augmenter ou diminuer le vitesse de S 00 99 lent à rapide 4 Appuy...

Page 60: ...épétée jusqu à ce que l affichage indique u 2 Appuyez sur la touche ENTER 3 Utilisez les touches UP ou DOWN pour augmenter ou diminuer la valeur de l option actuelle de r000 255 rouge G000 255 vert b000 255 bleu U000 255 blanc ou F 00 99 stroboscope d effet kinta 4 Appuyez sur la touche ENTER pour passer à l option suivante 5 Répétez les étapes 3 et 4 jusqu à ce que le produit soit réglé comme vou...

Page 61: ...f Pour activer le mode son actif avec l IRC 6 1 Appuyez sur la touche SOUND du IRC 6 2 Appuyez sur la touche 1 7 pour sélectionner le programme consultez Couleurs et programmes Contrôle manuel Pour sélectionner manuellement la couleur d effet kinta avec l IRC 6 1 Appuyez sur la couleur désirée parmi R rouge G vert B bleu or W blanc Stroboscope Pour définit le stroboscope avec l IRC 6 1 Appuyez sur...

Page 62: ...z les touches UP ou DOWN pour définit l adresse de départ à d 1 4 Appuyez sur la touche ENTER 5 Réglez le D Fi USB pour recevoir sur un canal spécifique 1 à 16 6 Branchez le D Fi USB 7 Continuez jusqu à ce que tous les appareils esclaves soient paramétrés et connectés Appareil maître 1 Paramétrez l appareil maître pour un fonctionnement en mode autonome 2 Réglez le D Fi USB pour qu il transmette s...

Page 63: ...essous 1 Débranchez l appareil 2 Attendez que l appareil soit à la température ambiante 3 Utilisez un aspirateur ou un compresseur d air et une brosse douce pour enlever la poussière accumulée sur les surfaces évents externes 4 Nettoyez toutes les surfaces transparentes avec une solution douce de nettoyant pour vitres sans ammoniaque ou de l alcool isopropylique 5 Appliquez la solution directement...

Page 64: ...entation US Monde UK Europe Connecteur d entrée d alimentation IEC IEC Connecteur de sortie d alimentation Edison IEC Prise du cordon d alimentation Edison US Prise locale Type Alimentation Longueur d onde Laser rouge 100 mW 650 nm Laser vert 30 mW 520 nm Type Couleur Quantité Alimentation Courant Longueur d onde LED Rouge 1 7 5 W 2 4 A 50 000 heures LED Vert 1 7 5 W 2 4 A 50 000 heures LED Bleu 1...

Page 65: ...ce request Vous devez nous retournez la marchandise en port prépayé dans ses boîte et emballage d origine et avec tous ses accessoires Chauvet ne délivrera pas d étiquettes de renvoi Indiquez lisiblement le NAR sur une étiquette apposée sur le colis Chauvet refusera la réception de tout appareil pour lequel aucun NAR n a été demandé Avant de nous retourner le colis inscrivez les informations suiva...

Page 66: ...ope Ltd Adresse Unit 1C E mail UKtech chauvetlighting eu Brookhill Road Industrial Estate Pinxton Nottingham UK Site web www chauvetdj eu NG16 6NT Téléphone 44 0 1773 511115 Fax 44 0 1773 511110 Chauvet Europe BVBA Adresse Stokstraat 18 E mail BNLtech chauvetlighting eu 9770 Kruishoutem Belgium Site web www chauvetdj eu Téléphone 32 9 388 93 97 Chauvet France Adresse 3 Rue Ampère 91380 Chilly Maza...

Page 67: ...rbeitung in Kenntnis zu setzen Chauvet ist jedoch nicht verpflichtet solche Überarbeitungen vorzunehmen und verpflichtet sich auch nicht dies zu tun Laden Sie die jeweils aktuelle Version unter www chauvetdj com herunter Geistiges Eigentum Die in diesem Handbuch enthaltenen urheberrechtlich geschützten Arbeiten einschließlich aber nicht beschränkt darauf aller Zeichnungen Texte und Bilder sind das...

Page 68: ...s Gerät immer an einem Ort mit ausreichender Belüftung und mit einem Abstand von 50 cm zu den angrenzenden Flächen Stellen Sie sicher dass die Lüftungsöffnungen am Gehäuse des Geräts nicht verschlossen sind Schließen Sie dieses Gerät niemals an einen Dimmer an Achten Sie beim Auswechseln der Sicherung darauf den gleichen Typ mit den gleichen Werten zu verwenden Heben Sie das Produkt zum Tragen nur...

Page 69: ...ngsanleitung aufgeführten Sicherheits und technischen Daten gelesen und verstanden zu haben Installieren Sie die Lasereffekte IMMER so dass alle Laserstrahlen mindestens 3 Meter 9 8 Fuß über dem Boden verlaufen auf dem Personen stehen können Siehe den Abschnitt Bestimmungsgemäße Verwendung in dieser Anleitung Nach der Montage und vor der Inbetriebnahme in der Öffentlichkeit testen Sie ob das Gerät...

Page 70: ...e Laser Display kann über die International Laser Display Association bezogen werden kann unter www ilda com Laserklassifizierung Klasse 3R Wellenlänge optische Leistung der roten Laserdiode 650 nm 100 mW Wellenlänge optische Leistung der grünen Laserdiode 520 nm 30 mW Strahldurchmesser 5 mm am Austritt Impulsdaten Alle Impulse 4 Hz 0 25 Sek Streuverlust jeder Strahl 2 mrad Streuverlust Gesamtlich...

Page 71: ...nstecken Dies könnte zu Beschädigungen des Produkts führen SMD Stroboskop LEDs x16 Kinta Effektlinsen x24 USB Anschluss Infrarot sensor LED Anzeigen DMX Musik Auto Slave Anzeige und Steuerungstasten MENU UP DOWN ENTER Mikrofon Empfindlichkeit knopf DMX In Ausgang Sicherheitsöse Strom ausgang Sicherungs halter Strom zufuhr Laser ausgang 7 4 Zoll 187 mm 7 4 Zoll 187 mm 10 3 Zoll 261 mm ...

Page 72: ...em nachfolgenden Abbildung Abbildung für Serienschaltung Schließen Sie dieses Gerät nur an einen abgesicherten Stromkreislauf Leistungsschalter oder Sicherung an Stellen Sie sicher dass das Gerät entsprechend an die Masse angeschlossen ist um die Gefahr elektrischer Schläge oder eines Brands zu vermeiden Um unnötigen Verschleiß zu vermeiden und die Lebensdauer des Geräts zu verlängern trennen Sie ...

Page 73: ... erforderlichen Tragfähigkeit Der Bügel verfügt dazu über mehrere 13 mm große Löcher Mit den Bügeleinstellknöpfen lässt sich die winklige Ausrichtung des Geräts justieren Die Bügeleinstellknöpfe nur manuell lösen und festschrauben Bei der Verwendung von Hebelwerkzeugen können die Bügeleinstellknöpfe beschädigt werden Montageansicht Bestimmungsgemäße Verwendung Das Gerät muss aufgehängt werden Aus ...

Page 74: ...werden kann Damit der Laser in Betrieb genommen werden kann ist folgendermaßen vorzugehen Die Verriegelung einstecken Den Schlüssel einstecken und in die Stellung ON Ein drehen Wenn nicht BEIDE dieser Schritte durchgeführt worden sind kann der Laser nicht in Betrieb genommen werden Nur zur Veranschaulichung Drehen Sie den Schlüssel immer in die Stellung OFF Aus und ziehen Sie ihn heraus wenn Sie d...

Page 75: ...nd erhöhen den numerischen Wert der entsprechenden Funktionen DOWN Damit navigieren Sie durch die Menüpunkte nach unten und verringern den numerischen Wert der entsprechenden Funktionen ENTER Mit dieser Taste wählen und bestätigen Sie eine Funktion im System Menü oder einen ausgewählten Wert Modus Programmierebenen Beschreibung DMX 2 Ch d 1 511 4 Kanal DMX Modus 9 Ch d 1 504 9 Kanal DMX Modus Vore...

Page 76: ... zu hoch ist müssen Sie den Zugang zu einigen Gerätekanälen beschränken Der Kinta FX ILS verwendet bis zu 9 DMX Kanäle im 9 Ch Modus die höchste konfigurierbare Adresse auf 504 festlegen Der Kinta FX ILS verwendet 2 DMX Kanäle im 2 Ch Modus die höchste konfigurierbare Adresse auf 511 festlegen Wenn Sie mit dem DMX Protokoll nicht vertraut sind laden Sie DMX Eine Einführung unter www chauvetdj com ...

Page 77: ...rsicht um BEIDES einzustellen Den Kanal und dann Die Option zum Empfangen und Senden HINWEIS Der DIP Schalter 5 gilt für das Empfangen ODER das Senden bitte daher sorgfältig auswählen D Fi USB DIP Schalter Kanäle ACHTUNG KEIN anderes Gerät als einen D Fi USB in den USB Anschluss einstecken Dies könnte zu Beschädigungen des Produkts führen Nach dem Einstecken übernimmt der D Fi USB die Steuerung de...

Page 78: ...ion 006 255 Kinta Effekt Stroboskop langsam bis schnell 5 Kinta Effektmotor 000 Keine Funktion 001 127 Kinta Effektmotor Indexierung 128 255 Motorgeschwindigkeit langsam bis schnell 6 SMD Stroboskope Programm 000 009 Keine Funktion 010 019 Stroboskope Programm 1 langsam bis schnell 020 029 Stroboskope Programm 2 langsam bis schnell 030 039 Stroboskope Programm 3 langsam bis schnell 040 049 Strobos...

Page 79: ...den automatischen Programmgeschwindigkeit festzulegen des Kinta FX ILS gehen Sie wie folgt vor 1 Drücken Sie wiederholt auf MENU bis S auf der Anzeige angezeigt wird 2 Drücken Sie ENTER 3 Verwenden Sie UP oder DOWN um die Geschwindigkeit S 00 99 langsam bis schnell zu erhöhen oder zu verringern 4 Drücken Sie ENTER 7 Laserfarbe K 8 muss für den Stroboskop aktiv sein 000 009 Keine Funktion 010 049 R...

Page 80: ...ken Sie ENTER 3 Verwenden Sie UP oder DOWN um der Wert der aktuellen Option zu erhöhen oder zu verringern von r000 255 rot G000 255 grün b000 255 blau U000 255 weiß oder F 00 99 Kinta Effekt Stroboskop 4 Drücken Sie ENTER um zur nächsten Option zu wechseln 5 Wiederholen Sie die Schritte 3 und 4 bis das Produkt wie gewünscht eingestellt ist Das Gerät reagiert nur auf niedrige Musikfrequenzen Bass o...

Page 81: ... 6 1 Drücken Sie auf der IRC 6 auf SOUND 2 Drücken Sie 1 7 um das Programm auswählen siehe Farben und Programme Manuellersteuerung Um die Kinta Effektfarbe manuell auszuwählen mit der IRC 6 1 Drucken Sie die gewünschte Farb von R rot G grün B blau oder W weiß Stroboskop Um das Stroboskop einstellen mit der IRC 6 1 Drücken Sie auf der IRC 6 auf STROBE 2 Drücken Sie oder um die Stroboskop Geschwindi...

Page 82: ... oder DOWN die Startadresse bis d 1 stellen 4 Drücken Sie ENTER 5 Stellen Sie den D Fi USB so ein dass er auf einem bestimmten Kanal empfangen kann 1 16 6 Schließen Sie den D Fi USB an 7 Beenden Sie die Einstellungen und das Anschließen aller Slave Geräte Master Gerät 1 Stellen Sie den Betrieb des Master Geräts auf Einzelplatzmodus ein 2 Stellen Sie den D Fi USB so ein dass er auf dem D Fi Kanal s...

Page 83: ... 2 Warten Sie bis das Gerät auf Raumtemperatur abgekühlt ist 3 Verwenden Sie einen Staubsauger oder Druckluft sowie eine weiche Bürste um den Staub auf der Oberfläche des Geräts und in den Lüftungsbereichen zu entfernen 4 Reinigen Sie alle transparenten Oberflächen mit einer milden Seifenlösung mit ammoniakfreiem Glasreiniger oder Isopropylalkohol 5 Geben Sie die Lösung direkt auf ein weiches fase...

Page 84: ...odukten 8 A 33 Produkten Sicherung T 1 A 250 V T 1 A 250 V I O Eingangsbuchse USA weltweit GB Europa Stromeingangsbuchse IEC IEC Stromausgangsbuchse Edison IEC Netzkabelstecker Edison USA Lokaler Stecker Typ Leistung Wellenlänge Laser rot 100 mW 650 nm Laser grün 30 mW 520 nm Typ Farbe Menge Leistung Strom Betriebsdauer LED Rot 1 7 5 W 2 4 A 50 000 Stunden LED Grün 1 7 5 W 2 4 A 50 000 Stunden LED...

Page 85: ...e Beschreibung des Grundes für das Zurückschicken angeben zu können Um eine Serviceanfrage online zu stellen gehen Sie zu www chauvetdj com service request Senden Sie die Ware frei in der Originalverpackung und mit den originalen Zubehörteilen zurück Chauvet lässt keine Retouren abholen Schreiben Sie die RMA gut leserlich auf die Verpackung Chauvet weist alle Waren zurück die keine RMA besitzen Be...

Page 86: ...Europe Ltd Adresse Unit 1C Email UKtech chauvetlighting eu Brookhill Road Industrial Estate Pinxton Nottingham UK Webseite www chauvetdj eu NG16 6NT Telefon 44 0 1773 511115 Fax 44 0 1773 511110 Chauvet Europe BVBA Adresse Stokstraat 18 Email BNLtech chauvetlighting eu 9770 Kruishoutem Belgium Webseite www chauvetdj eu Telefon 32 9 388 93 97 Chauvet France Adresse 3 Rue Ampère 91380 Chilly Mazarin...

Page 87: ... si impegna a farlo tali modifiche Scaricare l ultima versione da www chauvetdj com Proprietà intellettuale Le opere d autore contenute in questo manuale inclusi ma non limitati a tutto il design il testo e le immagini sono di proprietà di Chauvet Copyright 2022 Chauvet Sons LLC Tutti i diritti riservati Pubblicato elettronicamente da Chauvet negli Stati Uniti d America CHAUVET il logo Chauvet ILS...

Page 88: ...un luogo con adeguata ventilazione ad almeno 50 cm dalle superfici adiacenti Assicurarsi che nessuna feritoia di ventilazione sul contenitore del prodotto sia bloccata Non collegare mai l unità a un dimmer Assicurarsi di sostituire il fusibile con un altro dello stesso tipo e valore Per trasportare l unità utilizzare sempre la staffa di montaggio Non accendere e spegnere l unità ad intervalli brev...

Page 89: ...zzare il laser senza aver prima letto e compreso tutti i dati tecnici e di sicurezza riportati nel presente Manuale Impostare e installare SEMPRE tutti gli effetti laser ad almeno 3 metri sopra la pista pavimento Vedere la sezione Uso corretto di questo Manuale Dopo l impostazione e prima di utilizzarli in pubblico testare i laser per assicurarsi che funzionino correttamente Non utilizzare l unità...

Page 90: ...tramite l International Laser Display Association www ilda com Classificazione laser Classe 3R Lunghezza d onda alimentazione ottica del diodo laser rosso 650 nm 100 mW Lunghezza d onda alimentazione ottica del diodo laser verde 520 nm 30 mW Diametro del fascio 5 mm all apertura Dati impulso Tutti gli impulsi 4 Hz 0 25 sec Divergenza ciascun fascio 2 mrad Divergenza luce totale 160 gradi Potenza l...

Page 91: ... In caso contrario l unità potrebbe danneggiarsi Ingresso uscita DMX Porta fusibile Ingresso alimentazione Uscita alimentazione Indicatori LED Anello di sicurezza LED SMD strobo x16 Emissione laser Microfono Manopola sensibilità Lentieffetto Kinta x24 DMX Sound Auto Slave Display e pulsanti di controllo MENU UP DOWN ENTER Porta USB Sensore IR 7 4 po 187 mm 7 4 po 187 mm 10 3 po 261 mm ...

Page 92: ... circuito protetto sezionatore o fusibile Per evitare il rischio di folgorazione o di incendio assicurarsi che l unità abbia una messa a terra elettrica adeguata Per evitare che si usuri inutilmente e prolungarne la durata quando non utilizzata scollegare completamente l unità dall alimentazione tramite l interruttore o staccando la spina Non collegare mai l unità a un reostato resistore variabile...

Page 93: ...ffa consentono di orientare l unità verso l angolo desiderato Allentare o serrare le manopole della staffa solo manualmente L uso di attrezzi potrebbe danneggiare le manopole Schema di montaggio Uso corretto Questo prodotto è destinato esclusivamente al montaggio sospeso Per motivi di sicurezza Chauvet raccomanda di montare gli effetti luminosi su piattaforme rialzate e stabili o su robusti sosteg...

Page 94: ...iano entrambi inseriti e la chiavetta sia in posizione ON Affinché il laser funzioni è necessario ESEGUIRE ENTRAMBE LE OPERAZIONI inserire l interblocco inserire la chiavetta e ruotarla in posizione ON In caso contrario il laser NON si attiva Solo a scopo illustrativo Quando si lascia questo prodotto incustodito ruotare sempre la chiavetta in posizione OFF e rimuoverla per evitare incidenti o lesi...

Page 95: ... dell indirizzo configurabile a 511 Per informazioni sul protocollo DMX scaricare DMX Primer da www chauvetdj com Per selezionare la caratteristica DMX e l indirizzo iniziale procedere come segue 1 Premere MENU ripetutamente fino a visualizzare sul display 2 Ch o 9 Ch 2 Premere ENTER 3 Utilizzare UP oppure DOWN per aumentare o diminuire l indirizzo iniziale da d 1 511 4 Premere ENTER Pulsante Funz...

Page 96: ... impostare ENTRAMBI utilizzare lo schema fornito Il canale e L opzione Ricezione o Trasmissione NOTA il microinterruttore 5 è per trasmissione o ricezione scegliere con attenzione Canali microinterruttori D Fi USB ATTENZIONE Nella porta USB collegare SOLO un D Fi USB In caso contrario l unità potrebbe danneggiarsi Dopo il collegamento D Fi USB prende il controllo del prodotto DMX cablato controllo...

Page 97: ...ell effetto kinta 000 005 Nessuna funzione 006 255 Stroboscopio dell effetto kinta lento a veloce 5 Motore dell effetto kinta 000 Nessuna funzione 001 127 Indicizzazione motore dell effetto kinta 128 255 Velocità del motore dell effetto kinta lento a veloce 6 Programma SMD strobo 000 009 Nessuna funzione 010 019 Programma SMD strobo 1 lento a veloce 020 029 Programma SMD strobo 2 lento a veloce 03...

Page 98: ...r impostare la velocità del programma automatico dello Kinta FX ILS procedere come segue 1 Premere MENU ripetutamente fino a visualizzare sul display S 2 Premere ENTER 3 Utilizzare UP oppure DOWN per aumentare o diminuire la velocità da S 00 99 lento a veloce 4 Premere ENTER 7 Colore laser C 8 deve essere attivo per lo stroboscopio 000 009 Nessuna funzione 010 049 Rosso 050 089 Verde 090 129 Rosso...

Page 99: ...visualizzare sul display u 2 Premere ENTER 3 Utilizzare UP oppure DOWN per aumentare o diminuire il valore dell opzione corrente da r000 255 rosso G000 255 verde b000 255 blu U000 255 bianco or F 00 99 stroboscopio effetto kinta 4 Premere ENTER per passare da un opzione all altra 5 Ripetere i passaggi 3 e 4 fino a impostare l unità come desiderato L unità risponde solo alle basse frequenze della m...

Page 100: ...a con il telecomando IRC 6 1 Premere SOUND sullo IRC 6 2 Premere 1 7 per selezionare il programma vedere Colori e Programmi Controllo manuale Per selezionare manualmente il colore dell effetto kinta con il telecomando IRC 6 1 Premere il colore desiderato da R rosso G verde B blu o W bianco Stroboscopio Per impostare il stroboscopio con il telecomando IRC 6 1 Premere STROBE sullo IRC 6 2 Premere or...

Page 101: ...B per ricevere su un canale specifico 1 16 6 Collegare il D Fi USB 7 Terminare l impostazione e il collegamento di tutte le unità slave Unità master 1 Impostare l unità master per il funzionamento in modalità indipendente 2 Impostare il D Fi USB per trasmettere sul canale D Fi su cui le unità slave stanno ricevendo 3 Collegare il D Fi USB Modalità ILS ILS Sistema di illuminazione integrato fornisc...

Page 102: ...resa di alimentazione 2 Attendere che il prodotto sia a temperatura ambiente 3 Usare un aspirapolvere o aria compressa asciutta e una spazzola morbida per rimuovere la polvere formatasi sulla superficie e sulle bocchette di ventilazione esterne 4 Pulire tutte le superfici trasparenti con una soluzione di sapone delicato un detergente per vetri senza ammoniaca o alcol isopropilico 5 Applicare la so...

Page 103: ...T 1 A 250 V I U alimentazione Stati Uniti Mondo Regno unito Europa Connettore ingresso alimentazione IEC IEC Connettore uscita alimentazione Edison IEC Spina cavo di alimentazione Edison Stati Uniti Spina locale Tipo Alimentazione Lunghezza d onda Laser rosso 100 mW 650 nm Laser verde 30 mW 520 nm Tipo Color Quantità Alimentazione Corrente Durata Nominale LED Rosso 1 7 5 W 2 4 A 50000 ore LED Verd...

Page 104: ...com service request Inviare la merce in porto franco nella scatola originale con l imballaggio originale e gli accessori Chauvet non emette etichette di reso prepagato Etichettare il pacco in modo chiaro con il numero di Autorizzazione al reso RMA Chauvet rifiuterà qualsiasi reso privo del numero RMA Prima di spedire il prodotto scrivere chiaramente le seguenti informazioni su un foglio di carta e...

Page 105: ...Unit 1C E mail UKtech chauvetlighting eu Brookhill Road Industrial Estate Pinxton Nottingham UK Website www chauvetdj eu NG16 6NT Telefono 44 0 1773 511115 Fax 44 0 1773 511110 Chauvet Europe BVBA Indirizzo Stokstraat 18 E mail BNLtech chauvetlighting eu 9770 Kruishoutem Belgium Website www chauvetdj eu Telefono 32 9 388 93 97 Chauvet France Indirizzo 3 Rue Ampère 91380 Chilly Mazarin E mail FRtec...

Page 106: ...tellen Chauvet is echter niet verplicht dergelijke herzieningen te maken Download de nieuwste versie van www chauvetdj com Intellectueel eigendom De auteursrechtelijk beschermde werken in deze handleiding waaronder maar niet beperkt tot alle ontwerpen teksten en afbeeldingen zijn eigendom van Chauvet Copyright 2022 Chauvet Sons LLC Alle rechten voorbehouden Elektronisch uitgegeven door Chauvet in ...

Page 107: ...e ventilatie op ten minste 50 cm afstand van aangrenzende oppervlakken Zorg ervoor dat de ventilatiesleuven op de behuizing van het product nooit geblokkeerd worden Sluit het product nooit aan op een dimmer Vervang de zekering met een van hetzelfde type en met dezelfde waarde Gebruik altijd de bevestigingsbeugel om het product te dragen Schakel het product niet kort na elkaar aan uit Dit verlaagt ...

Page 108: ...esteld en geplaatst zodat het laserlicht ten minste 3 meter boven de vloer is waar mensen op staan Zie de paragraaf Correct gebruik van deze handleiding Na instelling en voor openbaar gebruik moeten de lasers getest worden om te controleren of ze goed functioneren Dit product niet gebruiken als er een storing is gedetecteerd De laser NIET gebruiken als het slechts een of twee bundels emitteert in ...

Page 109: ... richtlijn voor laservertoning kan worden verkregen via de International Laser Display Association www ilda com Laserclassificatie Klasse 3R Rode laserdiode golflengte optische vermogen 650 nm 100 mW Groene laserdiode golflengte optische vermogen 520 nm 30 mW Diameter van de straal 5 mm bij de opening Pulsgegevens Alle pulsen 4 Hz 0 25 sec Divergentie elke straal 2 mrad Divergentie totale licht 16...

Page 110: ...oort plaatsen Dit kan het product namelijk beschadigen SMD LED Stroboscopen x16 Kinta effect lenzen x24 USB poort IR sensor LED indicatoren DMX Geluid Auto Slave Display en bedieningsknoppen MENU UP DOWN ENTER Laser uitvoer Stroom ingang Zekering houder Microfoon Gevoeligheids knop DMX in uitgang Veiligheidslus Vermogens uitgang 7 4 in 187 mm 7 4 in 187 mm 10 3 in 261 mm ...

Page 111: ...Linking Diagram Sluit het product altijd aan op een beschermd circuit aardlekschakelaar of zekering Zorg ervoor dat het product voldoende elektrisch is geaard om het risico op elektrocutie of brand te vermijden Sluit om onnodige slijtage te verhinderen en de levensduur te verlengen tijdens periodes van niet gebruik het product via stroomonderbreker of de stekker volledig van stroom af Sluit het pr...

Page 112: ...e geschikt is voor dit doeleinde De verstelknoppen van de beugel zorgen voor directionele verstelling bij het richten van het product naar de gewenste hoek Maak de beugelknoppen alleen met de hand los of vast Het gebruik van gereedschap kan de knoppen beschadigen Montagediagram Correct gebruik Dit product is alleen geschikt voor gebruik boven lichaamshoogte Voor veiligheidsdoeleinden raadt Chauvet...

Page 113: ...eutel naar de AAN stand wordt gedraaid Voordat de laser werkt MOET U ZOWEL De vergrendeling plaatsen De sleutel plaatsen en naar de AAN stand draaien Als deze beide handelingen niet uitgevoerd worden zal de laser niet inschakelen Alleen voor illustratieve doeleinden De sleutel naar de UIT stand draaien en het verwijderen wanneer dit product onbeheerd wordt achtergelaten om ongelukken of letsel aan...

Page 114: ...kt 2 DMX kanalen in 2 Ch modus wat bepaalt dat het hoogst configureerbare adres 511 is Als u niet bekend bent met het DMX protocol download dat de DMX primer van www chauvetdj com Om het persoonlijkheid en startadres te selecteren doet u het volgende 1 Druk op MENU totdat 2 Ch of 9 Ch weergegeven wordt op het display 2 Druk op ENTER 3 Gebruik UP of DOWN om het startadres te selecteren van d 1 511 ...

Page 115: ...X ILS in 2 Gebruik de tabel voor het instellen van ZOWEL Het kanaal en daarna De ontvangst en zendoptie LET OP DIP Switch 5 is voor verzenden OF ontvangen dus kies zorgvuldig D Fi USB DIP Switch kanalen Waarschuwing NIETS anders dan een D Fi USB in de USB poort plaatsen Dit kan het product namelijk beschadigen Nadat het is aangesloten zal de D Fi USB het product overnemen Bedrade DMX handmatige DM...

Page 116: ...005 Geen functie 006 255 Kinta effect stroboscoop langzaam tot snel 5 Kinta effect motor 000 Geen functie 001 127 Kinta effect motor indexeren 128 255 Kinta effect motor snelheid langzaam tot snel 6 SMD stroboscopen programma 000 009 Geen functie 010 019 Stroboscopen programma 1 langzaam tot snel 020 029 Stroboscopen programma 2 langzaam tot snel 030 039 Stroboscopen programma 3 langzaam tot snel ...

Page 117: ...matisch Programmasnelheid Om de automatisch programmasnelheid van het Kinta FX ILS te stellen doet u het volgende 1 Druk herhaaldelijk op MENU totdat S weergegeven wordt op het display 2 Druk op ENTER 3 Gebruik UP of DOWN om de snelheid te verhogen of te verlagen van S 00 99 langzaam tot snel 4 Druk op ENTER 7 Laserkleur K 8 moet actief zijn om de stroboscoop 000 009 Geen functie 010 049 Rood 050 ...

Page 118: ...egeven wordt op het display 2 Druk op ENTER 3 Gebruik UP of DOWN de waarde van de huidige optie te verhogen of te verlagen van r000 255 rood G000 255 groen b000 255 blauw U000 255 wit of F 00 99 kinta effect stroboscoop 4 Druk op ENTER om naar de volgende optie te gaan 5 Herhaal stap 3 en 4 totdat het product naar wens is ingesteld Het product reageert alleen op lage frequenties van de muziek lage...

Page 119: ... 6 1 Druk op SOUND op de IRC 6 2 Druk op 1 7 om het programma te kiezen zie Kleuren en programma s Handmatige bediening Om de kinta effectkleur handmatig te selecteren met de IRC 6 1 Druk op het gewenste kleur van R rood G groen B blauw of W wit Stroboscoop Om de stroboscoop snelheid te stellen met de IRC 6 1 Druk op STROBE op de IRC 6 2 Druk op of om de stroboscoop snelheid te verhogen of te verl...

Page 120: ...d 1 4 Druk op ENTER 5 Stel de D Fi USB in om op een specifiek kanaal 1 16 te werken 6 Sluit de D Fi USB aan 7 Voltooi het instellen en aansluiten van alle slaaf producten Master product 1 Stel het masterproduct in om te werken in zelfstandige modus 2 Stel D Fi USB in om op het D Fi kanaal uit te zenden waar de slaves op ontvangen 3 Sluit de D Fi USB aan ILS Mode ILS geïntegreerd verlichtingssystse...

Page 121: ...roduct te reinigen 1 Haal het apparaat van de stroom 2 Wacht totdat het product op kamertemperatuur is 3 Gebruik een stofzuiger of droge perslucht en een zachte borstel om opgehoopt stof van de externe oppervlakken en ventilatiegaten te verwijderen 4 Reinig alle transparante oppervlakken met een milde zeepoplossing ammoniumvrije glasreiniger of isopropylalcohol 5 Pas de schoonmaakoplossing direct ...

Page 122: ...33 producten Zekering T 1 A 250 V T 1 A 250 V Stroom I O VS wereldwijd VK Europa Stroomingangsstekker IEC IEC Stroomuitgangsstekker Edison IEC Stroomsnoerstekker Edison VS Lokale stekker Type Vermogen Golflengte Laser rood 100 mW 650 nm Laser groen 30 mW 520 nm Type Kleur Aantal Vermogen Stroomsterkte Levensduur LED Rood 1 7 5 W 2 4 A 50 000 uur LED Groen 1 7 5 W 2 4 A 50 000 uur LED Blauw 1 7 5 W...

Page 123: ...zaak bij de hand hebt Om een serviceaanvraag online in te dienen ga naar www chauvetdj com service request Stuur het product gefrankeerd in zijn originele doos en met zijn originele verpakking en accessoires Chauvet geeft geen telefoon tags Label het pakket duidelijk met het RMA nummer Chauvet weigert producten die worden geretourneerd zonder een RMA nummer Vóór het verzenden van het product moet ...

Page 124: ...res Unit 1C E mail UKtech chauvetlighting eu Brookhill Road Industrial Estate Pinxton Nottingham UK Website www chauvetdj eu NG16 6NT Bandopname 44 0 1773 511115 Fax 44 0 1773 511110 Chauvet Europe BVBA Adres Stokstraat 18 E mail BNLtech chauvetlighting eu 9770 Kruishoutem Belgium Website www chauvetdj eu Bandopname 32 9 388 93 97 Chauvet France Adres 3 Rue Ampère 91380 Chilly Mazarin E mail FRtec...

Reviews: