background image


2

Introduction 

 
To get the most out of your new planer thicknesser, please read through this manual and safety 
instructions before use. Please also save the instructions in case you need to refer to them at a 
later date.  


Technical data 


Voltage/frequency    


230 V ~ 50 Hz 

Power 

rating 


   1500 

Planer: 

Planing 

width 

   200 

mm 

Planing depth  


0-3 mm 

Work table    


740 x 210 mm 

Working height  


360 mm 

Fence 

    530 


100 

mm 

Angle 

range 


   90-135° 


Thicknesser:  

Planing width  


200 mm 

Capacity 


   5-127 

mm 

Planing depth  


0-2 mm 

Work table    


270 x 210 mm 

Feed-in speed  


8 m/min 

No. 

of 

blades 

   2  

Extractor outlet 


100 mm dia. 


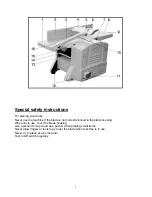
Main components 


1. Rear table 
2. Guide fence 
3. Blade guard arm 
4. Blade guard 
5. Width adjustment knob 
6. Angle adjustment knob 
7. Depth adjustment handle (thicknesser) 
8. Front table 
9. Plane depth adjustment knob (plane) 
10. Blade housing 
11. On/off switch 
12. Stabilising holes 
13. Thicknesser table 
14. Plane depth indicator 
15. Arm adjustment knob 
16. Hole for depth adjustment (in back table) 
 
An extractor nozzle, tools and blade adjustment gauge are also included (not llustrated here). 

Summary of Contents for W588

Page 1: ... PLANER THICKNESSER OPERATING INSTRUCTIONS MODEL W588 Charnwood Cedar Court Walker Road Bardon Leicestershire LE67 1TU Tel 01530 516 926 Fax 01530 516 929 Email sales charnwood net website www charnwood net ...

Page 2: ...esser Planing width 200 mm Capacity 5 127 mm Planing depth 0 2 mm Work table 270 x 210 mm Feed in speed 8 m min No of blades 2 Extractor outlet 100 mm dia Main components 1 Rear table 2 Guide fence 3 Blade guard arm 4 Blade guard 5 Width adjustment knob 6 Angle adjustment knob 7 Depth adjustment handle thicknesser 8 Front table 9 Plane depth adjustment knob plane 10 Blade housing 11 On off switch ...

Page 3: ... is not correctly locked in the blade housing When not in use cover the blade housing Use a piece of scrap wood as a pusher when planing small items Never allow fingers or tools to get near the blade when machine is in use Never try to plane across the grain Test on off switch regularly ...

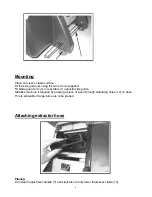
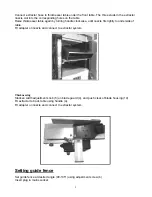
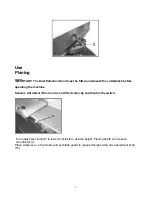
Page 4: ...guard arm 3 to rear table 1 opposite side guide Stabilise machine if required by passing a piece of wood through stabilising holes 12 on base This is advisable if large items are to be planed Attaching extractor hose Planing Turn depth adjustment handle 7 anti clockwise to fully lower thicknesser table 13 ...

Page 5: ...se until nozzle fits tightly to underside of table Fit adapter on nozzle and connect to extractor system Thicknessing Slacken width adjustment knob 5 on blade guard 4 and push clear of blade housing 10 Fit extractor to back table using handle a Fit adapter on nozzle and connect to extractor system Setting guide fence Set guide fence at desired angle 90 135 using adjustment screw b Insert plug in m...

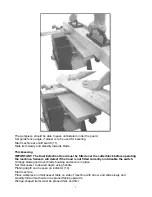
Page 6: ...erating the machine Sensors will detect if the hood is not fitted correctly and disable the switch Turn adjustment knob 9 to lower front table to desired height Planing depth can be seen on indicator c Place workpiece on front table and set blade guard to required height using arm adjustment knob 15 ...

Page 7: ...e cutterblock before operating the machine Sensors will detect if the hood is not fitted correctly and disable the switch Arrange blade guard over blade housing and secure in place Set thicknesser to desired depth using handle Planing depth can be seen on indicator 14 Start machine Place workpiece on thicknesser table on side of machine with arrow and slide slowly and steadily forward with side to...

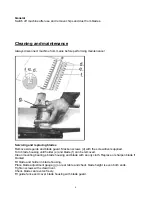
Page 8: ...crews d with the screwdriver supplied Turn blade housing until holder e and blade f can be removed Clean mounting bearings blade housing and blade with an oily cloth Replace or sharpen blade if blunted Fit blade and holder in blade housing Place blade adjustment gauge g on rear table and check blade height is even both ends Tighten screws with screwdriver Check blade can revolve freely Fit guide f...

Page 9: ...anner It is suitable for recycling Help to protect the environment take the packaging to the local amenity tip and place into the appropriate recycling bin Only for EU countries Do not dispose of electric tools together with household waste material In observance of European Directive 2002 96 EC on waste electrical and electronic equipment EEE and its implementation in accordance with national law...

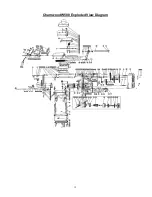
Page 10: ...r 4 21 Hexagon Bolt M8x20 66 Hexagon Bolt M4x12 22 Crank Stop 67 Goniometer A 23 Crank Bolt 68 Flat Washer 6 24 Crank Nip 69 Spring Washer 6 25 Hexagon Bolt M8x20 70 Male Hexagon Bolt M6x12 26 Flat Washer 4 71 Goniometer Mount 27 Cross Recessed Raised Pan Head Screws M4x10 72 Hexagon Socket Locating Screw 28 Spring Washer 4 73 Hexagon Bolt M6x25 29 Pressing And Shaving Feeding Pointer 74 Big Flat ...

Page 11: ...Switch Box Mount 112 Ball Bearing 6000 2Z 157 Cross Recessed Raised Pan Head Screws M5x10 113 Main Station Plate Welding Component 158 7A Overload Protector 114 Feeding Scale Sign 159 Switch Box Cover 115 Ajar Block Spring 160 Tapping Screw T4 2x15 116 Hexagon Bolt M5x10 161 Thin Nut M12 117 Ajar Washer B 162 KJD12 16 Main Switch 118 Macro Switch Idler Wheel Style 163 Eccentric Axis 119 Arbor Belt...

Page 12: ...12 Charnwood W588 Exploded View Diagram ...

Reviews: