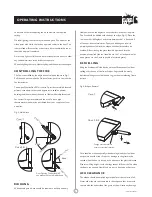
the grate bars. The ashpan is handled using the Door Opening tool
provided. Ensure that the tongue of the ashpan is protruding through
the slot in the top of the tool before lifting (See Fig.3). Care should
be taken to ensure that ash is cool before emptying it into plastic
liners or bins.
To make ash removal easier there is a special Charnwood ash carrier
available. This may be purchased from your supplier or, in case of
difficulty, from ourselves.
The grate should be kept in the closed position and should not be
riddled until the ash becomes so deep that it begins to block the
passage of air into the firebox at the sides or back of the grate. When
this is the case do not remove all of the ash using the riddling
mechanism but keep a layer about half an inch thick as this enables
the wood to burn more effectively. When lighting the fire a few small
dry logs with a good amount of kindling will help to get the fire up to
temperature quickly.
The stove is finished with a high temperature paint which will
withstand the temperatures encountered in normal use. This may be
cleaned with a damp lint-free cloth when the stove is cold. Should re-
painting become necessary then special high temperature paints are
available from your supplier or from Charnwood.
The glass in the door is a special ceramic glass which is able to
withstand high temperatures. Before cleaning the glass open the door
Special Points when Burning Wood
Cleaning
Cleaning the Glass
MAINTENANCE
and allow it to cool. Clean the glass using a damp cloth and then wipe
over with a dry cloth. Any stubborn deposits on the glass may be
removed with a proprietary stove glass cleaner or ceramic hob
cleaner. Some deposits on the glass may be burnt off simply by
running the fire at a fast rate for a few minutes. Do not use abrasive
cleaners or pads as these can scratch the surface which will weaken
the glass and cause premature failure. Aerosol spray cleaners should
not be used near the appliance whilst it is under fire.
If the fire is going to be out of use for a long period (for instance in
the summer) then to prevent condensation, and hence corrosion, the
air control should be left fully open and the fire door left ajar. It is
also advisable to sweep the chimney and clean out the fire. Spraying
the inside of the door and firebox with a light oil, such as WD40, will
also help to keep all internal parts working well.
After long periods where the fire has been out of use, the chimney
and appliance flueways should be cleaned before lighting.
For the fire to operate correctly it is important that the door seals
are in good condition. Check that they do not become worn or
frayed and replace them when necessary.
It is recommended that the fire is serviced once a year to keep it in
first class working order. After cleaning out the firebox thoroughly,
check that all internal parts are in good working order, replacing any
parts that are beginning to show signs of wear. Check that the door
seals are in good condition and that the door seals correctly. A
servicing guide is available on request. Repairs or modifications may
only be carried out by the Manufacturer or their approved agents.
Use only genuine Charnwood replacement parts.
It is important that the throat plate and all the stove flueways are kept
clean. They should be checked approximately once a week, by
looking up into the firebox for signs of soot or fly-ash on the throat
plate and at the sides of the firebox. If there are signs of a build up of
soot or fly-ash deposits then the fire must be let out in order to clean
the throat plate and flueways.
Before attempting to clean the throat plate and flueways ensure that
the fire is cold. Wear suitable gloves to prevent irritation from soot
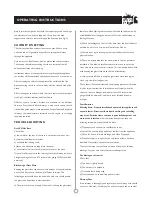
deposits. To remove the throat plate lift the front edge up, pull the
When Not in Use
Door Seals
Servicing
THROAT PLATE AND
FLUEWAY CLEANING
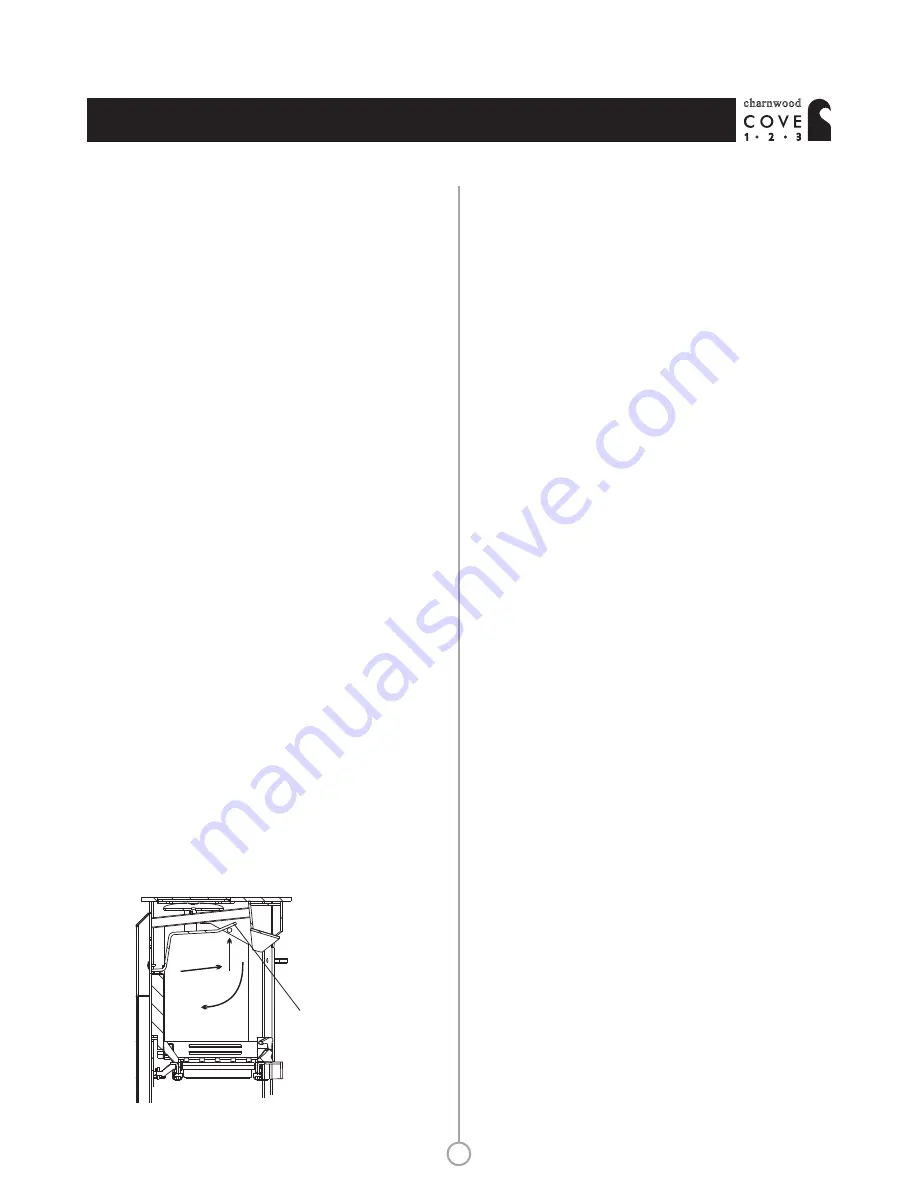
Lift throat plate at front,
then pull forward and
swing down. For Cove 1
Remove tubes from front
supports before swinging
Throat plate down.
Fig. 4. Throat Plate
1
2
3
®
charnwood
OPERATING INSTRUCTIONS
6
Summary of Contents for Cove 1
Page 1: ...Operating Installation Instructions charnwood 1 2 3 ...
Page 2: ......


