


ChamSys
MagicHD User Manual
Version 1.6.5.0
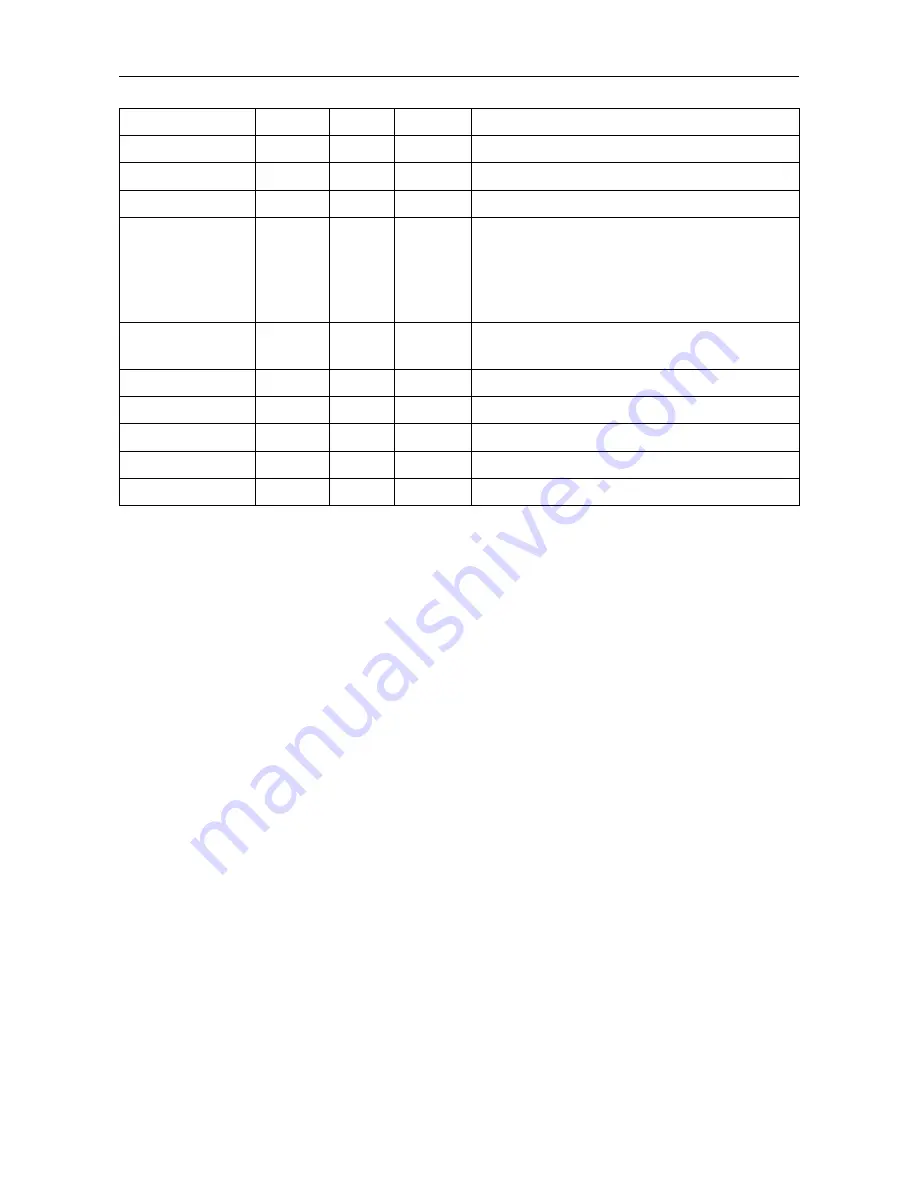
Colour Effect
FX R
FX G
FX B
Result
Posterise
3
3
3
Each of R,G,B quantised to 4 levels.
Colourise
255
130
40
Sepia
Colourise
0
255
0
Black & Green (“night vision”)
Mask
0
-
-
The layer is used as a mask. The lighter the
image, the more transparent it is. If the image
is black and white, white will show the layer
below, and black will not (and will show as
black).
Key
85
128
255
“Green screen” : any pure green will become
transparent.
RGB Select
3
2
1
RGB → BGR colour swap
RGB Select
5
6
7
Inverted colour
RGB Select
8
8
8
Inverted black and white
RGB Select
0
2
0
Green only (similar to Black & Green)
RGB Select
0
4
0
Black & Green
5.9 Blend
Blend controls how each layer is blended with the one below, in terms of colour and intensity.
Blending takes place from the lowest layer upwards: Layer 2 blends with Layer 1, then Layer 3
blends with the result of 1 and 2, and so on.
Normally layers are simply blended by brightness and transparency: when a layer is completely
opaque (full intensity, no mask), nothing can be seen through it. Normally, as a layer is faded, it
becomes transparent so things below it start to show through. If a mask is applied, dark areas of the
mask make the layer transparent, allowing layers beneath to show through.
5.10
Folder and File
These allow the media for the layer to be selected. If either are zero, the layer is switched off.
5.11
Start and End Frame
Start and end frame allow frame-wise control of which part of a movie is played. The default values
are a start frame of zero and an end frame of 2
23
which mean the whole file is to be used. If the end
frame is less than the length of the clip, playback will stop (or loop) when the end frame is reached.
Similarly playback can be started at any point in the file by setting the start frame.
To set the start and end frame accurately, use the
First Frame
or
Last Frame
play mode whilst
changing the start or end frame values respectively. Turning on the HUD for the layer being
programmed will also help since the start and end frame markers are shown on the media bar (see
section 8.1.
To take complete control of playback speed (e.g. to bounce a clip between two points in time to a
beat), use “First Frame” play mode, then apply a ramp effect to the start frame channel.
Note:
Page 25 of 51


