100380 - REAR TiNE TiLLER
TiLLiNG TiPS AND TECHNiqUES
21
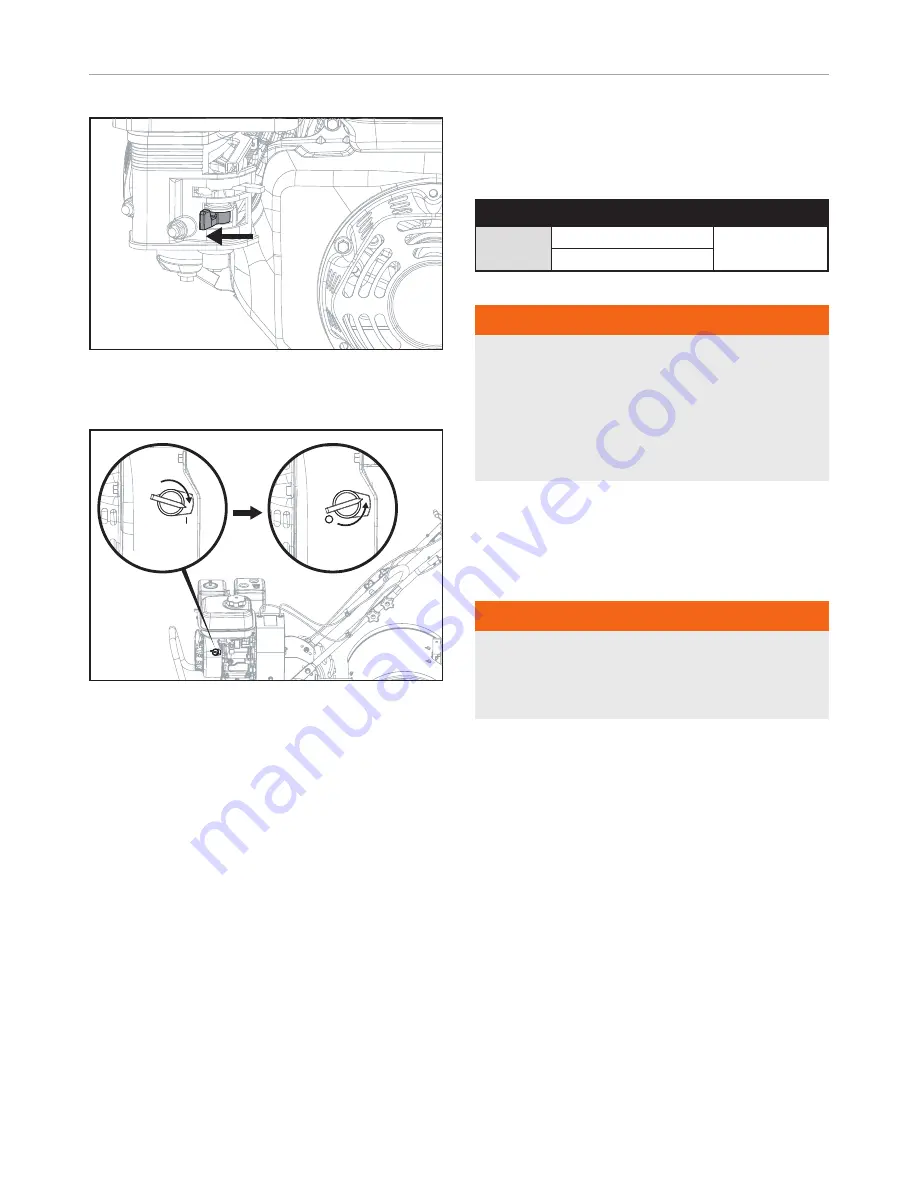
2. Turn the fuel valve to the “OFF” position.
3. Let the engine run until fuel starvation has stopped the
engine. This usually takes a few minutes.
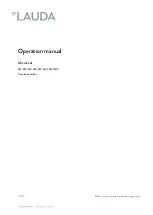
4. Turn the engine switch to the “OFF” position.
OFF
ON
Operation at High Altitude
The density of air at high altitude is lower than at sea level.
Engine power is reduced as the air mass and air-fuel ratio
decrease. Engine power and generator output will be reduced
approximately 3½% for every 1000 ft. of elevation above
sea level. This is a natural trend and cannot be changed by
adjusting the engine. At high altitudes increased exhaust
emissions can also result due to the increased enrichment of
the air fuel ratio. Other high altitude issues can include hard
starting, increased fuel consumption and spark plug fouling.
To alleviate high altitude issues other than the natural power
loss, CPE can provide a high altitude carburetor main jet.
The alternative main jet and installation instructions can be
obtained by contacting our Technical Support Team. Installation
instructions are also available in the Technical Bulletin area of
the CPE website.
The part number and recommended minimum altitude for the
application of the high altitude carburetor main jet is listed in
the table below.
In order to select the correct high altitude main jet it is
necessary to identify the carburetor model. For this purpose,
a code is stamped on the side of the carburetor. Select the
correct high altitude jet part number corresponding to the
carburetor code found on your particular carburetor.
Carb. Code high alt. Jet Part Number min. altitude
Z530610
16161-Z010310-0000
3000 ft. (914 m)
6000 ft. (1829 m)
16161-Z050210-0000
WARNiNG
Operation using the alternative main jet at elevations lower
than the recommended minimum altitude can damage the
engine. For operation at lower elevations, the originally
supplied standard main jet must be used. Operating the
engine with the wrong engine configuration at a given
altitude may increase its emissions and decrease fuel
efficiency and performance.
TiLLiNG TiPS AND TECHNiqUES
Tilling Depths
WARNiNG
Before tilling, contact your telephone or utilities company
and inquire if underground equipment or lines are used
on your property. Do not till near buried electric cables,
telephone lines, pipes or hoses.
Avoid pushing down on the handlebars in an attempt to force
the tiller to dig deeper. Doing so takes the weight off the
powered wheels, causing them to lose traction. Without the
wheels helping to hold the tiller back, the tines will attempt to
propel the tiller – often causing the tiller to skip rapidly across
the ground. (Sometimes, slight downward pressure on the
handlebars will help get through a particularly tough section
of sod or unbroken ground, but in most cases this wont be
necessary.)
Avoid trying to dig too deeply too quickly, especially when
busting sod or when tilling soil that hasn’t been tilled for some
time. Use shallow depth regulator settings (only an inch or two
deep) for the first passes through the soil. With each succeeding
pass, dig another inch or two deeper. (Watering the area a few
days prior to tilling will make the tilling easier, as will letting the
newly worked soil set for a day or two before making a final,
deep tilling pass.


