CHA RXL
Page 8
Receive Loop Assembly
The CHA RXL antenna and can be permanently mounted on an outdoor TV-style antenna mast, used portable on an
apartment balcony, or next to an RV, using a camera tripod, or indoors placed on a table top. Prepare the CHA RXL
for the intended installation method and then assemble the loop using the procedures below.
Mast Mount.
Perform the following steps to prepare the CHA RXL for mast mounting, see plates (7)-(9). If not
mounting the CHA RXL on a mast, skip to the Loop Assembly procedure.
1.
Layout the mast mounting hardware as shown in
the right photograph in plate (5).
2.
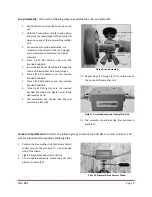
Insert both U-Bolts through the U-Bolt Holes (i) in
the outside of the Mounting Bracket (g), as
shown in plate (7).
3.
Place a ¼” Flat Washer over each of the four
threaded bolts of the inserted U-Bolts.
4.
Place a ¼” Split Washer over each of the four
threaded bolts of the inserted U-Bolts.
5.
Thread a ¼” Nut over each of the four threaded
bolts of the inserted U-Bolts.
Plate 7. Mast Mounting Bracket Assembly.
6.
Position the Preamplifier Unit (b) upside down on
the work surface.
7.
Place the Mounting Bracket on the bottom of the
Preamplifier Unit, as shown in plate (8).
The
Mounting Bracket can be installed in either
direction, depending on your installation
requirements.
Plate 8. Attaching Mounting Bracket.
8.
Insert a
¼”
Allen Head Bolt through both
Preamplifier Mounting Holes (h) and into the
corresponding threaded holes in the Preamplifier
Unit mounting plate on the bottom of the
Preamplifier Unit.
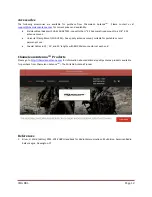
9.
Tighten both Allen Head B
olts using a 5/32” Allen
wrench until tight, as shown in plate (9).
Plate 9. Tightening Allen Head Bolts.

