background image

8

12


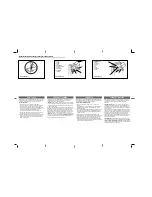
LEFT


/


RIGHT


HAND


INSTALLATION

LEFT
(handing must
be changed
during limit
setting)

RIGHT
(factory
default
setting)

Inside garage looking out

Note: A ballooning door may delay the safety reversal
response and can compromise garage door security.

• To remedy any ballooning place self tapping metal screws

or rivets where the curtain leaves the roll. Secure these
through the curtain into the drum wheel at each end of the
roll.

• After determining the correct fastener location as shown, lift

the door approximately half a turn from the closed position
to allow access for drilling.

Free curtain

Ballooning

Add fasteners here

Door closed

Door can be
lifted

Door secure

11

10


PINNING


THE


DOOR

Summary of Contents for WeatherDrive LM555EVGBSA

Page 1: ...ing Garage Door Opener LM555EVGBSA Engineered and designed in Australia Chamberlain Australia Pty Ltd PO BOX 1446 Lane Cove NSW 1595 AUSTRALIA www liftmaster me com Keep these instructions for future...

Page 2: ...a strong jet of water from all practicable directions Protection against temporary immersion than second numeral 7 agreement but no less severe submersion tests subject to Protection against continou...

Page 3: ...supply to the garage door opener before making repair removing covers or carrying out other maintenance WARNING Important safety instructions It is important for the safety of persons to follow all in...

Page 4: ...he curtain or is a smaller diameter additional clearance may be required 95 mm Minimum distance from edge of curtain to edge of door bracket 40 mm Direct clamping method The maximum allowable door hei...

Page 5: ...onnected to the garage door Lift the door to about halfway and then release it The door should remain spring balanced Raise and lower the door to determine if there are any sticking or binding points...

Page 6: ...used to SAVE the REMOTE CONTROLS 6 Key Lock used to lock the engage disengage mechanisim for commercial applications 7 LEDs 1 Program DOWN and Diagnostic code indicator Number 1 2 Program UP indicator...

Page 7: ...may fall rapidly due to weak or broken springs or being out of balance OPERATING THE MANUAL RELEASE The manual release mechanism enables the door to be manually operated during power outages or in an...

Page 8: ...y To remedy any ballooning place self tapping metal screws or rivets where the curtain leaves the roll Secure these through the curtain into the drum wheel at each end of the roll After determining th...

Page 9: ...mounting bracket from the wall Install the opener Slide the opener over the door axle and engage the drive legs into the door drum wheel either side of a spoke Refit the door mounting bracket to the w...

Page 10: ...ly 8 Press and release the UP button The door will travel to the OPEN position with LED 2 flashing LED 1 starts flashing when OPEN position is reached 9 Press and release the DN button The door will t...

Page 11: ...ction card is attached to the rope as detailed in section 8 Read the safety instructions page 3 for further details concerning safety FIXING WARNING LABELS 40 mm Test obstacle 40 mm TESTING THE SAFETY...

Page 12: ...ector System is installed and needs to be removed the opener will need to be reprogrammed Perform the power ON OFF sequence as follows Remove the IR wires from the opener Turn the mains power OFF for...

Page 13: ...into the opener before mounting the unit as detailed in the Wireless Programming section TRAVEL SPEED OPTIONAL There are two travel speeds available for this opener Regular and Slow speed The WeatherD...

Page 14: ...132A2940 Flash x 2 BEEP E LOCK Start with the door fully OPEN Press Release all The control panel is now LOCKED and pressing any button will only allow the courtesy light to turn ON Transmitters remai...

Page 15: ...s together for 3 seconds figure 2 Release when the Courtesy light flashes once 3 Press the Remote Control button that you have allocated for this feature figure 3 Do not use the button already allocat...

Page 16: ...onal identification number PIN of your choice on the keypad 4 Press and hold the ENTER button Check to see if the courtesy light flashes Release the ENTER button after the light flashes To change an e...

Page 17: ...Month Repeat safety reverse test Make any necessary adjustments section 13 Manually operate door If it is unbalanced or binding call for professional garage door service Check to be sure door opens an...

Page 18: ...enuine accessories are approved for use with this opener Generic compatible accessories are NOT approved for use with this opener NOTE The terminal block is weather protectedby a rubber grommet When u...

Page 19: ...essory If the red light on the beam is flashing the alignment is incorrect The red light on the beams may not be on if the opener is in Standby mode Activate the door to temporarily exit standby mode...

Page 20: ...ily obstructed Realign both sensors to ensure both LEDs are steady and not flickering Make sure nothing is hanging or mounted on the door that would interrupt the sensors path while closing No RPM pul...

Page 21: ...1 Liftmaster IP34...

Page 22: ...2 X X 1 2 3 4 5 6 1 2 3 4 5 6 7 8 IP IP AS 1939 5 IP IP AS 1939 6 0 50 12 5 2 5 2 5 1 1 1000 150 0 15 60 7...

Page 23: ...40 Protector SystemTM 400 40 1 5 1702 EV 3 4 4 4 5 6 7 8 9 10 11 12 13 13 14 14 15 16 17 17 17 17 18 19 20 3...

Page 24: ...7 1 2 1 2 3 4 5 6 7 8 9 10 11 3 4 1 2 U 3 8 10 13 4 300 5 5 5 6 7 8 8 9 2 5 6 13 10 8 1 8 11 10 8 5 5 3 5 5 15 Protector System IR 400 40 35 40 95 40 4 12...

Page 25: ...5 4 15 5 U 6...

Page 26: ...6 7 1 1 2 IR 3 IR IR 4 24 50 2 DN 3 UP 4 P 5 S 6 7 LED 1 1 2 3 2 8 3...

Page 27: ...7 8 8 1 8 10 9...

Page 28: ...8 11 12 10 11...

Page 29: ...9 13 U U 25 28 1 8 25 28 12...

Page 30: ...LED 3 P 1 2 3 1 2 3 DN UP P S 1 2 3 DN UP P S 1 2 3 DN UP P S 4 UP UP DN 5 P 6 DN UP DN 7 P LED 2 8 UP LED 2 9 DN LED 1 LED 1 S LED 2 UP LED 1 DN LED 1 4 5 6 7 8 9 1 2 3 DN UP P S 1 2 3 DN UP P S 1 2...

Page 31: ...11 1 5 1 8 15 50 12 16 1 8 8 3 1 8 1 5 40 40 14 15...

Page 32: ...ROTECTOR SYSTEM IR 400 40 The Protector System The Protector System IR IR 5 5 5 IR Chamberlain IR TTC TCC 10 180 IR TTC IR P DN 3 UP 10 DN P P DN 3 P 1 2 3 DN UP P S 1 2 3 DN UP P S 1 2 3 DN UP P S IR...

Page 33: ...13 18 128 EV 1 5 128 EV 19 WeatherDrive LM555EV 3 DN UP UP DN 3 1 2 3 DN UP P S 1 2 3 DN UP P S 17 18...

Page 34: ...14 20 WeatherDrive LM555EV S DN 3 1 2 3 DN UP P S 21 WeatherDrive LM555EV S UP 3 1 2 3 DN UP P S 19 20...

Page 35: ...15 22 PET 1 1 PET 1 2 3 2 PET P UP 3 2 DN UP P S 3 3 1 2 3 1 2 PET P UP 3 2 DN UP P S 1 2 3 21...

Page 36: ...16 23 2 1 2 3 DN UP P S 3 S 1 1 2 S 2 3 3 1 1 S 8 2 747 EV PIN 1 S 2 S 3 4 PIN 4 ENTER ENTER PIN 1 PIN 2 3 PIN 4 ENTER 4 PIN ENTER 1 2 3 DN UP P S 1 2 3 DN UP P S S S PIN 4 _ _ _ _ ENTER ENTER 22...

Page 37: ...17 128 EV Protector System 3 14 13 Liftmaster Protector System TM 32 O300 500 15 120 2 15 IP 4 IP34 IP 5 1 2 64 868 434 54 433 92 433 30 25 55 LM555EV 120 50 60 240 220...

Page 38: ...18 24 1 128 EV 2 TX4UNI 3 747 EV 4 760 EV 5 1702 EV IR EV771 6 EV75 7 4 5 6 7 Liftmaster 25 WEATHERDRIVE LM555EV 1 2 3 4 1 2 3 4 24 com n o Com IR 23 24 2...

Page 39: ...19 1 3 2 3 4 5 6 7 10 The Protector System LED 8 7 9 10 8 11 12 LED 13 TX4UNI...

Page 40: ...20 26 LED 1 2 LED 1 LED 3 1 1 1 2 1 3 1 4 LED 1 5 RPM RPM 2 1 PCB 15 2 2 PCB 15 2 4 15 4 1 4 2 25 114A5572A...

Reviews: