background image

18

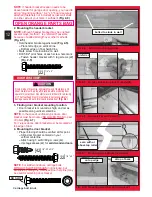
CONNECTING TO POWER

FOR HELP-1.800.929.3667 OR OVERHEADDOOR.COM

5

1. Plug the operator into a properly grounded 

electrical outlet

.

2. Check Safe-T-Beam

®

alignment (Fig. 6-3)

.

To reduce the risk of electrical shock, this 
equipment has a grounded type plug that includes
a third (

grounding

) pin. This plug will only fit a

grounded type outlet. If you do not have a 
grounded outlet, contact a qualified electrician to
install one. DO NOT alter the plug in any way. The
door operator must be properly grounded in order
to prevent personal injury and damage to 
the components.

WARNING

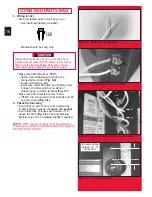
FIG. 6-1 Removing motor cover.

Check local building codes to make sure that you
are not required to have your garage door operator
permanently wired, with circuit breaker protection.
If permanent wiring is required, have this installed
by a qualified electrician.

CAUTION

1. Instructions for electrician

.

Remove power from circuit.

Remove motor cover 

(Fig. 6-1)

.

Removing hex head screw located in center 
on bottom of cover.

Slide cover down and off.

Remove and throw away existing power cord.

Remove 7/8" knockout plug 

(Fig. 6-2)

Install a suitable entrance bushing.

Connect permanent wiring to power head

.

White to white

/

black to black

/

ground to green

Use only UL recognized wire nuts. 

Wires inside power head must be at least 6" 
in length.

Replace motor cover, and re-energize 
the circuit.

2. Check Safe-T-Beam

®

alignment (Fig. 6-3)

.

The electrical power to the door operator MUST
BE turned off when the motor cover is removed.
Electrical power must remain off while making 
electrical connections.

WARNING

WITH GROUNDED PLUG:

WITH PERMANENT WIRING:

The circuit board is light sensitive. Make sure 
the motor cover has been replaced prior to 
re-energizing the circuit.

CAUTION

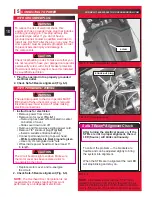
Safe-T-Beam

®

Alignment Check

FIG. 6-2 Knock-out plug.

NOTE

: The Overhead Door Corporation is not

responsible for charges resulting from work 
performed by an independent electrician.

FIG. 6-3

screw

knock-out plug

After turning the electrical power on, if the
STB’s are not in proper alignment, the red
LED (Source) will blink continuously.

To correct the problem — the brackets are
flexible and can be adjusted slightly to bring
the system into alignment.

When the STB’s are in alignment the red LED
will stop blinking and stay on.

NOTE: 

If a problem exists with the “STB” that is 

preventing the door from closing, the door can be
closed by holding the wall control button in until the
door is fully closed. (The remote control will not work.) 

Summary of Contents for Python2 Series OCG

Page 1: ...talled to close door SAVE THIS MANUAL FOR FUTURE REFERENCE NOTE Your Operator comes with a Rail Assembly which is standard for up to a 7 foot 6 inch high door An extension kit for an 8 foot high door is available For Answers and Assistance 1 800 929 3667 or visit www overheaddoor com Includes Remote Control and SERIES II Electronics Series OCG ...

Page 2: ...NOT SHOWN If your garage does not have a separate entry door you might want to consider an emergency release kit GER 2 for installation on your garage door See page A at the center of this manual 5 You need a 110 120 Volt power supply available If you plan to plug the unit into a standard electrical outlet is one available The outlet should be no more than about 3 feet from the power head once it ...

Page 3: ...929 3667 OR OVERHEADDOOR COM TYPICAL SUPPORT BRACKET EXTENSION SPRING OR TORSION SPRING SAFE T BEAM BRACES ADDED HEADER BRACKET MOUNTING BOARD TYPICAL 1 PIECE DOOR INSTALLATION 48 POWER CORD TO 120V GROUNDED OUTLET 4 1 3 6 2 3 5 SECTIONAL DOOR 1 PIECE DOOR ...

Page 4: ... inside garage Independent light control allows convenient manual control of the automatic lighting system NOTE Your garage door operator may not come with all above items included as standard equipment Operator MUST be installed with the included Wall Control SAFETY FEATURES Safe T Beam STB Non Contact Reversing System Puts an invisible beam across the door opening The door stops and reverses to ...

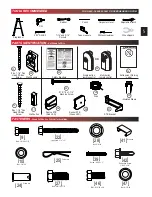
Page 5: ...6 35 33 31 32 37 FASTENERS Shown Full Size See Parts List for description Lag screw 1 4 x 2 22 Screw 8 32 x 1 39 Self drilling Screw 1 4 20 x 3 4 42 Nut 1 4 20 10 Cotter pin 25 Clevis pin 24 Wire clip 41 Bolt 3 8 16 x 7 8 27 Nut 3 8 16 28 Bolt 1 4 20 x 5 8 9 34 Wall console Wall button Nut 5 16 18 47 6 x 1 1 4 Pan Head Phillips Screw Safety Brochure Entrapment Warning Label 10 16 x 1 1 4 Machine S...

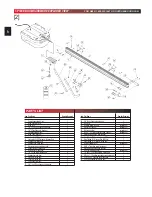
Page 6: ...DED VIEW FOR HELP 1 800 929 3667 OR OVERHEADDOOR COM 2 10 13 39 3 9 11 25 15 16 23 28 17 27 25 26 42 24 20 12 18 47 22 9 10 39 41 14 22 Item Part Name Number Required 28 3 8 16 hex flange nut yellow bag 2 29 Wire box 1 30 Insulated staple red bag varies model 31 Wall button red bag varies model 32 Wall console box varies model 33 No 6 x 1 1 4 flat head phillips screw red bag varies model 34 Entrap...

Page 7: ...e words Danger Warning and Caution are used to emphasize important safety information The word DANGER means that severe injury or death will result from failure to follow instructions WARNING means that severe injury or death can result from failure to follow instructions CAUTION means that property damage or injury can result from failure to follow instructions The word NOTE is used to indicate i...

Page 8: ...om has 4 holes in the boom strap end The hole furthest away from the end is for an extension kit if needed Drive chain can slide out of booms Do not run until operator is fully assembled CAUTION Make sure that the carriage magnet is in place in the top of the carriage slide CAUTION 10 9 BOOM ASSEMBLY Use a clean flat surface Boom is up side down 2 Slip carriage into carriage slot of boom Flip the ...

Page 9: ...f the power head you can then push it the rest of the way It is a snug fit Securely fasten with 2 bolts 9 and nuts 10 Fig 1 4 OPEN GREEN PARTS BAG FIG 1 3 Slip carriage slide into boom FIG 1 4 Attach boom to power head magnet 4 Attach emergency release cord knob and tag Tie overhand knot in 1 end of cord Tighten knot FIG 1 5 inset A Slip opposite no knot end through knob Slip through hole in emerg...

Page 10: ...ire Fig 1 6 Turn set screws 39 into threaded holes just enough so screw stays in place Fig 1 6 Point arrow on top CLOSE limit switch toward door end of boom Place CLOSE limit switch Brown wire on boom about 12 from boom strap Fig 1 7 Gently tighten set screw enough to keep switch from moving Point arrow on top OPEN limit switch toward door end of boom Place OPEN limit switch white wire on boom whe...

Page 11: ...high object on the floor at the center of the doorway This is the size of a 2 x 4 board laid flat HEADER AND DOOR MOUNTING BRACKETS 1 Finding header bracket mounting location Close garage door Use a pencil Mark center of garage door one half overall width with 6 vertical line at top edge of door Continue this line on wall above door for about 12 Fig 2 1 Raise garage door until top edge of door rea...

Page 12: ...G 2 Mounting the header bracket NOTE Although header bracket may be oriented several ways method 1 is preferred if possible because of added strength over other methods Fig 2 5 Hold header bracket against wall Fig 2 5 Place left edge on vertical line Bottom edge on final height line Mark screw hole locations on wall Drill 5 32 pilot holes at each screw hole mark Fasten header bracket with 3 lag sc...

Page 13: ...t clear door at highest point of travel Be level or power head slightly below level Trackless doors Boom must clear door at highest point of travel by 1 to 1 1 2 Securely tighten power head mounting bolts 46 and nuts 47 Lower door Fully tighten boom strap nut DO NOT PLUG UNIT IN YET 3 Adjusting length of emergency release cord Check release knob height Low enough you can reach it High enough to cl...

Page 14: ...oor arms sectional doors 27 28 INSTALL DOOR ARMS 1 piece doors OPEN YELLOW PARTS BAG 1 Attach the arms Straight arm to door bracket using clevis pin 24 cotter pin 25 Fig 2 12 Curved arm to carriage using clevis pin 24 cotter pin 25 Fig 2 12 2 Connecting the arms Slide carriage back and forth to adjust arm length Overlap arms as little as possible Make overall length as long as possible Fasten arms...

Page 15: ...Determine which side of garage receives most direct sunlight Fig 3 4 Red LED should always be on sunny side whenever possible Fig 3 4 For multiple doors Preventing crossed signals is critical Place source and sensor modules on adjacent doors facing in opposite directions Fig 3 4 NOTE To helppreventinterferencefrom sun STB sensors Green LED may be placed further away from the door opening where the...

Page 16: ...heck the following Insure that no part of door or its hardware is in path between lenses of source and sensor Insure that tops of lenses are between 5 6 above the floor Fig 3 9 The brackets are flexible and can be adjusted slightly if needed NOTE STB alignment check must be performed following connection to electrical power see page18 DO NOT PLUG IN YET Staples which are too tight can cut or pinch...

Page 17: ...ten wall control to wall with 2 screws either wall button or console use 33 Fig 5 3 Remove protective backing from entrapment warning label Fig 5 4 Stick label on wall near wall control NOTE Additional wall controls are available from your dealer ONLY ONE OF YOUR WALL CONTROLS MAY BE THE LIGHTED TYPE If you have a lighted wall control all your additional controls must be un lighted More than one l...

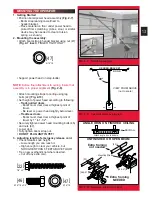
Page 18: ...g Connect permanent wiring to power head White to white black to black ground to green Use only UL recognized wire nuts Wires inside power head must be at least 6 in length Replace motor cover and re energize the circuit 2 Check Safe T Beam alignment Fig 6 3 The electrical power to the door operator MUST BE turned off when the motor cover is removed Electrical power must remain off while making el...

Page 19: ...ong boom to align front edge of switch with back edge of carriage Fig 7 4 Gently tighten set screw Manually close door Place emergency release lever in engaged position Press wall control button Carriage slide will move toward door engage with carriage and stop at CLOSE limit switch 2 Adjusting OPEN force Press wall control button Door should open and stop at OPEN limit Door does not fully open Pr...

Page 20: ...terference to radio communications However there is no guarantee that interference will not occur in a particular installation If this equipment does cause harmful interference to radio or television reception which may be determined by turning the equipment off and on the user is encouraged to try to correct the interference by one or more of the following measures Re orient or relocate the recei...

Page 21: ...y replacement Use coin ball point pen or similar device Gently push straight in on battery cover lock tab as shown Fig 9 1 Flip open battery cover Remove old battery Make sure new battery is facing proper direction Match battery polarity with symbols inside battery cover fig 9 2 Recommended replacement battery is Eveready A 23 12 volt Slip new battery into place Snap battery cover shut Operate rem...

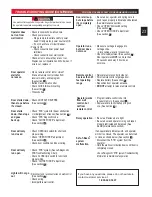
Page 22: ... SENSOR MISSING OR BAD 2 SENSOR DEFECTIVE 1 CHECK WIRING 2 CALL CUST SERV OFF 3 BLINKS PAUSE REPEAT ON 1 SENSOR RECEIVING INTERFERENCE 1 ATTEMPT TO DETERMINE SOURCE OF INTERFERENCE 2 CALL CUST SERV 4 BLINKS PAUSE REPEAT ON 1 SOURCE NOT SENDING PULSES 2 SOURCE DEFECTIVE 1 CALL CUST SERV 2 CALL CUST SERV NOTE IF OPERATING PROBLEM EXISTS THE DOOR CAN BE CLOSED IF YOU DISCONNECT THE STB SYSTEM FROM TH...

Page 23: ...epair properly lubricated and balanced See maintenance section Check OPEN limit switch setting See section Check OPEN FORCE adjustment See section Make sure carriage is engaged to carriage slide place carriage lever in lock position Check force adjustment See section Door operator will NOT run more than 30 seconds each way if door does not move Relocate remote control inside car Point remote contr...

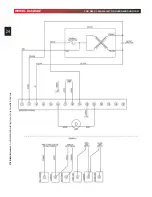
Page 24: ...24 WIRING DIAGRAM FOR HELP 1 800 929 3667 OR OVERHEADDOOR COM STB Bracket Extensions Provides additional bracket length where it may be needed for clearance ...

Page 25: ... diferentes a las reglamentaciones de los Estados Unidos y del Canadá antes de usar los mismos Les émetteurs sont conformes à la réglementation américaine et canadienne à compter de leur date de fabrication Aucune garantie n est stipulée indiquant qu ils sont conformes à toutes les prescriptions juridiques d autres autorités Si les émetteurs sont utilisés dans d autres pays il incombe à l importat...

Page 26: ...nal purchaser and is not transferable Repair or replacement labor is included for a period of one year from the date of installation After one year all labor charges will be the responsibility of the owner This warranty applies only to the original purchaser and is not transferable This warranty does not apply to any operator installed in a commercial industrial or other non residential applicatio...

Page 27: ...moto de lujo con CodeDodger Télécommande de luxe avec CodeDodger 2 Button Remote Control with CodeDodger Controlador remoto de 2 funciones con CodeDodger Télécommande à 2 fonctions avec CodeDodger 3 Button Remote Control with CodeDodger Controlador remoto de 3 funciones con CodeDodger Télécommande à 3 fonctions avec CodeDodger 3 Button Mini Remote Control with CodeDodger Minicontrolador remoto de ...

Page 28: ...OverHead Door Corporation Access Systems Division 22790 Lake Park Blvd Alliance Ohio 44601 Call 1 800 929 3667 Web www overheaddoor com ...

Reviews: