background image

14

U1 

PO

W

ER 

TIMER 

DEFEA

MAS 

MR

RADIO 

MID 

TIMER 

TIMER 

E

N

ABLE 

T TS 

FSTS 

E2 

RELA

Y A 

RELA

Y B 

D1 DIA

C2 

B2 PR

OG 

24

V


AC


24

V


AC


TIMER 

DEFEA

CM

N


MAS 

EYES 

EDGE 

OPE

N


CLOSE 

ST

OP 

CM

N


SBC 

11 

10 

14 

13 

12 

8


CLOSE 

ST

OP 

OPE

N


EDGE 

OLS 

MID 

SLS 

MOTO

DIRECTIO

N


CLS 

D25 

D24 

D26 

D27 

D36 

C77 

C73 

C54 

C78 

L1 

L5 

P6 

D35 

S

8


D16 

P7 

EYES 

K3 

P1 

D34 

F1 

F

AILSAFE 

(B2  C2  D1  E2

N

O

N

 F

AILSAFE 

D23 

D15 

D1 

D22 

R8 

J1 

X1 

E1 

R29 

C18 

D8 

U7 

R31 

D31 

C3

Ø 

D7 

D6 

D5 

D4 

C25 

C17 

C11 

D3

Ø

P1

Ø 

P4 

Ø

14LG

Ø

657–A  

Ø

14GP

Ø

657–A 

J3

ØØ 

D2

Ø 

D21 

D13 

D14 

D28 

D17 

D19 

SBC 

C71 

® 

Remove Jumper

To Install External

Door Interlock

3-Button

Station

Maintenance

Alert LED

(RD) (WH)

Open

Close

Stop

Open/Close

Single Button

Sensing

Edge

CPS-L & CPS-LN4

Hoist Interlock

When Present

TMR DEF

SWITCH

MO

V


MO

V


NOTE: 

Lock Sensor is provided on Models 

DJ and DH only, red wire from main harness 
connects to NC on Bypass L/S and to NO on 
Lock Sensor switch. White wires connect the 
COM on Bypass L/S and Lock Sensor switch to 
NC on Open L/S

.

(WH)

(WH)

(WH)

(RD)

(PU)

(YE)

COM

NO

NC

NO

NC

COM

NO

NC

COM

OPEN  L/S

NO

NC

LOCK

SENSOR

(see note at left)

CLOSE  L/S

SAFETY  L/S

(WH)

(RD)

NO

NC

COM

BYPASS

L/S

(WH)

(RD)

(YE) (BL) 

(YE) 

(OR) 

(

W

H) 

(YE) 
(PU) 

(

W

H) 

(RD) 
(GY) 
(YE) 
(RD) 

(

W

H) 

(PU) 
(YE) 
(OR) 

(GY) 

(OR) 

(PU) 

(

W

H) 

(

W

H) 

(

W

H) 

(

W

H) 

(

W

H) 

(

W

H) 

(GY) 

(YE) 

(

W

H) 

(GY) 

(

W

H) 

(

W

H) 

(

W

H) 

(

W

H) 

(

W

H) 

(PU) 

(BR) 

(BR) 

(YE) 

208/ 230 / 380 / 460

VOLT 3PH.

POWER IN

(BK) 

COM 120 

V

AC 

240 / 460 / 

575  

V

AC 

+24 

V

AC 

-24 

V

AC 

COIL 

COIL 

COM 

COM 

N

N

See Motor

Connections

See Motor

Connections

8


0 1 

8


0 1 

A

B

C

D

OPEN

CLOSE

STOP

NOTE: 

Gray (GY) and purple (PU) motor

wires are reversed for H and HJ right hand
models and all GH and J models.

575V BRAKE

(WHEN PRESENT)

1

2

3

(GY)
(BR)

(PU)

(BR)

(BL/BK)

(BL/BK)

(YE)

230V BRAKE

(WHEN PRESENT)

J

T4

T7

T1

T5

T8

T2

T6

T9

T3

(GY)
(BR)

(PU)

(BR)
(YE)

J

230V BRAKE

(WHEN PRESENT)

J

T4

T7

T1

T5

T8

T2

T6

T9

T3

(GY)
(BR)

(PU)

(BR)
(YE)

J

208/230V MOTOR CONNECTION

460V MOTOR CONNECTION

575V MOTOR CONNECTION

(

W

H) 

(RD) 

(YE) 

(GY) 

(

W

H) 

(OR) 

(YE) 

1   2   3   4 

RPM Board

Radio

R1  R2  R3 

L3   L2   L1


L O G I C   ( V E R .   3 . 0 )   3   P H A S E   W I R I N G   D I A G R A M

Summary of Contents for H

Page 1: ...self diagnostic feature built into the MAS Maintenance Alert System LED An LED on the 3 button station will signal when the set number of cycles months is reached or when the operator requires immediate service This Operator Features the Enhanced Radio Receiver Built on Board Serial Box Installation Date 2 Y E A R W A R R A N T Y 315MHz Visit www LiftMaster com to locate a professional installing ...

Page 2: ...ON Control Wiring Connections 11 Mounting Instructions 11 External Radio Wiring Connections 11 DIAGRAMS Standard Power Control Connection Diagrams 12 1 Phase Wiring Diagram 13 3 Phase Wiring Diagram 14 Logic Board 15 PROGRAMMING Logic Control Pushbuttons 16 Determine and Set Wiring Type 16 Failsafe Wiring Types 17 Self Monitoring Safety Device Options 17 Programming Remote Controls 18 19 Maintenan...

Page 3: ...EAD ASSEMBLY OWNER S MANUAL AND CAUTION LABELS HARDWARE BOX INCLUDES FASTENERS DISCONNECT AND CHAIN HOIST WALL BRACKET 3 BUTTON CONTROL STATION WITH LED HOIST HAND CHAIN MODELS H AND HJ ONLY DOOR SPROCKET DOOR OPERATOR DRIVE CHAIN 14 50 63 83 cm 6 94 17 63 cm 7 56 19 2 cm 8 34 21 18 cm 7 62 19 35 cm 4 62 11 7 cm 16 81 42 7 cm 4 41 11 2 cm 20 15 51 18 cm Hand Chain Wheel Present with Models H and H...

Page 4: ...NT See Motor Nameplate ELECTRICAL TRANSFORMER 24Vac Secondary CONTROL STATION NEMA 3 Button Station Open Close Stop w LED WIRING TYPE C2 Standard Momentary contact to OPEN and STOP constant pressure to CLOSE plus wiring for sensing device to reverse and auxiliary devices to open and close with open override See pages 16 and 17 for optional wiring types and operating modes LIMIT ADJUST Linear drive...

Page 5: ...systems the handing of the operator must be determined at the time of order The handing is indicated by last letter of the model name R or L The hand chain wheel can not be switched on site If your installation causes the hand chain to hang in the door opening hook the chain off to the side near the top of the door jamb To prevent possible SERIOUS INJURY or DEATH DO NOT connect electric power unti...

Page 6: ...t this time 4 Wrap drive chain around door sprocket and join roller chain ends together with master link 5 Raise operator to approximate mounting position and position chain over operator sprocket 6 Raise or lower operator until the chain is taut not tight Make sure the operator output shaft is parallel to door shaft and sprockets are aligned When in position secure the operator to wall or mountin...

Page 7: ...ct chain must be released from the chain keeper before the door will operate again electrically MODEL J This operator has a floor level disconnect chain to disconnect the door from the door operator 1 To disengage pull the chain and secure in the disengaged position by slipping the end through the keyhole bracket mounted on the wall Or if emergency egress device is used pull handle to disengage op...

Page 8: ...rd to junction box not provided fastened to the wall approximately halfway up the door opening A D J U S T M E N T To avoid SERIOUS PERSONAL INJURY or DEATH from electrocution disconnect electric power BEFORE manually moving limit nuts ATTENTION AVERTISSEMENT AVERTISSEMENT AVERTISSEMENT WARNING CAUTION WARNING WARNING WARNING LIMIT SWITCH ADJUSTMENT NOTE Make sure the limit nuts are positioned bet...

Page 9: ...eversal System will return the door to the full open position when closing or stops the door when opening 1 Remove cotterpin from nut on the clutch shaft 2 Back off clutch nut until there is very little tension on the clutch spring 3 Tighten clutch nut gradually until there is just enough tension to permit the operator to move the door smoothly but to allow the clutch to slip if the door is obstru...

Page 10: ...wiring MUST be run in separate conduit ON MENT AVERTISSEMENT AVERTISSEMENT NG N WARNING WARNING WARNING ÓN ADVERTENCIA ADVERTENCIA NCIA GROUND WIRING CONNECTIONS 1 Connect earth ground to the chassis ground screw in the electrical box enclosure 2 Use same conduit entry into the electrical box as the power wiring IMPORTANT NOTE This unit must be properly grounded Failure to properly ground this uni...

Page 11: ...on change is not available on the DJ and DH models EXTERNAL RADIO WIRING CONNECTIONS On all models a radio terminal bracket marked R1 R2 R3 is located on the outside of the electrical enclosure In B2 mode the operator will then open a fully closed door close a fully open door stop an opening door and reverse a closing door from the radio remote In TS control wiring the operator will only open the ...

Page 12: ... WH RD Sensing Edge CPS L CPS LN4 Timer Defeat Switch R1 R2 R3 Radio Control 24V DC only Neutral Hot Gnd Remove Jumper To Install External Interlock Single Phase Power Wiring Three Phase Power Wiring Phase 1 Phase 2 Phase 3 Gnd Line Power 208 230 380 460 575 Vac Three Phase Line Power 115 230 Vac Single Phase 3 Button Station OPEN CLOSE STOP ...

Page 13: ...V MOV YE BL YE OR WH YE PU WH RD GY YE RD WH PU YE OR GY OR PU WH WH WH WH WH PU YE WH WH WH WH YE 115 230 VOLT 1PH POWER IN hot neutral ground BK COM 120 VAC 120 240 VAC 24 VAC 24 VAC See Motor Connections 8 0 1 4 6 2 6 2 8 4 0 1 COIL COM NO C B A WH BL GY YE BR GY See Motor Connections NOTE Lock Sensor is provided on Models DJ and DH only red wire from main harness connects to NC on Bypass L S a...

Page 14: ...and to NO on Lock Sensor switch White wires connect the COM on Bypass L S and Lock Sensor switch to NC on Open L S WH WH WH RD PU YE COM NO NC NO NC COM NO NC COM OPEN L S NO NC LOCK SENSOR see note at left CLOSE L S SAFETY L S WH RD NO NC COM BYPASS L S WH RD YE BL YE OR WH YE PU WH RD GY YE RD WH PU YE OR GY OR PU WH WH WH WH WH WH GY YE WH GY WH WH WH WH WH PU BR BR YE 208 230 380 460 VOLT 3PH ...

Page 15: ...4 F1 FAILSAFE B2 C2 D1 E2 NON FAILSAFE D23 D15 D1 D22 R8 J1 X1 E1 R29 C18 D8 U7 R31 D31 C3Ø D7 D6 D5 D4 C25 C17 C11 D3Ø2 P1Ø P4 Ø14LGØ657 A Ø14GPØ657 A J3ØØ D2Ø D21 D13 D14 D28 D17 D19 CONTACTOR 3 PH SINGLE PHASE SBC C71 Wiring Type Selector Dial Failsafe Switch Maximum Run Timer Button Auxiliary Board Connections Programmed Chip Mid Stop Learn Button Timer to Close Learn Button Radio Learn Button...

Page 16: ...ith wiring for sensing device to stop Compatible with 2 Button E2 Momentary contact to open with override and constant pressure to close Release of close button will cause door to reverse roll back feature plus wiring for sensing device to reverse Compatible with 3 Button Station LOGIC CONTROL PUSHBUTTONS OPEN CLOSE STOP Open Close and Stop buttons are mounted directly on the logic board Thus maki...

Page 17: ...ters the B2 mode Compatible with 3 Button Station 1 Button Station and 1 and 3 Button Remote Controls NOTE Requires Optional self monitoring photo eyes to operate this feature wire type C2 Failsafe Same functions as C2 Self Monitoring safety device must be installed to operate door for each of the following failsafe wiring types See Self Monitoring Safety Device Options Compatible with 3 Button St...

Page 18: ... as 23 Security remote controls or dip switch remote controls PROGRAMMING REMOTE CONTROLS STANDARD SINGLE BUTTON REMOTE CONTROL 1 To enter programming press and release the RADIO button on the logic board LED will light 2 Press and hold the remote control button until the LED flashes rapidly then release remote control button The LED will then remain on solid after releasing the button Repeat to a...

Page 19: ...1 D34 F1 FAILSAFE B2 C2 D1 E2 NON FAILSAFE D23 D15 D1 D22 R8 J1 X1 E1 R29 C18 D8 U7 R31 D31 C3Ø D7 D6 D5 D4 C25 C17 C11 D3Ø2 P1Ø P4 Ø14LGØ657 A Ø14GPØ657 A J3ØØ D2Ø D21 D13 D14 D28 D17 D19 CONTACTOR 3 PH SINGLE PHASE SBC C71 CLOSE STOP OPEN EDGE D1 D22 D2Ø D21 D13 Open Close Stop REMOTE CONTROL PROGRAMMING FEATURE Program Remote Controls from the 3 button control station 3BCS Requires Firmware Ver...

Page 20: ...ge 28 to diagnose problem Example A door is installed with 30 000 cycle springs and has an annual service contract To set the MAS turn selector dial to PROGRAM press MAS button press the STOP button to clear the memory and then press the OPEN button 6 times 30 000 cycles and close 4 times 12 months Press the MAS again to complete the programming Set the selector dial to desired wiring type Special...

Page 21: ... will automatically close after pre set amount of time Great for apartment buildings fire stations and other applications where the end user wants the door to close automatically after a specified amount of time Requirements Must have at least one of the following safety devices attached CPS L CPS LN4 or CPS3 card with valid safety device Wiring type must be set to TS T or FSTS TO PROGRAM MANUALLY...

Page 22: ...ven with multiple inputs Benefit Provides energy cost savings by limiting the door opening height Requirements This feature works in conjunction with the programmable Timer to Close feature To enable this feature you must first connect a treadle photo eye or loop detector accessory to the SBC input and must have at least one of the following safety devices attached CPS L CPS LN4 or CPS3 card with ...

Page 23: ...press and hold the MRT button until the MAS led flashes rapidly Operation will vary depending on wiring type SELECTOR DIAL A U T O M A T I C A L LY L E A R N E D P R O G R A M M I N G AUXILIARY REVERSAL SYSTEM RPM SENSOR Feature This feature utilizes the RPM sensor connected to the logic board to detect when the clutch slips and reverses the door clutch must be properly adjusted In addition the RP...

Page 24: ...ctivating the door to close Benefit Advanced warning of the door closing helps prevent traffic collisions with the door Light Control Module Operation The green lights on the OPTION BOARD will turn on if the board is seated properly and the power is on When the door reaches the full open limit or mid stop the timer circuit and the green lamp holder will be activated Green lamp will not be activate...

Page 25: ...Shafts PROCEDURE Check for excessive slack Check and adjust as required Lubricate Check set screw tightness Check and adjust as required Check condition and tension Check and tighten as required Check and operate Check for wear and lubricate EVERY 3 MONTHS OR 5 000 CYCLES EVERY 6 MONTHS OR 10 000 CYCLES EVERY 12 MONTHS OR 20 000 CYCLES LIFE OF OPERATOR FEATURE ODOMETER CYCLE COUNTER The operator i...

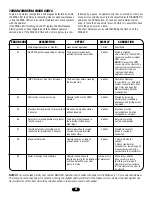
Page 26: ... terminal 12 Timer to close will not close OLS Yellow Pressing the Open Limit Switch should turn ON this LED CLS Yellow Pressing the Close Limit Switch should turn ON this LED SLS Yellow Pressing the Sensing Limit Switch should turn ON this LED Edge Yellow Indicates a closed circuit between common and terminal 8 Pressing the edge should turn ON this LED Mid Stop Yellow Solid on indicates door is s...

Page 27: ...should replaced see wiring diagram turn on and the door should move in the corresponding direction If Relay A or B lights and the door does not move off board relay may need to be replaced see wiring diagram Off Board Relays i Possible accessory malfunction Disconnect all devices reattach them one at a time testing for a failure after each one is replaced j Possible logic board failure Replace log...

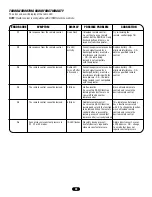
Page 28: ...d as an input E6 Rotary dial in invalid position for greater The door will not respond to 6 blinks Rotary dial must be than 30 seconds the 3 button station or any set to a valid position other input E7 Failsafe Safety device faulted or not Normal operation 5 second 7 blinks Cleared when safety connected for greater than 2 minutes constant pressure override device is cleared or required to close co...

Page 29: ...ence OR 30 seconds discharged battery or outside obtain a qualified remote interference interfering with the control learn process OR the radio being learned is not compatible with the operator R4 The remote control cannot be learned 2 Blinks No free records Erase all learned remote A user enters RADIO function controls and re learn the learning mode but there is no desired remote control space le...

Page 30: ...30 E L E C T R I C A L B O X 1 4 7 6 10 5 2 11 K2 K1 3 9 8 K72 12515 1 K72 14130 1 ...

Page 31: ...3 MOV 580V 6 K79 15016 1 RPM sensor assembly 7 K1A5729 Logic board Logic 3 8 K2A761 Coaxial cable 9 K1C3196 3 Antenna 10 13 10024 Limit Nut 11 23 10041 Limit Switch SERVICE KITS ITEM PART DESCRIPTION K1 K72 14130 1 Limit shaft kit Complete with Limit shaft limit nuts limit bearings limit sprocket interrupter cup shim washers compression ring roll pin and e rings K2 K72 12515 1 Limit switch kit Com...

Page 32: ...32 M O D E L J 12 14 16 15 13 3 8 10 2 9 11 2 1 4 3 7 5 6 6 K1 K2 K72 19975 K72 19974 ...

Page 33: ...4 Keyed flange Bearing 1 3 15 19480 Dual sprocket 32 14 4 15 19484 Splined core sprocket 5 18 30957 Compression spring 6 75 19985 Pulley assembly 7 80 19846 Splined hub J disconnect 8 15 19478 Sprocket assembly 9 15 48B18LGE Sprocket 48B18 X 1 10 15 50B12LGH Sprocket 50B12 X 1 11 16 5L304 Cogged Belt 30 4 12 K75 19978 L Frame kit LH 13 K75 19978 R Frame kit RH 14 K75 19977 J Arm kit 15 17 6014 Mot...

Page 34: ...34 M O D E L H 19 15 14 11 2 16 17 18 10 9 4 3 1 12 7 7 13 5 6 2 8 K1 K2 K72 19974 K72 19979 ...

Page 35: ...Keyed flange bearing 1 3 15 19480 Dual sprocket 32 14 4 15 19481 Sprocket 14 Tooth 5 18 11379 Compression spring 6 75 10884 Chain wheel assembly 7 75 19985 Pulley assembly 8 75 19986 Chain guide assembly 9 15 19478 Sprocket assembly 10 15 19480 Dual sprocket 32 14 11 15 48B18LGE Sprocket 48B18 X 1 12 15 50B12LGH Sprocket 50B12 X 1 13 16 5L304 Cogged belt 30 4 14 K75 19978 L Frame kit LH 15 K75 199...

Page 36: ...36 M O D E L H J 2 20 21 17 16 12 13 12 14 22 11 12 1 3 4 6 19 18 8 15 7 2 5 7 9 10 K1 K2 K72 19974 K72 19982 ...

Page 37: ...ocket 32 14 4 15 19484 Splined core sprocket 5 18 11379 Compression spring 6 18 30957 Compression spring 7 75 10884 Chain wheel assembly 8 75 19985 Pulley assembly 9 75 19986 Chain guide assembly 10 80 19846 Splined hub 11 15 19478 Sprocket assembly 12 15 19480 Dual sprocket 32 14 13 15 48B18LGE Sprocket 48B18 X 1 14 15 50B12LGH Sprocket 50B12 X 1 15 16 5L304 Cogged belt 30 4 16 K75 19978 L Frame ...

Page 38: ...38 O P E R A T O R N O T E S ...

Page 39: ...39 O P E R A T O R N O T E S ...

Page 40: ... 6 4 5 Stop Close Open Stop Close Open 7 6 4 5 Stop Close Open 2 BUTTON STATION OR 3 POSITION KEYSWITCH WITH SPRING RETURN TO CENTER STANDARD 7 6 4 Close Open D1 E2 MODE ONLY 2 OR MORE 7 6 4 Close Open Close Open D1 E2 MODE ONLY OPEN CLOSE 1 4 B2 T TS FSTS MODE ONLY Any Commercial Type LiftMaster Brand Receiver 1 BUTTON STATION OR ANY AUXILIARY DEVICE RADIO CONTROLS SENSING DEVICE TO REVERSE OR ST...

Reviews: