40
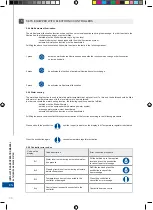
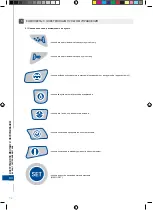
Unless massage intensity adjustment pushbuttons are held for 5 seconds, the intensity adjustment function is switched off.
A user can activate it again by a short press of the SET pushbutton so that the air system LED 2 or water system LED 3 is
ON. Subsequent pressing of the SET pushbutton enables the user to adjust the intensity of other massage modes.
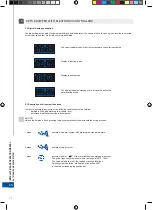
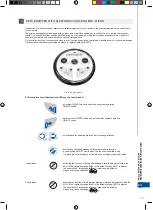
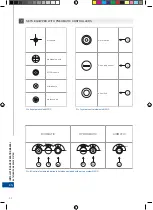
LED1 ON: The massage air system is in the constant operation mode.
LED1 blinking: The massage air system is in the pulsed operation mode.
LED2 ON: Air massage intensity adjustment function is accessible.
LED3 ON: Water massage intensity adjustment function is accessible.
LED4 ON: The massage water system is in the constant operation mode.
LED4 blinking: The massage water system is in the pulsed operation mode.
6.2 Description of air system functions
In order to activate the air system, the bathtub must be filled to the required level.
NOTICE!
Unless the bathtub is filled, pressing the air system pushbutton starts bathtub drying process.
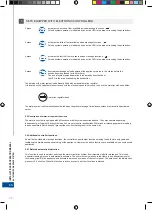
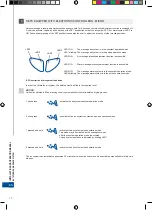
1 short press - activates the air system constant operation mode.
2 short press - deactivates the air system constant and pulsed operation mode.
1 pressed and held - activates the air system pulsed operation mode.
.
This mode may be activated as the subsequent mode
.
after the constant operation mode is activated.
Pulsed system operation is indicated by blinking LED 1.
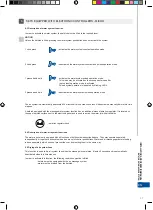
2 pressed and held - activates the air system pulsed operation mode.
The air system is automatically deactivated 20 minutes after its activation unless it is deactivated manually before this time
elapses.
6
SETS EQUIPPED WITH ELECTRONIC CONTROLLERS - MICRO
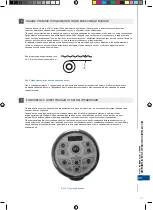
LED2
LED1
LED3
LED4
INST
ALLA
TION
AND OPERA
TION MANUAL
BA
THTUB WITH MASSAGE SYSTEM
EN
!
Summary of Contents for AirMATIC
Page 2: ...www cersanit com...
Page 47: ...47 INSTALLATION AND OPERATION MANUAL BATHTUB WITH MASSAGE SYSTEM EN...
Page 48: ...48 RU 1 Cersanit T 2 Ma a 3 MO T M...
Page 49: ...49 RU 3 MO 3 4 10 15 2 5 B C D 1 2 3 1 a a b B b 1 2 3 C D 1 2 3...
Page 51: ...51 4 O temp 38o C 3 3 4 3 4 cm 5 4 RU...
Page 52: ...52 5 5 1 O MENU SET RU...
Page 54: ...54 RU 5 5 2 O c 5 3 O 1 2 1 40 100...
Page 55: ...55 RU 2 3 4 5 5 4 O 1 2 1 40 100 5...
Page 56: ...56 RU 5 2 wci ni cie 3 wci ni cie 4 wci ni cie 5 wci ni cie 5 5 O 5 6 5 6 1 A 3 5...
Page 57: ...57 RU 5 6 2 O 45 1 100 2 5 6 3 1 2 5 10 a Er2 Er1...
Page 58: ...58 RU 5 6 4 1 2 3 5 6 5 5 6 6 Ko 5 Ko O Er1 Er2 Er3 Er4...
Page 59: ...59 RU 6 MICRO 5 6 1 O LED 1 M LED2 2 od MIN MAX MAX LED3...
Page 61: ...61 RU MICRO 6 3 O 1 2 1 LED4 2 20 6 4 O 6 5 O 45 6...
Page 62: ...62 RU 1 100 LED1 2 6 6 1 2 20 MICRO 6...
Page 63: ...63 RU AIRMatic 9 O 10 C 5 HYDROMatic 10 O 6 2 4 A B 7 DUOMatic 11 O 6 2 4 10 A B C 7 7...
Page 64: ...64 RU 7 EURO 6 MATIC A B C 7 MATIC DUOMATIC HYDROMATIC AIRMATIC A B C C B A C 8 O MATIC...
Page 65: ...65 RU 9 AIRMatic 7 10 HYDROMatic 11 DUOMatic...
Page 66: ...66 RU a 10 10 5 8 9 O O 800 1200 2000...
Page 67: ...67 RU...
Page 87: ...87 RO INSTRUC IUNI DE MONTAJ I NTRE INERE A C ZILOR DE BAIE CU SISTEME DE MASAJ...
Page 107: ...107...

