4 | Automate
™
Programming Instructions | MTSOPLAN-B
ROLLEASE ACMEDA
1
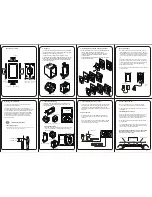
INSTALLATION
Step 1.
Step 2.
OPTION A.
OPTION B.
IMPORTANT!
IMPORTANT!
Locate the optimal position for solar panel in window.
Installing Solar panel
Install mounting bracket to wall/mounting point.
Clean Solar panel front surface with alcohol wipe.
Allow surface to dry.
Fix Solar panel to mounting bracket.
Peel protective film off one side of adhesive tape and attach to one end of Solar
panel.
Press adhesive tape firmly onto Solar panel surface for 5 seconds to ensure good
adhesion.
Ensure that adhesive tape does NOT cover any portion of the Solar panel cells.
Repeat previous steps for attaching adhesive tape to other end of Solar panel.
i.
i.
ii.
ii.
Attaching Mounting Bracket to Window Frame
Attaching Solar Panel via Adhesive Tape to a Window or surface
Avoid any partial covering of any solar panel cell.
Ensure solar panel has adequate exposure to sunlight.
When selecting a position for solar panel, consider any external obstructions like trees, building,
signs, etc. that may limit the amouhnt of sun light reaching onto the solar panel.
Any partial or total covering of any solar panel cell will affect solar panel performance.