13
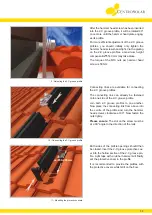
9 - Adjusting the 2-C groove profile
After the hammer head screw
has been inserted
into the 2-C groove profile, it will be rotated 90°
once more until the hammer head plate engag-
es its profile.
For more efficient adjustment of the 2-C groove
profiles, you should initially only tighten the
hammer head screws hand-tight. Via the grating
on the 2-C groove profiles, a maximum height
compensation
of 40 mm may take place.
The torque of the M10 nuts per hammer head
screw is 50 Nm.
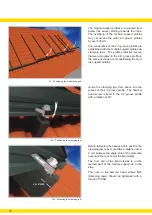
10 - Connecting the 2-C groove profile
Connecting links are available for connecting
the 2-C groove profiles.
The connecting link can already be fastened
onto one side of the 2-C groove profile.
Join both 2-C groove profiles to one another.
Now place the connecting link from above into
the centre of the profile and turn the hammer
head screws clockwise at 90°. Now fasten the
nuts tightly.
Please ensure:
The slot on the screw must be
at a 90° angle to the direction of the rails.
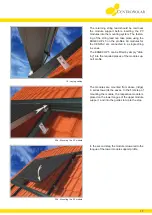
11 - Mounting the protective covers
Both sides of the profile openings should then
be closed. Insert the 2-C groove protective cov
-
er into the hollow section of the 2-C groove pro
-
file. Light taps with a rubber hammer will finally
set the protective cover in the profile.
It is recommended to provide the profiles with
the protective covers whilst still on the floor.
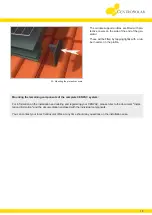
ca. 250-400 mm
Summary of Contents for CENPAC 3 Series
Page 1: ...www centrosolar com www centrosolar co uk CENPAC Mounting instructions CENPAC 3 x CENPAC 5 x...
Page 2: ......
Page 4: ...4...
Page 22: ...Notes 22...
Page 23: ......


