


C E N T R A L S T A T E S M A N U F A C T U R I N G , I N C .
E f f e c t i v e 0 1 / 2 0 2 1 • I n f o r m a t i o n s u b j e c t t o c h a n g e
58
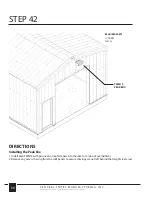
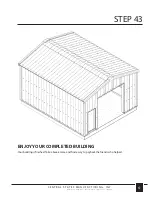
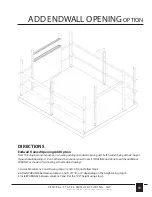
STEP 40
1. Once all of the roof panels are installed with an inside closure above the eave trim at the low eave, and butyl
tape at every lap then you may begin installing your roof formed ridge caps.
2. While on the ground, run ACC51 around three sides of your ridge cap.
a. The bottom of your overlap rib.
b. The full 3’ length on the bottom of both sides, 2” from the edge.
c. Leave wax paper installed until the ridge cap is in position then pull the paper off and secure ridge cap
to roof panels and into the roof ZEE purlin. (DO NOT OVERLAP MORE THAN 1 RIB)
3. Fasten TRIM2 to roof panels and purlins using FAST3. Be sure your fasteners are to the interior of ACC57 so
the ACC57 prevents water going through Fastener holes.
Install the Ridge Cap
DIRECTIONS
TRIM2
RIDGE CAP
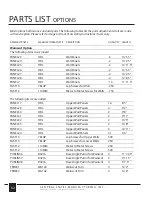
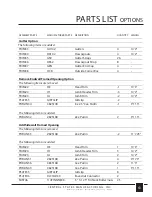
REQUIRED PARTS
(8) TRIM2
FAST3
ACC51
Tip: To locate the center of ridge on
building, use two levels to meet in
the middle to determine apex.
ZEE PURLIN
TRIM2
ROOF PANEL
Summary of Contents for Centra Series
Page 2: ......
Page 75: ......
Page 76: ...Copyright 2021 Central States Manufacturing Inc All Rights Reserved centralstatesmfg com ...


