background image


Do not attempt to raise a vehicle on the lift until the lift has been 

correctly installed and adjusted as described in this manual. 

R

ECEIVING 

The  shipment  should  be  thoroughly  inspected  as  soon  as  it  is  received.  The  signed  bill  of  lading  is 
acknowledgement by the carrier of receipt in good condition of shipment covered by our invoice. 
If any of the goods called for on this bill of lading are shorted or damaged, do not accept them until the 
carrier  makes  a  notation  on  the  freight  bill  of  the  shorted  or  damaged  goods.  Do  this  for  your  own 
protection. 
NOTIFY our company AT ONCE if any hidden loss or damage is discovered after receipt.   

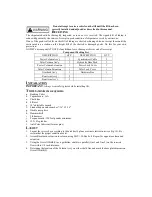
Component Packing List 

DESCRIPTION 

QTY 

DESCRIPTION 

QTY 

Power Column Ass

Synchronizer Cable   

Idler Column Ass

Hydraulic Hose Pack 

Power Column Extension 

Power Lock Cover 

Idler Column Extension 

Idler Lock Cover 

Overhead Ass

Hardware Box   

Rear Arm Ass


Front Arm Ass


I

NSTALLATION 

IMPORTANT

: Always wear safety glasses while installing lift. 

T

OOLS

 (MINIMUM REQUIRED) 

a.


Banding Cutter 

b.


Tape measure, 16ft 

c.


Chalk line 

d.


4ft level 

e.


10

 adjustable wrench 

f.


Standard open end wrenches 7/16

-15/16" 

g.


Needle nose pliers 

h.


Hammer drill   

i.


2lb hammer 

j.


Torque wrench: 150 foot pounds minimum 

k.


12 ft. Step ladder 

l.


Anti-Seize lubricant (for arm pins) 

L

AYOUT


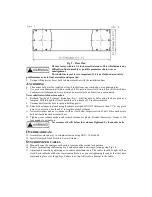
1.


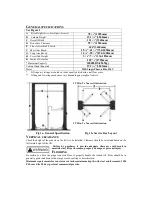
Layout the service bay according to the architect

s plans or owners instructions (see Fig 1b). Be 

certain that the proper conditions exist. 

2.


Assemble column extension to column using M12

×

30 Hex bolt. Repeat for opposite column and 

extension. 

3.


Using the Overall Width(C) as a guideline, chalk two parallel (line 1 and line 2) on the concrete 
floor within 1/8 inch tolerance. 

4.


Determine the location of the Column Ass

y on either chalk line and mark the base plate dimension 

Overall Width(L) . 

Summary of Contents for 94780

Page 1: ...10000LBS 2 POST LIFT Model 94780 INSTALLATION OPERATION MAINTENANCE MANUAL IMPORTANT READ THIS MANUAL COMPLETELY BEFORE INSTALLING or OPERATING LIFT...

Page 2: ...lowering speeds may vary depending on weight of vehicle 12 Min To Nearest Obstruction 12 Min To Nearest Obstruction Fig 1a General Specification Fig 1b Service Bay Layout VERTICAL CLEARANCE Check the...

Page 3: ...REMENTS For lift installation and operation for single phase units it is necessary to have a dedicated circuit with a 25 amp circuit breaker or time delay fuse SAFETY NOTICES AND DECALS For your safet...

Page 4: ...sion 1 Power Lock Cover 1 Idler Column Extension 1 Idler Lock Cover 1 Overhead Ass y 1 Hardware Box 1 Rear Arm Ass y 2 Front Arm Ass y 2 INSTALLATION IMPORTANT Always wear safety glasses while install...

Page 5: ...r holding power 10 Shim both columns to plumb using the shims provided DO NOT shim more than 1 2 at any given point Use a level no less than 24 in length to plumb columns 11 Assemble washer and nut to...

Page 6: ...eal without damage to the fitting follow this procedure for each hose connection Screw flared fitting on finger tight Rotate flared fitting 1 1 2 hex flats 90 deg Back the flared fitting off one full...

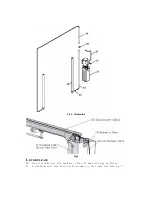
Page 7: ...Fig 5 Hydraulics Fig 6 LOCK RELEASE 23 Install Lock Release Stud and Knob to Power Column Lock using one M10 nut 24 Attach Mechanical Lock Release Cable Assembly to two Column Lock Pawl Fig 7...

Page 8: ...USTMENTS 29 Lower the lift to the floor and raise the lift approximately one foot 30 Start with Idler side first Slowly and carefully loosen the bleed plug on top of the cylinder just enough to allow...

Page 9: ...loyer shall insure that the lift inspector and maintenance personnel are qualified and that they are adequately trained in these procedures The employer shall maintain these periodic inspection and ma...

Page 10: ...issing or damaged See Installation instructions page 3 Daily 1 Keep lift components clean 2 Check for loose or broken parts 3 Check hydraulic system for fluid leaks 4 Check adapters for damage or exce...

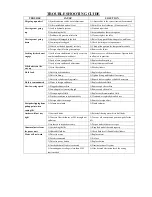
Page 11: ...hose 2 Defect in fitting 2 Tighten fitting and replace if necessary Fluid Leak 3 Defect in cylinder packing seals 3 Repack seals or replace cylinder if necessary Fluid is contaminated 1 Water or forei...

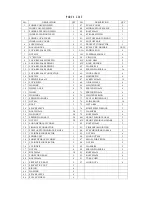
Page 12: ...WASHER 2 69 LIMITED BOLT 4 18 WHEEL AXES 4 70 SPRING PIN 4x24 4 19 WHEEL 4 71 SPRING PIN 4x30 4 20 WASHER 6 8 72 LIMITED SPRING 4 21 SPRING WASHER 6 8 73 LEVEL LIMITED BOLT 4 22 NUT M6 9 74 SLIDE BLOC...

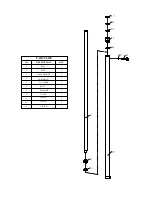
Page 13: ...1 RAM 2 1 RING RAM HEADER GUIDE RING CYLINDER BOLT WASHER O RING COVER O RING O RING 1 1 1 1 1 1 1 1 3 4 5 6 7 8 9 10 11 1 1 PARTS LIST NO DESCRIPTION QTY b1 b2 b11 b9 b8 b7 b6 b5 b3 b4 b10...

Page 14: ...4 2 28 27 26 25 18 19 20 21 22 8 17 16 15 14 13 12 6 7 5 9 11 10 8 3 1...

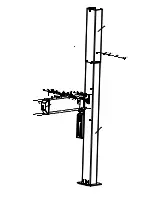
Page 15: ...8 42 41 40 21 20 22 20 2122 54 38 39 POWER COLUMN EXTENSION POWER COLUMN ASSY 33 82 26 27 69 70 71 72 73 66 67 64 68 62C 64 63 65 78 77 76 46 80C REAR ARM ASSY 92 IDLER COLUMN ASSY IDLER COLUMN EXTENS...

Page 16: ...you This warranty is expressly in lieu of all other warranties express or implied including the warranties of merchantability and fitness To take advantage of this warranty the product or part must b...

Reviews: