background image

16

CLASSIC EDGE OUTDOOR FURNACE • OWNER'S MANUAL

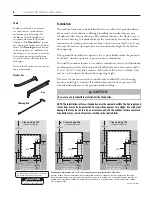
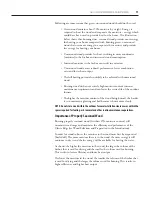
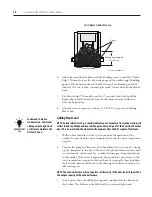
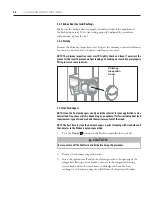
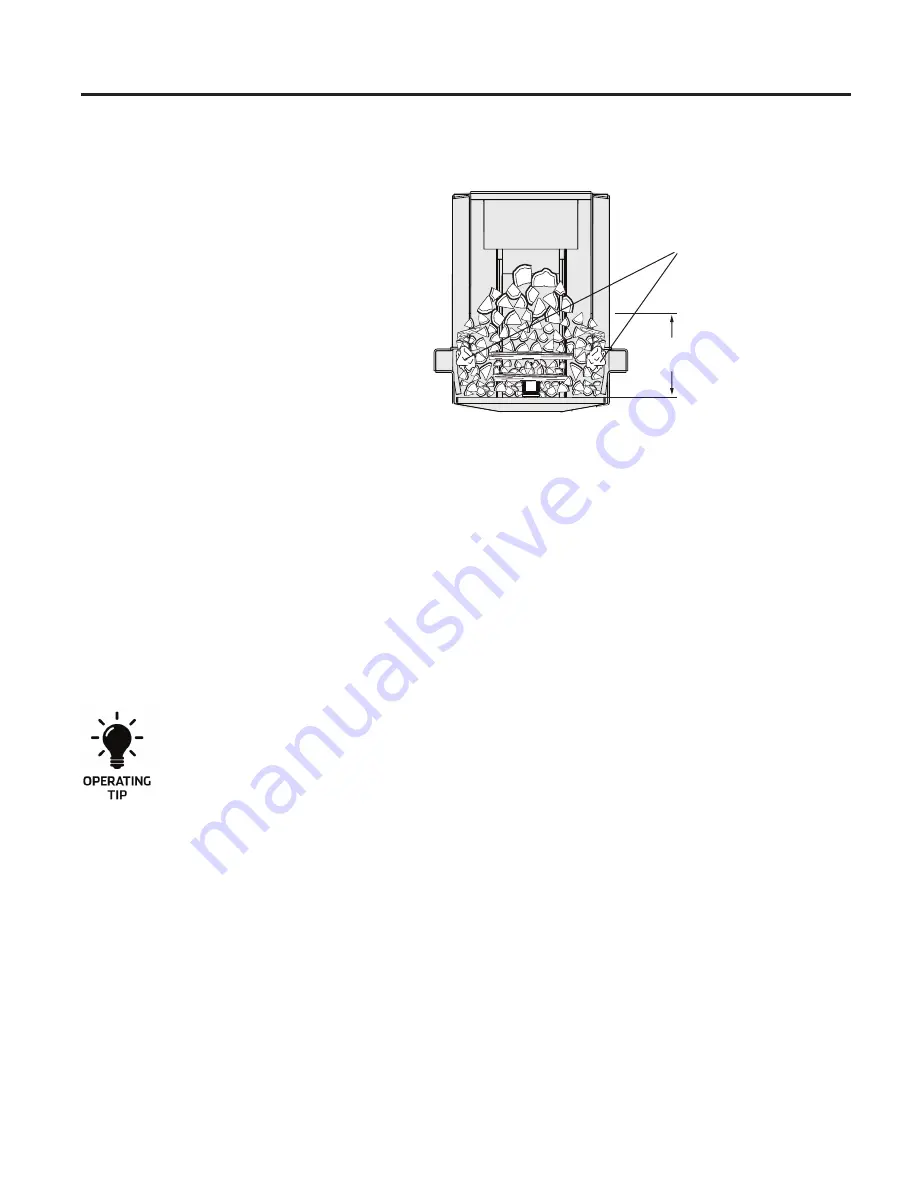
Cold Start Initial Fire Up

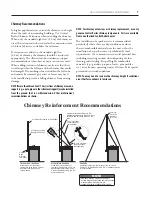
Kindling Approximately

15" (38 cm)

Paper

© 2015 Central Boiler

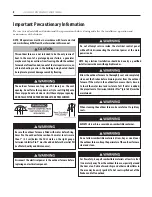
6.  Allow the wood load to burn until the kindling turns to coals (for Classic 

Edge 750 models, leave the bypass door open); then add enough kindling 

again to fill the firebox about 1/4 full. On top of the kindling, add 8-10 

inches (20-25 cm) of dry, seasoned split wood. Close and latch the firebox 

door.

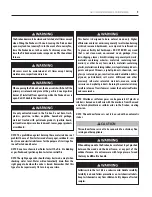
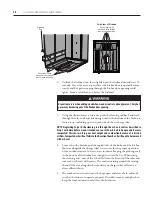
7.  For Classic Edge 750 models, wait for 15 seconds; then slowly pull the 

bypass door handle toward the front of the furnace and push down to 

close the bypass door.

8.  After the water temperature is above 150˚F (66˚C), proceed to Adding 

Heat Load.

Adding Heat Load

NOTE: During initial start-up, a considerable amount of moisture from condensation will 

collect inside the firebox and heat exchanger and may drip out of the Reaction Chamber 

door. This is normal and the moisture will evaporate after the first couple of fuel loads.

1.  With no heat load draw in the system, monitor the operation of the 

outdoor furnace until the water temperature reaches the water temperature 

setpoint.

2.  Turn on the pump(s); then start a heat load draw in the system by turning 

up the thermostat in the house. Monitor the outdoor furnace for one hour 

or until another cycle occurs (i.e., outdoor furnace goes from combustion 

to idle mode). If the water temperature drops and does not recover to the 

water temperature setpoint within one hour of starting the heat load draw, 

the heat load draw should be shut off, allowing the furnace to cycle to the 

idle mode again.

NOTE: The outdoor furnace will not operate satisfactorily if the heat load is higher than 

the output capacity of the outdoor furnace.

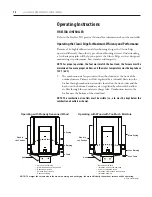
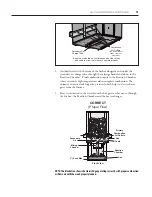
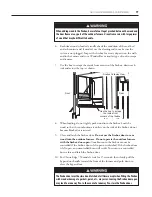
3.  At this point, there should be glowing coals established in the bottom of 

the firebox. The firebox can be filled with dry, seasoned split wood.

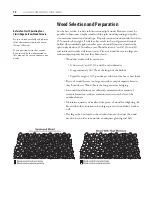
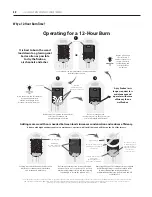
Load wood to reduce 

condensation - this means 

adding only enough wood 

each time to maintain the 

fire for 12 hours.

Summary of Contents for CLASSIC EDGE 350

Page 1: ...ammable vapors and liquids in the vicinity of this or any other appliance WHAT TO DO IF YOU SMELL GAS Do not try to light any appliance Do not touch any electrical switch Immediately call your gas sup...

Page 2: ...and heat exchange efficiency with a single fuel load without refueling Results vary based on wood species wood quality wood quantity and moisture content Efficiencies are determined under the same te...

Page 3: ...the Coal Bed 14 Ash Removal Frequency 14 Cold Start Firing 14 Adding Heat Load 16 AddingWood Best Practices for Frequency and Amount 17 Why a 12 Hour BurnTime 20 Maintenance 21 Control Locations 22 R...

Page 4: ...operly use a moisture meter to test firewood before using in a wood burning stove or fireplace Wet wood can create excessive smoke which is wasted fuel Split Stack Cover and Store Video http www youtu...

Page 5: ...plementary information worthy of particular attention relating to installation operation or maintenance of the outdoor furnace but is not related to a hazardous condition Be sure to follow all instruc...

Page 6: ...urnace enclosure Foundations may consist of concrete crushed rock or patio blocks Do not use any combustible materials for the foundation CAUTION 2015 Central Boiler Outdoor furnace must be installed...

Page 7: ...tion purposes only 118 1330 PEX Pipe 296 Swing Check Valve 198 6054 6764 5000018 224 388 388 171 1330 5926 556 3042 5926 3 4 Power disconnect circuit breaker shuts off all power excluding outlet Centr...

Page 8: ...hten all hardware securely NOTE A hole for the ground terminal has been pre punched in the outdoor furnace base near the pumps Furnace Installation Connecting toYour Existing System A common installat...

Page 9: ...ller must comply with all applicable codes and regulations NOTE Any electrical installation should be done by a qualified installer in accordance with applicable codes NOTE A certified electrician mus...

Page 10: ...6 CLASSIC EDGE OUTDOOR FURNACE OWNER S MANUAL...

Page 11: ...here are dry conditions or where there is combustible material near the unit unless the installation of a spark arrester is prohibited by local requirements Use common sense to avoid potential fires i...

Page 12: ...sight gauge Corrosion Inhibitor Plus must be added before the initial fill seeWater Quality and Maintenance Disconnect the electrical power to the outdoor furnace before replacing an electrical compon...

Page 13: ...o open or close This heater is designed to burn natural wood only Higher efficiencies and lower emissions generally result when burning air dried seasoned hardwoods as compared to softwoods or to gree...

Page 14: ...Is approximately 60 70 of the length of the firebox Typically weighs 10 15 pounds per cubic foot for heavy heat loads Pieces of wood that are too large can reduce output capacity because they burn sl...

Page 15: ...e of the outdoor furnace The higher the moisture content of the wood being burned the harder it is to maintain a glowing coal bed because it burns more slowly NOTE Do not store wood within the outdoor...

Page 16: ...air flow regulated by a solenoid flows into the firebox through combustion air outlets located on the front sides and the back near the bottom Secondary air is regulated by solenoids that allow air f...

Page 17: ...stion occurs in the Reaction Chamber where extremely high temperatures aid in complete combustion The chimney creates a draft negative pressure which helps to draw exhaust gases from the furnace 3 Hea...

Page 18: ...ecessary for the proper operation of the outdoor furnace Ash acts as an insulator keeping the glowing coals in the bottom of the firebox hot enough to restart the fire when needed after being in idle...

Page 19: ...Bypass Alarm Kit p n 2500153 is installed the alarm is a reminder that the bypass door is open During a cold start it will continue to sound Whenopeningthefireboxdoor thedoorswitchwillshutofftheprima...

Page 20: ...normal and the moisture will evaporate after the first couple of fuel loads 1 With no heat load draw in the system monitor the operation of the outdoor furnace until the water temperature reaches the...

Page 21: ...furnace frequently or for extended periods of time with the water temperature below 150 F as this will result in more condensation in the firebox that can lead to excessive corrosion NOTE Operating at...

Page 22: ...sult in poor heat output and combustion because of restricted airflow CompactedashwillnotfallintotheReactionChamber itwillneedtoberemoved with a shovel 4 Some ash in the bottom and the angled sides of...

Page 23: ...n loading do not tightly pack wood into the firebox Load the wood so that the combustion air outlets on the side of the firebox do not become blocked or restricted 9 Close and latch the firebox door D...

Page 24: ...ses condensation the firebox and air channels will not dry NO DRYING Very little radiant heat to dry air channels High humidity Reloading at this level can restrict airflow and create excessive coals...

Page 25: ...be determined D When new after three months then every six months thereafter F Frequency will vary depending on heat load requirements type of wood used and the moisture content of the wood E Refer to...

Page 26: ...n the preventive maintenance schedule are intended to serve as a guideline Actual intervals between inspections and maintenance may vary depending on a number of factors including your heat load requi...

Page 27: ...The wood load should be matched to the heat load MAINTENANCE SECTIONS Refer to the Preventive Maintenance Schedule for the recommended intervals with which to perform these maintenance items 3 1 Wate...

Page 28: ...free of obstruction Combustion Air Outlets one side of firebox shown same on other side Secondary Air Charge Tube Keep the combustion air outlets open and clear of ash and coals to allow the furnace t...

Page 29: ...e the Wonder Bar to completely scrape the face of the firebox door frame where the door seal contacts 6 Using the illustration as a reference push the cleaning rod back and forth through the ash in th...

Page 30: ...r 3 7 Heat Exchangers NOTE Clean the heat exchangers weekly until the interval for your application can be determined Frequency will vary depending on a number of factors including heat load requireme...

Page 31: ...e the hoe to pull the ash to the front of the furnace then use a small shovel to remove all of the ash and deposits from the Reaction Chamber Take care not to damage the temperature sensor 7 Close the...

Page 32: ...he hoe to pull the ash to the front of the furnace then use a small shovel to remove all of the ash and deposits from the Reaction Chamber Take care not to damage the temperature sensor NOTE It is ext...

Page 33: ...s of corrosion are present determine the cause and correct it as soon as possible Refer to the section title Corrosion is Present in the Troubleshooting section 3 A thin tar like creosote layer may fo...

Page 34: ...all ash and deposits from behind the side air channels Combustion Air Outlets one side of firebox shown same on other side Secondary Air Charge Tube Keep the combustion air outlets open and clear of a...

Page 35: ...bolts 7 Close and secure the airbox cover Install the outer airbox cover and secure with screws Do not connect power or operate the outdoor furnace with the outer airbox cover removed The outer airbo...

Page 36: ...wer source Do not proceed without testing that power is disconnected Make sure the power cannot be reconnected while servicing the solenoids i e use lock out tag out 2 Remove the outer airbox cover th...

Page 37: ...grease 3 15 Complete Firebox Cleaning Procedures The procedures outlined here explain how to thoroughly clean the firebox Reaction Chamber heat exchanger and chimney tee The frequency for performing t...

Page 38: ...etailed procedures Use the Wonder Bar to completely scrape the areas shown in gray 2 Reaction Chamber 3 Firebox 4 Chimney Tee 5 Heat Exchangers 6 Reaction Chamber Pay special attention to these seams...

Page 39: ...It is extremely important to clean all the way to the back of the Reaction Chamber To make sure ash is being completely removed mark the hoe handle when the hoe is positioned all the way to the back o...

Page 40: ...osion Use a wire brush to clean if needed 4 ChimneyTee 1 Remove the chimney inspection cover Clean the chimney outlet and chimney of excessive ash or deposits NOTE The chimney inspection cover must fi...

Page 41: ...remove the plate remove the acorn nuts Take care not to damage the gasket View Inside Firebox The plate at the back of the firebox can be removed for inspection and cleaning the heat exchangers if nee...

Page 42: ...plates Remove any ash or deposits from behind the air channel plates in the wall of the firebox 2 Using a screwdriver or similar tool clean out each combustion air outlet in the air channel plates Mak...

Page 43: ...sing a new test kit The pH test strips and Permanganate Reagent each have a varying shelf life that can affect their accuracy Test kits should be stored in a dry area at room temperature to obtain max...

Page 44: ...container 2 Dip the pH test strip from the test kit in the water sample Shake excess water off the test strip Compare the color of the test strip to the chart provided to determine pH level 3 If the...

Page 45: ...he valve when finished The water in the sight gauge valve and tube will drain when the valve is closed CAUTION The water in the sight gauge may be hot Use caution when obtaining a sample 2 If no antif...

Page 46: ...t but 15 to 30 drops is acceptable One drop of permanganate reagent equals approximately 100 ppm SYSTEM MAINTENANCE The pH and nitrite levels of the water once treated should remain stable as long as...

Page 47: ...een maintained and corrosion is present in the water jacket The water jacket should be thoroughly flushed and the system refilled with the proper amount of Corrosion Inhibitor Plus added Be sure to te...

Page 48: ...codes and regulations When performingworkonanapplianceobserveallprecautionsintheliterature tagsandlabels attached to the appliance and other safety precautions that may apply When working with electr...

Page 49: ...firebox 1 Disconnect power to the outdoor furnace Do not proceed without testing that power is disconnected Make sure the power cannot be reconnected while testing components i e use lock out tag out...

Page 50: ...d latch assembly 2014 Central Boiler CAUTION The firebox door seal will be damaged or destroyed if it is not installed properly REACTION CHAMBER DOOR SEAL The Reaction Chamber door seal must be in goo...

Page 51: ...e all the way around the Reaction Chamber door cut the end of the rope about one inch longer than required and press it tightly against the beginning end of the rope 7 Close the Reaction Chamber door...

Page 52: ...Do not proceed without testing that power is disconnected Make sure the power cannot be reconnected while testing components i e use lock out tag out 2 Remove the outer airbox cover then open the airb...

Page 53: ...t power to the furnace and test solenoid operation Do not connect power or operate the outdoor furnace with the outer airbox cover removed The outer airbox cover must be installed and secured with scr...

Page 54: ...ce making sure the alignment pin fits into the alignment hole in the refractory modules THERMOCOUPLE 1 Disconnect power to the outdoor furnace Do not proceed without testing that power is disconnected...

Page 55: ...he higher the moisture content of the wood being burned the harder it is to maintain the proper coal bed because energy is required to heat the wood and more slowly evaporate boil off the water The la...

Page 56: ...Reaction Chamber remain unobstructed to allow final combustion to occur It is not designed to be an ash collection area although over time ash will gradually accumulate in the Reaction Chamber If ash...

Page 57: ...ure Is there creosote and or ash inside the airbox Creosote ash or even coals in the airbox is an indication that the outdoor furnace has not been maintained and or operated properly Especially import...

Page 58: ...nce section If adding water does not correct the problem contact your Central Boiler dealer 10 Low water temperature for too long a period of time The display on the controller will indicate and the c...

Page 59: ...flue draft is less than 0 05 in WC 12 45 Pa add more chimney sections After the test fill the hole in the chimney inspection cover with high temp silicone Perform test with bypass closed at normal op...

Page 60: ...t either add drier smaller pieces of wood first or partially fill with wood to allow time for the coals to restart the fire 5 Water temperature setpoint too low Set the water temperature setpoint high...

Page 61: ...ems 7 Supply and return lines installed incorrectly Make sure the hot supply line is connected to the correct fitting on the outdoor furnace and heat exchanger 8 Circulation pump s installed backwards...

Page 62: ...ropriate procedure see Owner Serviceable Items 2014 Central Boiler NOTE Iftheoutdoorfurnaceisoperatedwiththedooropen thefireboxdoorsealmaybedamaged 2 Solenoid and or air regulating disc stuck open or...

Page 63: ...must not be located below the pump motor If necessary remove the four screws and rotate the pump body 2 Water will not circulate If the system has been drained and refilled or if the system has been o...

Page 64: ...al under many conditions and is not suggestive of poor combustion or high emissions Opacity is the amount of light which is blocked in an exhaust plume It is a measurement that is usually stated as a...

Page 65: ...load is low during warm outdoor temperatures for example filling the firebox full with wood can lead to condensation in the firebox When the demand for heat is low add only enough wood to the firebox...

Page 66: ...pendant l utilisation NE br lez PAS de bois trait de plastique ou de caoutchouc dans la chaudi re Le tirage maximal est indiqu sur la plaque signal tique Respectez TOUJOURS l ensemble des l gislations...

Page 67: ...63 CLASSIC EDGE OUTDOOR FURNACE OWNER S MANUAL WIRING DIAGRAM SECONDARY SOLENOID FAN PRIMARY SOLENOID...

Page 68: ...are not covered Parts that are factory installed by Central Boiler but are manufactured by others may be covered by their own manufacturer s warranty and are not covered by this limited warranty excep...

Reviews: