background image

Erecting Procedure

16

Celina Tent Inc. - HGPTS - NSN: 8340-01-535-6379 (FEMA MOD)

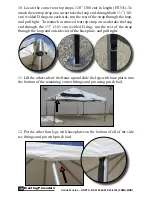
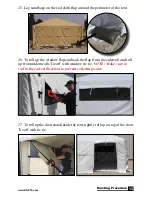
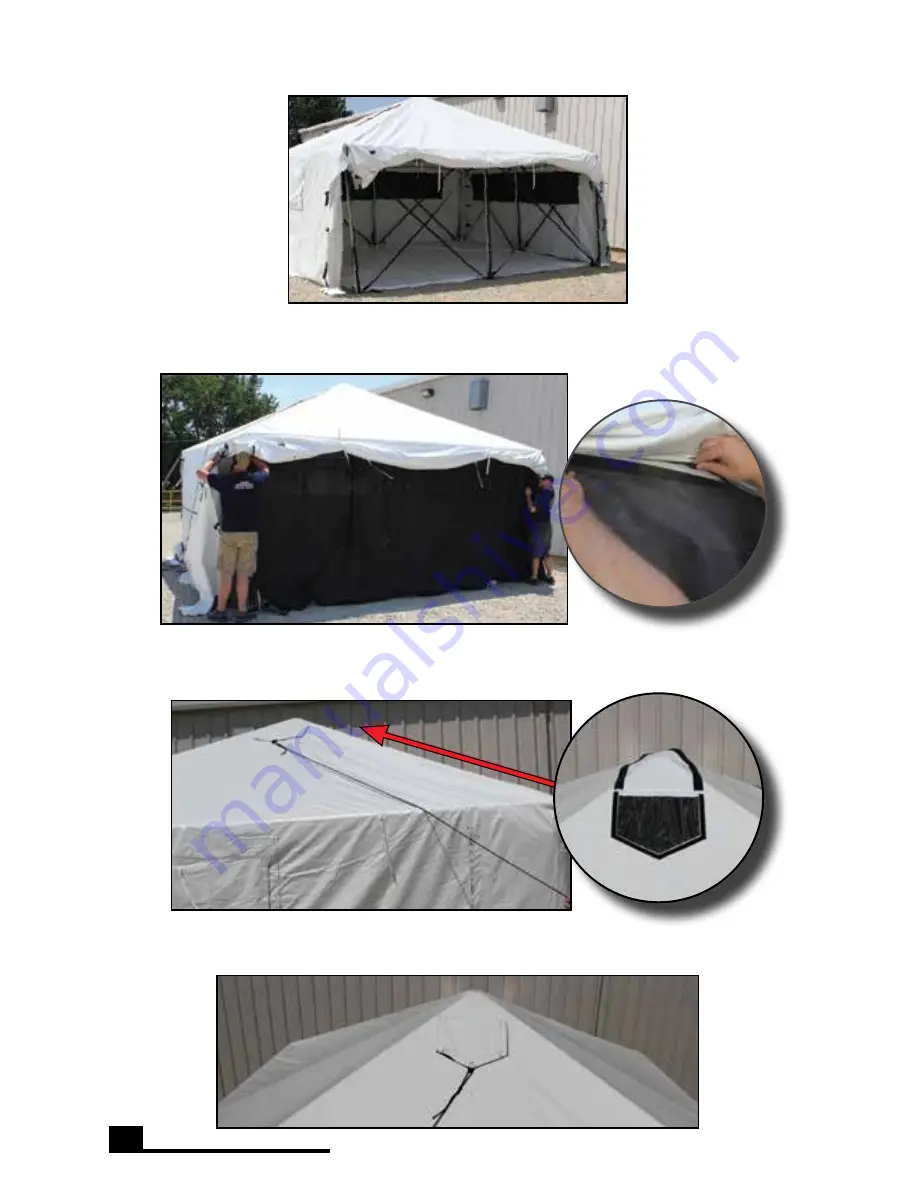
30. To open the peak vent, loosely hold on to the rope.  Walk around to the 

opposite side of the tent and pull on the rope until the 

flap is open. 

31. To close the peak vent, loosely hold on to the rope.  Walk around to 

the vent side of the tent and pull on the rope until the flap is closed. 

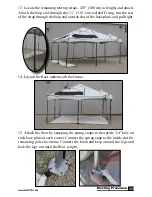
29. To add mesh sidewalls, velcro mesh sidewalls to flap underneath tent 

wall and connect all of the side release buckles and tighten. 

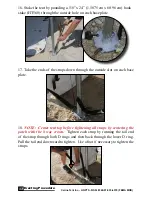
28. To roll up the sidewall stand inside the tent tightly roll up sidewall and 

tie off with tie ties.

Summary of Contents for HGPTS

Page 1: ...General Purpose Tent System HGPTS Manufactured By CELINA TENT INC 5373 State Route 29 Celina Ohio 45822 9210 USA www CelinaTent com NSN 8340 01 535 6379 FEMA MOD 2015 INSTRUCTION MANUAL ERECTION AND S...

Page 2: ...2 9210 USA www CelinaTent com Fax 419 584 0949 Phone 419 586 3610 Introduction 3 4 Parts Breakdown 5 6 Erecting Procedure 7 17 Strike Procedure 18 19 Repackaging Procedure 20 22 Repair Procedure 22 Ca...

Page 3: ...shelter that is capable of withstanding a steady wind speed of 55 mph with gusts up to 65 mph wThe shelter is able to withstand a snow load of 10 pounds per square foot for a maximum of 12 hours wDoor...

Page 4: ...able side release buckles to prevent element intrusion A mud flap around the perimeter of the shelter is provided in order to place sand bags to achieve maximum rigidity of the shelter and to reduce p...

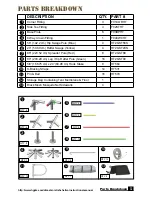
Page 5: ...4 F02STHT Base Plate 8 F03BPHT 8 Way Crown Fitting 1 F048WCHT 56 142 2 cm Hip Swage Pole Blue 4 HT2GST56S 20 50 80 cm Rafter Swage Yellow 4 HT2GST20S 88 223 52 cm Spreader Pole Red 8 HT2GST88 80 203 2...

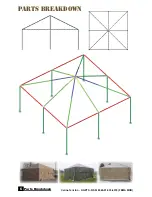
Page 6: ...Parts Breakdown 6 Celina Tent Inc HGPTS NSN 8340 01 535 6379 FEMA MOD SIDE VIEW TOP VIEW PARTS BREAKDOWN...

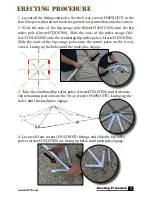
Page 7: ...of the rafter swage Yel low HT2GST20S onto the remaining hip rafter poles Green HT2GST80 Slide the ends of the hip swage poles onto the corner posts on the 8 way crown Lining up the holes until the pu...

Page 8: ...ings F02STHT into the hip raf ter poles Green HT2GST80 Lining up the holes until the push pins engage 6 Connect each of the 88 223 52 cm spreader poles Red HT2GST88 between each corner F01CORHT and ea...

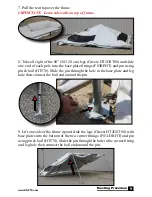
Page 9: ...fittings F03BPHT and pin using pin bail HT570 Slide the pin through the hole in the base plate and leg hole then connect the bail end around the pin 9 Lift one side of the frame up and slide the legs...

Page 10: ...HT531 To attach the tent top strap on a corner take the loop end through both 1 3 81 cm welded D rings on each side run the rest of the strap through the loop and pull tight To reattach a removed tent...

Page 11: ...Connect the spring snap to the inside slot for remaining poles locations Connect the hook and loop around the legs and kick the legs out until the floor is tight 13 Locate the remaining tent top strap...

Page 12: ...ase plate 17 Take the ends of the straps down through the outside slot on each base plate 18 NOTE Center tent top before tightening all straps by centering the patch with the 8 way crown Tighten each...

Page 13: ...oor To find the door bay stand under the center of the tent facing the direction of the roof vent The door bay is directly in front on the left 19 Locate the fourteen X Bracing straps 148 370 cm in le...

Page 14: ...hrough both D rings and then back through the lower D ring Pull the tail end downward to tighten Use a foot if necessary to tighten the straps 24 Close all corners by connecting all of the side releas...

Page 15: ...tent 26 To roll up the window flaps unhook the flap from the sidewall and roll up from underneath Tie off with window tie tie NOTE Make sure to roll in the correct direction to prevent collecting wate...

Page 16: ...ntil the flap is open 31 To close the peak vent loosely hold on to the rope Walk around to the vent side of the tent and pull on the rope until the flap is closed 29 To add mesh sidewalls velcro mesh...

Page 17: ...p the floor upside down so the D ring which is in the middle of the floor is facing up Tie a rope or a string to the D ring Hang the D ring 2 3 feet below the center of the 8 way crown Attach the spri...

Page 18: ...f all X Bracing straps 14 total 3 Take away the floor by unhooking all of the spring snaps and separating all of the hook and loop Set off to the side 4 Pull all of the stakes out of the ground 5 Loos...

Page 19: ...plates place off to the side and carefully set the frame all the way down NOTE Do not set frame on sidewalls 9 Gently remove the tent top from the frame 10 Fold up the tent top along with the floor an...

Page 20: ...a Tent Inc HGPTS NSN 8340 01 535 6379 FEMA MOD REPACKAGING PROCEDURE 1 Lay the complete HGPTS tent top out as flat as possible 2 Fold all four sidewalls in towards the center of the tent top 3 Set the...

Page 21: ...lled up floor and top in the center of the bag directly on the printed instructions 7 Connect the male and female side release buckles long way first and pull tight 8 Join the remaining three side rel...

Page 22: ...he tear 2 Apply vinyl adhesive to the back of the vinyl patch and press over the desired area Hold for several seconds to allow adhesion to occur Make sure all the edges of the patch are glued down to...

Page 23: ...examine the installation site to determine the proper securing and anchoring methods Guy lines and frame must be staked properly on all four corners based on current and future weather conditions to...

Page 24: ...CELINA TENT INC 5373 State Route 29 Celina Ohio 45822 9210 USA www CelinaTent com Fax 419 584 0949 Phone 419 586 3610...

Reviews: