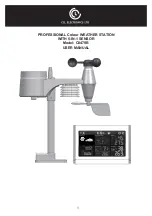
background image

8

CONSOLE                                                                                                                                                              

BACKUP BATTERIES INSTALLATION

1. Remove the battery door on the bottom of the main unit.

2. Insert a 3 new AAA batteries.

3. Replace the battery door.

4. 

Once the batteries are inserted, all the segments of the LCD will be shown briefly before entering the radio-

controlled time reception mode.

5. The RC clock will automatically start scanning for the radio-controlled time signal in 8 seconds.

Note:


 - If no display appears on the LCD after inserting the batteries, press 

[ RESET ]

 key by using a pointed object.

 - In some cases, you may not receive the signal immediately due to the atmospheric disturbance.

PAIRING OF WIRELESS 5-IN-1 SENSOR WITH DISPLAY MAIN UNIT

After insertion of batteries, the Display Main Unit will automatically search and connect the wireless 5-IN-1 

sensor (antenna blinking).

Once the connection is successful, antenna mark and readings for outdoor temperature, humidity, wind speed, 

wind direction, and rainfall will appear on the display.

CHANGING BATTERIES AND MANUAL PAIRING OF SENSOR

Whenever you changed the batteries of the wireless 5-IN-1 sensor, pairing must be done manually.
1. Change the batteries to new ones.

2. Press 

[ SCAN ] 

key.

3. Press 

[ RESET ]

 key on the sensor.

Note:


 - Pressing 

[ RESET ]

 key at bottom of wireless 5-IN-1 sensor will generate a new code for pairing purpose.

 - Always dispose old batteries in an environmentally safe manner.

RADIO CONTROLLED/ATOMIC CLOCK FUNCTION

When the unit receives RCC signal, a sync-time symbol    will appear on the LCD, and synchronizes daily.

Note:


1. The strength of radio-controlled time signal from the transmitter tower may be affected by geographical  

location or building around.

2. Always place the unit away from interfering sources such as TV set, computer, etc.

3. Avoid placing the unit on or next to metal plates.
4. Closed areas such as airport, basement, tower block, or factory are not recommended.

SIGNAL STRENGTH INDICATOR                                                                                                        


The signal indicator displays signal strength in 4 levels. Wave segment flashing means time signals are being 

received. The signal quality could be classified into four types:


or


No signal quality   

Weak signal quality

 Acceptable signal quality 

Excellent signal quality

TIME SETTING

The unit automatically set itself accordingly to the Radio Controlled Clock signal it received. To set the clock/

calendar manually, first disable the reception by holding the RCC key for 8 seconds.

TO MANUALLY SET THE CLOCK / TIME ZONE SELECTION

1. Press and hold 

[ CLOCK ] 

key


for 2 seconds until 

12 or 24 Hr

 flashes.

2. Use 

[   ] 

key / 

[   ] 

key to adjust, and press 

[ CLOCK ] 

key


to proceed to the next setting.

Summary of Contents for C8479B

Page 1: ...1 PROFESSIONAL Colour WEATHER STATION WITH 5 IN 1 SENSOR Model C8479B USER MANUAL...

Page 2: ...PEED WIND DIRECTION 11 WIND CHILL HEAT INDEX DEW POINT 12 HISTORY DATA ALL RECORDS IN THE PAST 24 HOURS 13 MAX MIN MEMORY FUNCTION 13 HI LO ALERT 13 WIRELESS SIGNAL RECEPTION 14 TEMPERATURE HUMIDITY 1...

Page 3: ...er when the set high or low weather criteria are met The barometric pressure records are computed to give users forthcoming weather forecast and stormy warning Day and date stamps are also provided to...

Page 4: ...6 HISTORY key 17 SENSOR key 7 INDEX key 18 RCC key 8 LCD display 19 RESET key 9 AAA battery compartment 20 key 10 Power jack Temperature sensor 21 key 11 Wall mounting hole 22 Extend wall mount holder...

Page 5: ...NSOR 1 Wind cups anemometer 2 Wind vane 1 2 2 LCD DISPLAY NORMAL TIME AND CALENDAR SECTION 1 Day of the week 2 Low battery indicator for main unit 3 Time 4 DST 5 RCC signal strength indicator 6 Alarm...

Page 6: ...dicator 2 Time range record indicator 3 Day records indicator 4 HISTORY 5 Hi Alert and Alarm 6 Current rainfall rate 7 Rainfall unit inch mm 3 4 2 1 5 6 7 WIND DIRECTION 1 WIND DIRECTION indicator 2 C...

Page 7: ...around the sensor for accurate rain and wind measurement Install the sensor with the smaller end facing the North to properly orient the wind direction vane Secure the mounting stand and bracket inclu...

Page 8: ...the sensor Note Pressing RESET key at bottom of wireless 5 IN 1 sensor will generate a new code for pairing purpose Always dispose old batteries in an environmentally safe manner RADIO CONTROLLED ATO...

Page 9: ...he ALARM key anytime to show the alarm time 2 Press the ALARM key to activate the alarm 3 Press again to activate alarm with ice alert function 4 To disable the alarm press until the alarm icon disapp...

Page 10: ...spheric pressure When you change the relative atmospheric pressure value the weather indicators will change along with it The relative atmospheric pressure is based on the sea level but it will change...

Page 11: ...m h TO SELECT WIND SPEED UNIT 1 Press and hold the key for 2 seconds to enter unit setting mode 2 Use key key to change the unit between mph miles per hour m s meter per second km h kilometer per hour...

Page 12: ...ome branches break off trees and some small trees blow over Construction temporary signs and barricades blow over 47 54 mph 41 47 knot 20 8 24 4 m s 10 Storm 89 102 km h Trees are broken off or uproot...

Page 13: ...wind speed and rainfall records 1 Press the HISTORY key to check past 1 hour history records 2 Press HISTORY key repeatedly to show past 2 3 4 5 24 history weather records MAX MIN MEMORY FUNCTION 1 Pr...

Page 14: ...rm automatically turn off after 2 minutes WIRELESS SIGNAL RECEPTION No sensor Signal searching Strong signal Weak signal Signal lost The 5 IN 1 sensor is capable of transmitting data wirelessly over a...

Page 15: ...n the Display main unit press and hold the WIND key for 8 seconds until the upper part Northern Hemisphere of the compass lights up and blinking 3 Use key key to change to lower part Southern Hemisphe...

Page 16: ...d Direction 1 Check wind cups Anemometer 2 Check the wind vane and Signal lost for 15 minutes 1 Relocate the main unit and 5 in 1 sensor closer to each other 2 Make sure the main unit is placed away f...

Page 17: ...F or MSF base on the country version DST AUTO OFF INDOOR BAROMETER Barometer unit hPa inHg and mmHg Measuring range 540 1100hPa Accuracy 700 1100hPa 5hPa 540 696hPa 8hPa 20 67 32 48inHg 0 15inHg 15 95...

Page 18: ...ll mm and in Range for rainfall 0 9999mm 0 393 7inches Resolution 0 4 mm 0 0157 in Accuracy for rainfall Greater of 7 or 1 tip Memory modes Max rainfall from last memory reset Historical data for last...

Reviews: