


11
MENU
MUTE
1
5
6
7
8
2
3
4
9
SIGMA 2200i
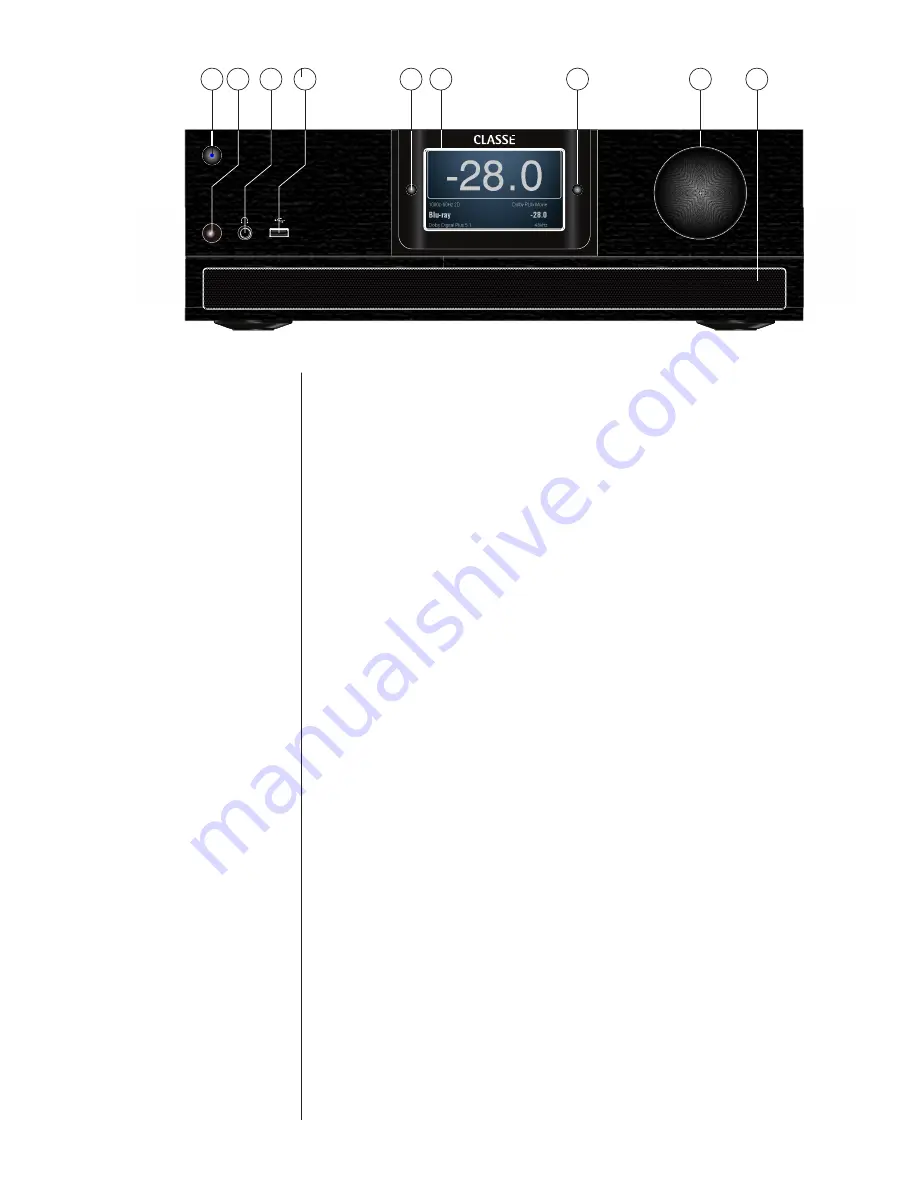
Front Panel
The front panel of the Sigma 2200i is shown above. The numbers in the drawing
refer to the descriptions that follow.
1
Standby/On Button and Status Indicator LED
Pressing the
Standby
button toggles the Sigma 2200i between
operate
and
standby
mode – a low-power state which leaves the preamp/processor and
amplifier outputs inactive. If the Wake on Network feature is enabled (see
Network Setup) the unit will respond to system commands via any of the
supported network control protocols (LAN, CAN-Bus or RS-232) from
Standby.
If the unit is already in Standby mode, pressing the Standby button fully
powers up the unit.
• LED On (Red) – the Sigma 2200i is in Standby mode.
• LED turns green, then blue – the unit is in the process of
power-up initialization.
• LED On (Blue), indicates the unit is in the operate mode.
• LED turns green, then red – the unit is in the process of
powering down into Standby mode.
•
LED Off – the unit is not getting AC power.
NOTE: A power-save feature is enabled that puts the Sigma 2200i
into standby after 20 minutes without a signal or if the volume
is set to a very low level or muted. If you require this feature to be
defeated, contact your Classe dealer.
As you customize the settings for the Sigma 2200i, most
changes are made on-the-fly without constantly requiring
additional steps to save settings. Settings are saved each time the
unit is put into Standby, so it is good practice to put the unit
into Standby after making changes to settings.
Summary of Contents for Sigma 2200i
Page 1: ...Owner s Manual Sigma 2200i Stereo Integrated Amplifier...
Page 47: ...47...


