— 15 —
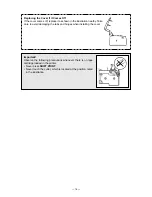
Important!
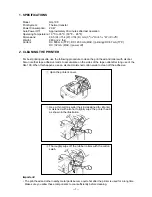
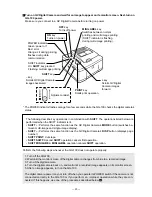
• When printing, the tape repeatedly feeds forward and back while the print operation is being per-
formed. The tape is cut automatically after the print operation is complete. Never pull on the tape or
turn off QG-100 power while a print operation is being performed.
• The POWER indicator color becomes orange while printing is being performed, and changes back to
green when printing is completed.
• Pressing PRINT causes the POWER indicator to start flashing orange, indicating that data is being
received from the digital camera. It may take a bit of time before actual printing begins.
• Start of a print operation may cause a little bit of blank tape to feed from the printer.
• Never open the printer's cover while a print operation is in progress.
• Printing may stop momentarily while you are outputting a series of prints or after you have used the
QG-100 continually for a long time. This is a normal operation that the QG-100 performs to protect
against overheating, and does not indicate malfunction. Normal printing should resume automatically.
• The color of an image printed on the printer may vary a little from the color of the actual item.
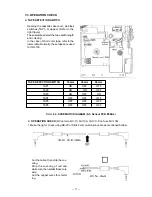
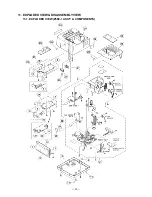
7-1. SENSOR POSITION
See to 11-1. EXPLODED VIEW (Z568-1 ASS'Y & COMPONENTS) ( 30 page).
7-2. PRINTING SPECIFICATION
• Printing method —
thermal printing
• Printing head —
384 dots
• Resolution —
200 dpi (dots per inch)
• Gradation number — 64 (gradation)
• Tape cartridge —
18, 36 & 46 mm width tape
• Printing size —
Standard printing:
3 varieties/18 mm
×
6, 36 mm
×
1, 46 mm
×
1
Multi-image printing: 2 varieties/36 mm
×
2, 46 mm
×
4
• Printing time (Standard printing) — 18 mm tape ... about 4 minutes 15 sec. (6 images printing)
36 mm tape ... about 2 minutes 15 sec.
46 mm tape ... about 2 minutes 45 sec.
●
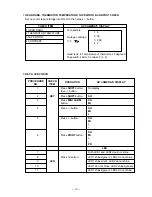
Tape types and sizes when connecting to a QV Digital Camera
Print size is set automatically according to the width of tape loaded.
18 tape provides 30 prints.
36 tape provides 60 prints.
46 tape provides 50 prints.
Store tapes in their original plastic bags in an area where they will not be subjected to high humidity.
Be sure to use only tape cartridges designed specially for use with the QG-100.
Standard Print Size
Multi-image Size
(Number of Prints)
(Number of Prints)
QR-18CR
18 mm (
11
/
16
")
16.0
×
21.5 (6)
16.0
×
21.5 (6)
QR-36CR
36 mm (1
3
/
8
")
27.5
×
37.0 (1)
16.0
×
21.5 (2)
QR-46CR
46 mm (1
13
/
16
")
41.25
×
55.5 (1)
16.0
×
21.5 (4)
Tape Width
Summary of Contents for QG-100
Page 1: ...JULY 1996 without price QG 100 ZX 568 ...
Page 4: ... 2 3 BLOCK DIAGRAM ...
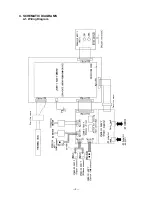
Page 5: ... 3 4 SCHEMATIC DIAGRAMS 4 1 Wiring Diagram ...
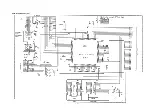
Page 6: ... 4 4 2 Main PCB Z568 1 1 2 ...
Page 7: ... 5 4 3 Main PCB Z568 1 2 2 ...
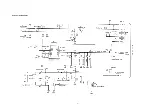
Page 8: ... 6 4 4 Power PCB Z568 S1 ...
Page 32: ... 30 11 EXPLODED VIEW DISASSEMBLY VIEW 11 1 EXPLODED VIEW Z568 1 ASS Y COMPONENTS ...
Page 34: ... 32 11 2 DISASSEMBLY VIEW PRINTER UNIT 1 2 ...
Page 35: ... 33 DISASSEMBLY VIEW PRINTER UNIT 2 2 ...
Page 37: ... 35 11 3 DISASSEMBLY VIEW CHASSIS UNIT 1 2 ...
Page 38: ... 36 DISASSEMBLY VIEW CHASSIS UNIT 2 2 ...
Page 40: ... 38 11 4 DISASSEMBLY VIEW CHASSIS ASS Y 1 2 ...
Page 41: ... 39 DISASSEMBLY VIEW CHASSIS ASS Y 2 2 ...
Page 43: ... 41 11 5 DISASSEMBLY VIEW HEAD HOLDER ASS Y 1 2 ...
Page 44: ... 42 DISASSEMBLY VIEW HEAD HOLDER ASS Y 2 2 ...
Page 46: ... 44 11 6 DISASSEMBLY VIEW PLATEN ASS Y ...
Page 48: ... 46 11 7 DISASSEMBLY VIEW CASSEETTE CASE ASS Y ...
Page 50: ... 48 11 8 DISASSEMBLY ASS Y MOTOR CHASSIS ASS Y ...
Page 51: ......
Page 52: ...MA0900461A ...

