background image

67

OTHER RECORDING FUNCTIONS

 IMPORTANT! 

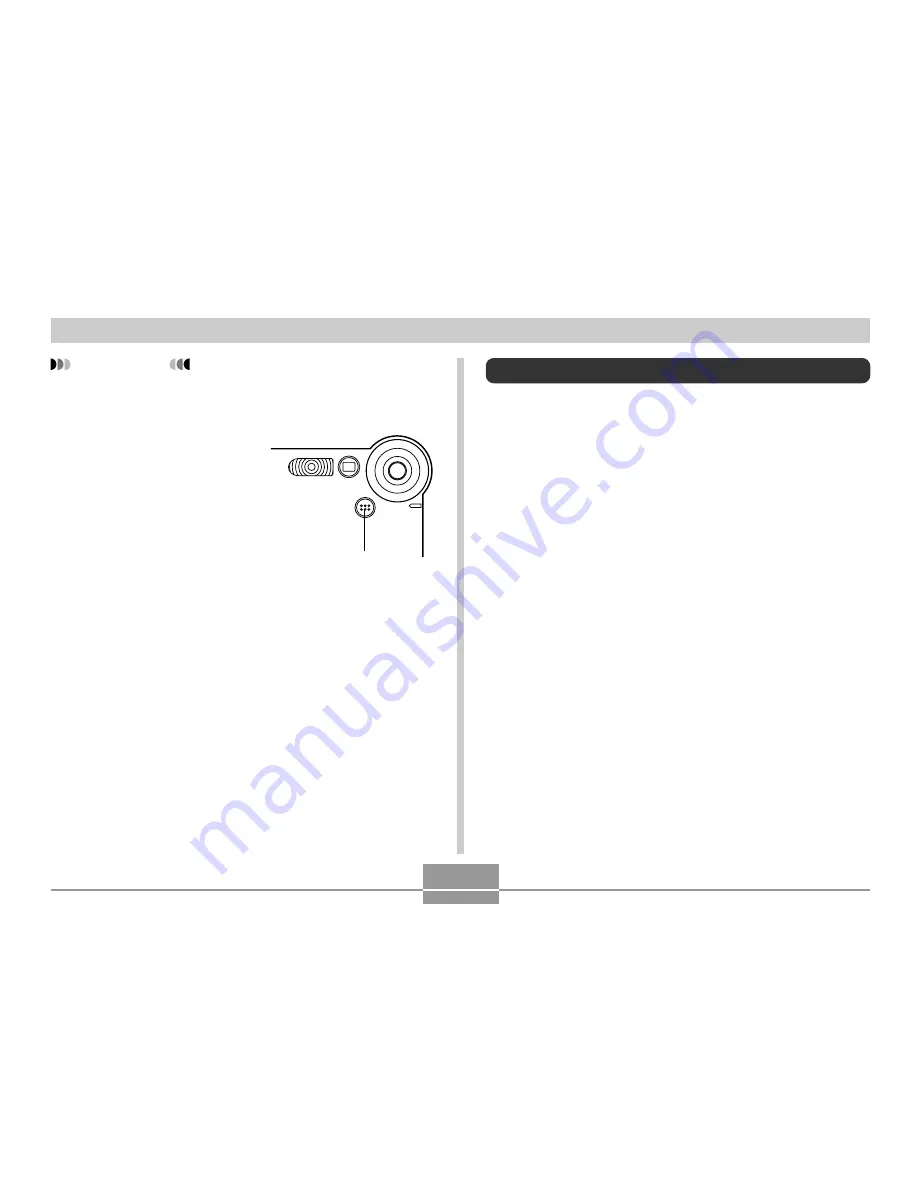
• The flash does not fire in the Movie mode.
• The EX-M20 also records audio. Note the following

points when recording a movie.
— Take care that you do

not block the
microphone with your
fingers.

— Good recording results are not possible when the

camera is too far from the subject.

— Operating camera buttons during recording can

cause button noise to be included in the audio.

— Movie audio is recorded in monaural.

Microphone

Recording Audio (EX-M20 Only)

Adding Audio to a Snapshot

You can add audio to a snapshot after you record it.

• Image Format: JPEG

JPEG is an image format that provides efficient data
compression.
The file extension of a JPEG file is “.JPG”.

• Audio Format: WAVE/ADPCM recording format

This is the Windows standard format for audio recording.
The file extension of a WAVE/ADPCM file is “.WAV”.

• Recording Time:

Up to about 30 seconds per image

• Audio File Size:

Approximately 240KB (30-second recording of
approximately 8KB per second)

Summary of Contents for EX-M20 - 1

Page 1: ...oth hands with your arms firmly against your sides Vertical When holding the camera vertically make sure that the flash is above the lens Hold the camera still with both hands IMPORTANT Make sure your fingers or the strap does not block the flash or lens Flash Lens NOTE Your image will be blurred if you move the camera when pressing the shutter release button Press the shutter release button caref...

Page 2: ... be exactly the image that is recorded ON OFF Power button 1200 1200 1600 1600 NORMAL NORMAL 03 12 24 03 12 24 12 58 12 58 12 12 Shutter release button Mode selector Recording an lmage Your camera automatically adjusts shutter speed in accordance with the brightness of the subject Images you record are stored in the camera s built in memory or to a memory card if you have one loaded in the camera ...

Page 3: ...eady stored in file memory and even lead to malfunction of the camera Never remove the memory card while an image is being recorded to the memory card Fluorescent lighting actually flickers at a frequency that cannot be detected by the human eye When using the camera indoors under such lighting you may experience some brightness or color problems with recorded images When Auto is selected for the ...

Page 4: ...ration toggles the zoom factor between 1X and 4X 1 In the REC mode press MENU 2 Use and to select the REC tab 3 Use and to select Digital Zoom and then press 4 Use and to select On and then press SET Selecting Off disables digital zoom 6 Record the image Zoom out Zoom in 5 In the REC mode use and to change the digital zoom factor Zoom in Zoom out ...

Page 5: ... in the REC mode Using the Flash Perform the following steps to select the flash mode you want to use 1 In the REC mode press MENU 2 Use and to select the REC tab 3 Use and to select Flash and then press 4 Use and to select the flash mode you want and then press SET To do this Have the flash fire automatically when required Auto Flash Turn off the flash Flash Off Always fire the flash Flash On Fir...

Page 6: ...d while in the REC mode About Red eye Reduction Using the flash to record at night or in a dimly lit room can cause red spots inside the eyes of people who are in the image This is caused when the light from the flash reflects off of the retina of the eye Red eye reduction fires a pre flash which causes the irises in the eyes of any people in the image to close This is followed by another flash op...

Page 7: ...s on the battery level temperature and other conditions The flash does not fire during movie recording This is indicated by on the monitor screen Flash The flash unit may not be able to charge when battery power is low Low battery power is indicated by the on the monitor screen and when the flash fails to fire properly resulting in poor image exposure When these symptoms occur charge the camera s ...

Page 8: ...ve represent the distance from the camera s lens surface to the subject 1 Align the Normal Macro selector with 2 Record the image Normal Macro selector To do this Shoot normal images at a distance of about 1m 39 4 to infinity Normal Shoot close ups at a distance of about 30cm 11 8 Macro Select this setting IMPORTANT Selecting the macro mode causes the indicator to appear on the monitor screen Norm...

Page 9: ...a records a series of three images in the sequence described below 1 The camera performs a 10 second countdown and then records the first image 2 The camera prepares to record the next image The amount of time required for preparation depends on the camera s current Size and Quality settings the type of memory built in or card you are using for image storage and whether or not the flash is chargin...

Page 10: ...g of images due to hand movement You can use the key customization feature page 75 to configure the camera so the self timer setting changes whenever you press and while in the REC mode Specifying Image Size and Quality You can specify the image size and image quality to suit the type of image you are recording To specify the image size 1 In the REC mode press MENU 2 Use and to select the REC tab ...

Page 11: ...ll file size but low quality NOTES If you plan to make large prints of your images or otherwise use them in applications where high resolution is your top priority select the 1600 x 1200 image size If you plan to send images as e mail attachments or otherwise use them in applications where data economy is your top priority select the 640 x 480 image size Selecting the 1600 x 1072 3 2 image size re...

Page 12: ... size is secondary Conversely use the Economy setting when file size is your top priority and image quality is secondary IMPORTANT Actual file size depends on the type of image you record This means that the remaining image capacity noted on the monitor screen may not be exactly accurate pages 23 183 ...

Page 13: ...DING FUNCTIONS This chapter describes the other powerful features and functions that are available for recording Exposure Compensation EV Shift Exposure compensation lets you change the exposure setting EV value manually to adjust for the lighting of your subject This feature helps to achieve better results when recording a backlit subject a strongly lit subject indoors or a subject that is agains...

Page 14: ... value to 0 0 causes the metering mode to change back to multi pattern metering You can use key customization page 74 to configure the camera to perform exposure compensation whenever you press 왗 and 왘 while in the REC mode Adjusting White Balance The wavelengths of the light produced by various light sources sunlight light bulb etc can affect the color of a subject when it is recorded White balan...

Page 15: ...usting White Balance Manually Select this setting Auto Manual Adjusting White Balance Manually Under some light sources automatic white balance under the Auto setting can take a long time to complete Also the auto white balance range color temperature range is limited Manual white balance helps to ensure that colors are recorded correctly for a particular light source Note that you must perform ma...

Page 16: ...r white balance adjustment is complete Dim lighting or pointing the camera at a dark colored object while performing manual white balance adjustment can cause the procedure to take a long time to complete 5 Press SET This registers the white balance settings and returns to the REC mode Using the BESTSHOT Mode Selecting one of the 15 BESTSHOT scenes automatically sets up the camera for recording a ...

Page 17: ... are provided as samples only Images recorded using a BESTSHOT scene may not produce the results you expected due to shooting conditions and other factors After selecting a BESTSHOT scene you can change to a different one by using 왗 and 왘 to scroll through available scenes When the one you want is displayed press SET NOTE You can use the key customization feature page 74 to configure the camera to...

Page 18: ...ess MENU 2 Select the REC tab select REC Mode and then press 왘 3 Use 왖 and 왔 to select BESTSHOT and then press SET This enters the BESTSHOT mode and displays a sample scene 4 Use 왗 and 왘 to display Register User Scene 5 Press SET 6 Use 왗 and 왘 to display the image whose setup you want to register as a BESTSHOT scene 7 Use 왖 and 왔 to select Save and then press SET This registers the setup Now you c...

Page 19: ... You can check the current setup of a scene by displaying the various setting menus When you register a BESTSHOT user setup it is automatically assigned a file name using one of the formats shown below depending on your camera model EX S20 UES20nnn JPE n 0 to 9 EX M20 UEM20nnn JPE n 0 to 9 To delete a BESTSHOT user setup 1 In the REC mode press MENU 2 Select the REC tab select REC Mode and then pr...

Page 20: ...ot mode lets you record images of two people and combine them into a single image This makes it possible for you to include yourself in group images even when there is no one else around to record the image for you Coupling Shot is available in the BESTSHOT mode page 58 First Image This is the part of the image that does not include the person who is recording the first image Second Image Making s...

Page 21: ...use the monitor screen to compose the right side of the image taking care to align the actual background with the semi transparent image of the background of the left side image which remains on the monitor screen When everything is aligned correctly record the image Pressing MENU any time after step 5 of the above procedure cancels the first image and returns to step 5 Semi transparent image ...

Page 22: ...n on the monitor screen 2 Ask someone else to record a shot of you against your original background telling them to compose the image by using the semi transparent monitor screen image as a guide The camera stores the image produced by step 2 only Depending on how the image is actually composed in step 2 its background may not be exactly the same as the one you composed in step 1 Note that Pre sho...

Page 23: ...he background image is not saved in memory at this time The exposure white balance zoom and flash settings are fixed for this type of image 6 Next use the monitor screen to compose the subject with the semi transparent background shown on the monitor screen When everything is aligned correctly record the image This records the image composed on the monitor screen in step 6 The reference background...

Page 24: ... tab select REC Mode and then press 왘 3 Use 왖 and 왔 to select Movie and then press SET Remaining capacity shows how many 60 second movies can still be recorded to memory 4 Point the camera at the subject and then press the shutter release button Movie recording continues for 60 seconds or until you stop it by pressing the shutter release button again The remaining recording time value counts down ...

Page 25: ... included in the audio Movie audio is recorded in monaural Microphone Recording Audio EX M20 Only Adding Audio to a Snapshot You can add audio to a snapshot after you record it Image Format JPEG JPEG is an image format that provides efficient data compression The file extension of a JPEG file is JPG Audio Format WAVE ADPCM recording format This is the Windows standard format for audio recording Th...

Page 26: ...o recording standby with the image you just recorded on the monitor screen You can cancel audio recording standby by pressing MENU 5 Press the shutter release button to start audio recording The operation flash charge lamp flashes green as recording is performed Even if you have the monitor screen turned off page 25 the monitor screen turns on while you are adding audio to a snapshot 6 Recording s...

Page 27: ... and 왔 to select Voice and then press SET This enters the Voice Recording Mode 4 Press the shutter release button to start voice recording The remaining recording time value counts down on the monitor screen and the operation flash charge lamp flashes green as recording is performed Pressing the DISP button during voice recording turns off the monitor screen The monitor screen turns back on automa...

Page 28: ...ded for some reason you can use EV shift exposure compensation to move it left or right in order to achieve better balance Optimum exposure can be achieved by correcting exposure so the graph is as close to the center as possible Audio Recording Precautions Keep the microphone on the front of the camera pointed at the subject Take care that you do not block the microphone with your fingers Good re...

Page 29: ...of light pixels and dark pixels This type of histogram results when the overall image is at optimal lightness IMPORTANT Note that the above histograms are shown for illustrative purposes only You may not be able to achieve exactly the same shapes for particular subjects A centered histogram does not necessarily guarantee optimum exposure The recorded image may be over exposed or under exposed even...

Page 30: ...Conforms to ISO 64 Conforms to ISO 125 Conforms to ISO 250 Conforms to ISO 500 Select this setting Auto ISO 64 ISO 125 ISO 250 ISO 500 IMPORTANT Increasing ISO sensitivity can cause static to appear inside an image Select the ISO sensitivity setting that suits your shooting needs Using a high ISO sensitivity setting along with the flash to shoot a nearby subject may result in improper illumination...

Page 31: ... 왔 to select the setting you want and then press SET Turning Image Review On and Off Image review displays an image on the monitor screen as soon as you record it Use the following procedure to turn image review on and off 1 In the REC mode press MENU 2 Select the REC tab select Review and then press 왘 3 Use 왖 and 왔 to select the setting you want and then press SET To do this Display images on the...

Page 32: ...ng you want and then press SET NOTE The initial default setting is REC Mode When you want to assign this function to 왗 and 왘 keys Recording mode 왗 and 왘 cycle through recording modes EX S20 Snapshot BESTSHOT Movie EX M20 Snapshot BESTSHOT Movie Snapshot Audio Voice Recording page 173 Flash mode 왗 and 왘 cycle through the flash mode settings page 47 EV shift 왗 decreases compensation 왘 increases comp...

Page 33: ...then press SET NOTE The initial default setting is Digital Zoom When you want to assign this function to 왖 and 왔 keys Recording mode 왖 and 왔 cycle through recording modes EX S20 Snapshot BESTSHOT Movie EX M20 Snapshot BESTSHOT Movie Snapshot Audio Voice Recording page 173 Digital Zoom 왖 increases the digital zoom factor 왔 decreases the digital zoom factor page 46 Flash mode 왖 and 왔 cycle through t...

Page 34: ...al Zoom On Setting when camera is turned off Off Snapshot Auto Auto Auto On 1 In the REC mode press MENU 2 Select the Memory tab select the item you want to change and then press 왘 3 Use 왖 and 왔 to select the setting you want and then press SET To do this Turn on mode memory so settings are restored at power on Turn off mode memory so settings are initialized at power on Select this setting On Off...

Page 35: ...mera s settings to their initial defaults as shown under Menu Reference on page 173 1 In the REC mode or the PLAY mode press MENU 2 Select the Set Up tab select Reset and then press 왘 3 Use 왖 and 왔 to select Reset and then press SET To cancel the procedure without resetting select Cancel and press SET ...

Reviews: