10
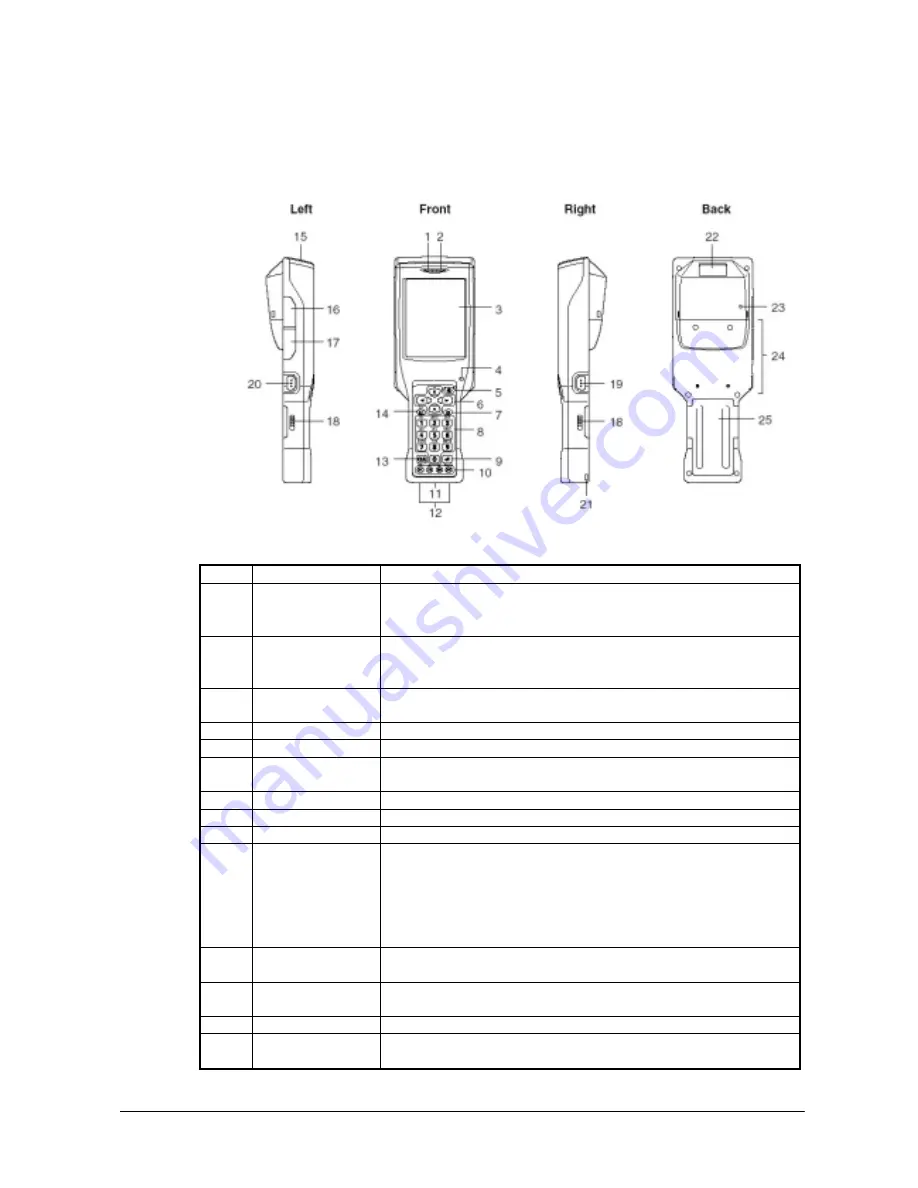
1.3 General Guide
Views
Table 1.4 Names of parts
No. Name
Description
Indicates the result of a bar code read operation.
Red
: Read error
1 Indicator
1
Green : Read successfully
Indicates the charge status of the battery pack.
Red :
Charging
2 Indicator
2
Green
: Charging complete
3
LCD panel and touch
screen
Shows text, operation indicators, etc. Also, operations can be performed and
text can be input using the supplied stylus.
4
Buzzer
Sounds a buzzer.
5
Power key
Hold down for about one second to turn the power on or off.
6
Cursor keys
These keys operate much like a computer’s cursor keys. They can be used to
select items, scroll screen contents, etc.
7
Programmable key
This key can be assigned with any function available.
8
Numeric keys
Use these keys to input numbers and letters.
9
Execute key
Press to register an input value and advance to the next step.
These keys can be assigned any function other than bar code reading. The
following are initial default settings.
F1
: Deletes one character to the left.
F2
: Inputs a hyphen (-).
F3
: Inputs a period (.).
10 Function
keys
F4
: Toggles to switch between numbers and alphabets.
11
IR port
This port is used for IR data communication with another Handheld Terminal
or the Bridge Satellite Cradle.
12
Power contacts
Contact points for supplying power from the Bridge Satellite Cradle and
Cradle-type Battery Charger.
13
CLR key
Press to clear all key inputs.
14
Fn key
Press this key and then a function key or number key to configure settings or
to run previously registered applications.
Continue.
Fig. 1.2


