26
⑥
Using the mouse
, move the
cursor
to an area to be zoomed in the zoom control screen and
double-click on it.
⑦
The Zoom function operates in three levels:
Normal, x4,
and
x16. Those
three
levels can be
switched
with
the mouse wheel
. The user also can left-click and drag the yellow box to move the focused image in
higher
than the x4 mode.
⑧
Using the remote and front panel
, it is
possible
to
change between the three zoom levels:
Front panel:
{SELECT}
button
Remote:
{SELECT}
button
;
t
he yellow box
can be moved by the arrow keys
5
-
3
-
5
Screen Control by using PTZ
The user can monitor in real-time with the
PTZ camera.
The PTZ camera must be connected to the system. For external connection
s
, refer to
[2-3 Connection of Other
Devices]
[3) Terminal block]
.
Navigate to
{Menu}
{Setup}
{Camera}
{PTZ}.
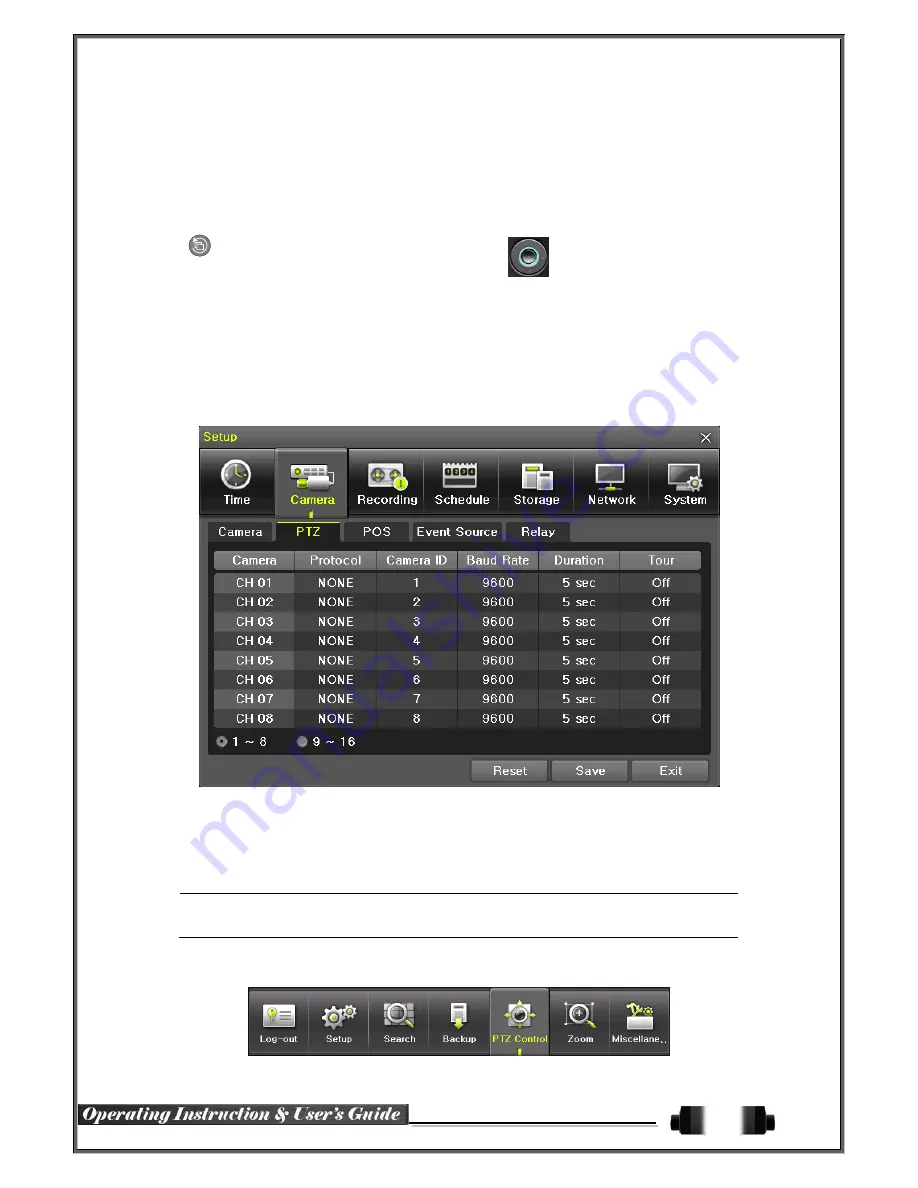
①
Configure Protocol / ID / Baud Rate / Duration / Tour
[Figure 5-15. PTZ Setup]
※
Baud rate can be selected at 2400/4800/9600/19200/38400.
※
Duration can be selected at 5/10/15/20/
User Setting (5-60)
seconds.
※
Tour consists of Tour 1/Tour 2
,
and each tour can be set with 8
possible
p
reset
s
.
※
HD-SDI Real-Time Pro DVRs
support 28 protocols for PTZ control. For supported protocols,
refer to APPENDIX.
②
To control
the
PTZ camera, select
{PTZ Control}
in
the
Menu or press
{PTZ}
o
n the remote.
[Figure 5-16. PTZ Control]
Summary of Contents for HDRP16
Page 1: ......


