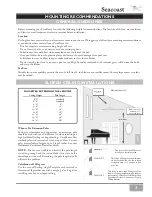


6
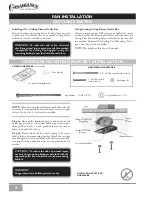
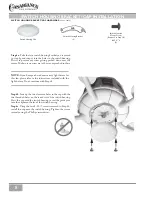
Step 4c.
Using the provided Allen wrench, loosen the set
screw several turns to allow installation of the downrod.
Th read the downrod into the motor coupling until it stops
turning. Th is will take at least four and a half full turns.
Step 4d.
Tighten the set screw securely with the provided
Allen wrench to ensure safe operation of your fan.
Step 4e.
Slide the motor cover down so that it is fl ush against
the top of the fan.
Step 4f.
Using the three provided screws, attach the motor
cover to the motor. Tighten securely with the provided
Phillips screwdriver.
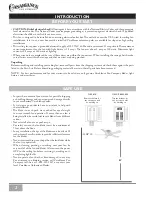
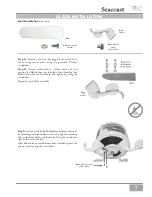
IMPORTANT SAFETY INFORMATION!
Before starting the installation of your ceiling fan, install the threaded
downrod into the motor coupling and lock the assembly
Prepare for fan installation as follows:
Step 4a.
Place the motor cover on the downrod as shown.
Step 4b.
Route the wires from the motor through the
Perma•Lock™ downrod and ball assembly.
Tip: Th e downrod has a tapered thread that is designed
to lock completely when correctly installed.
CAUTION:
Failure to fully lock in the downrod
before securely tightening the Allen set screw may
cause the fan to separate from the downrod during
normal operation!
Perma•Lock™ Downrod
and Ball Assembly
Motor Coupling
Tapered Thread
Allen Set Screw
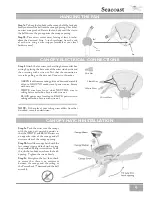
FAN PREPARATION
Step 4g.
Unsnap one of the switch housing brackets on
the bottom of the switch housing and set it aside for use
in step 6c.
Step 4h.
To reach the blade holder mounting holes in the
fan motor, the switch housing cap must be removed. Take
out the two 8-32
3
/
8
" screws securing the switch housing cap
and set them aside for use in step 6c.
Mount Screws
8-32 X
3
/
8
"
(2)
Switch
Housing
Cap
Switch
Housing
Bracket