113
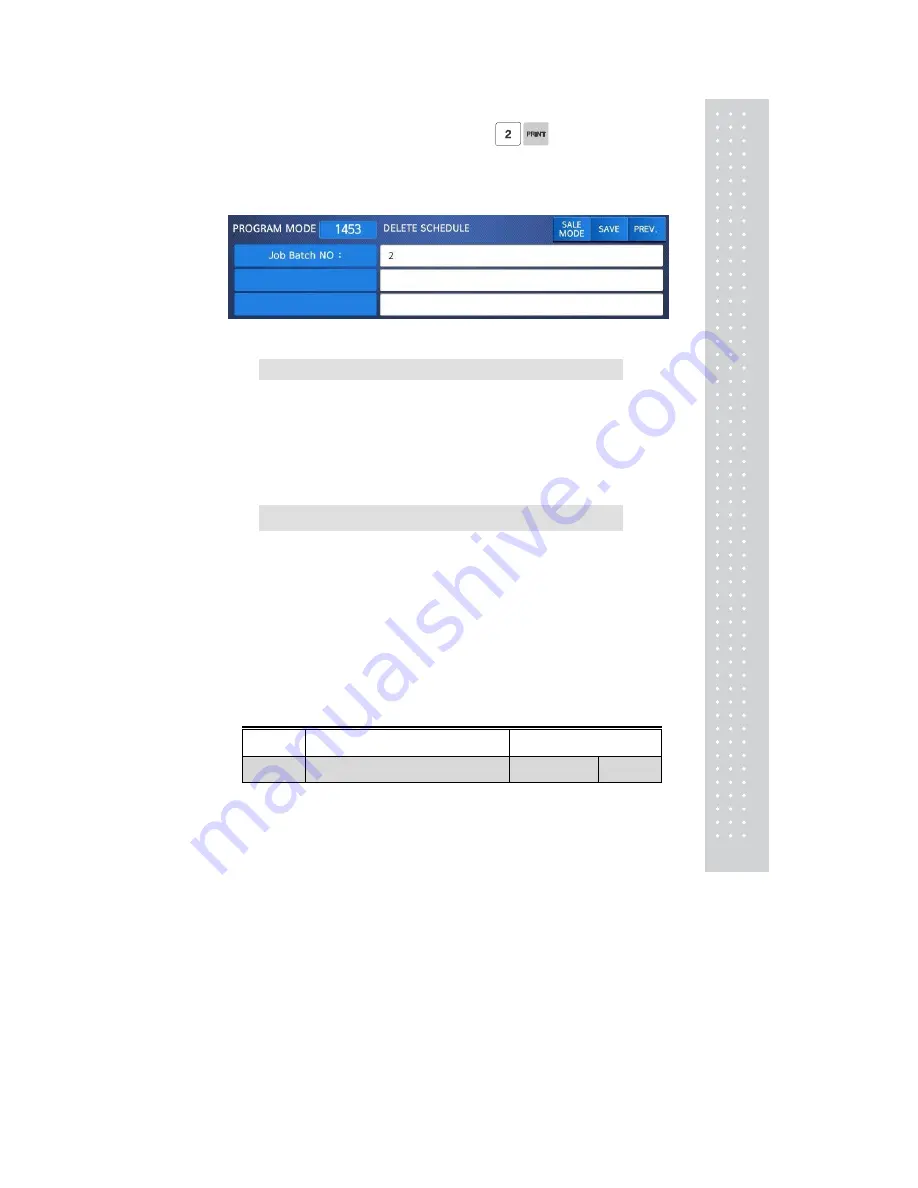
1. Job Batch Schedule number to delete
EX) Delete Job Batch Schedule no. 2
Note: There is no confirmation request when deleting a Job Batch Schedule No. Pressing
the PRINT key will cause the Job Batch Schedule No. entered to be deleted
.
2.11.6 Scanner (Menu code 1460)
( MENU → 4. Store Data Table → 6. Scanner )
This menu is used to make barcode scanning sale available or just to call up PLU.
These are operable functions and setting methods when using by connecting the barcode scanner to
CL7200 series.
2.11.6.1 New/Edit Scanner Conversion Table (Menu code 1461)
( MENU → 4. Store Data Table → 6. Scanner →
1. New/Edit Comv Table )
This is Mapping Table between each scanned bar code and each PLU number.
1. Setting up scan code No
Maximum number of Conv Table. Index is 1999
2. Setting up mapping Code
Enter the number ranged between 1 and 13
.
3. Setting up department No
Enter the Department number of the PLU to be mapped.
4. Setting up PLU No
Enter the PLU number to be mapped.
EX)
Index
The value to be compared with
data from a bar code
Department and PLU no. to be
mapped
Code No
Mapping Code
Department No
PLU No
Summary of Contents for CL7200 series
Page 1: ...2 ...
Page 8: ...9 1 GENERAL 1 1 PRECAUTIONS ...
Page 13: ...14 1 4 NAMEAND FUNCTIONS OVERALLVIEW ...
Page 14: ...15 DISPLAY Frontdisplayfortheoperator Frontdisplayfortheoperatorwithfunctionkey ...
Page 15: ...16 Backdisplayforcustomers ...
Page 24: ...25 1274 Tare Key ...
Page 40: ...41 ...
Page 45: ...46 ...
Page 50: ...51 ...
Page 78: ...79 ...
Page 121: ...122 ...
Page 145: ...146 Setting Configuration Permission ...
Page 152: ...153 ...
Page 159: ...160 5 ClearAll Clear all reports of period 1 and 2 ...
Page 161: ...162 Sample Scale Report ...
Page 163: ...164 Sample PLU Report ...
Page 165: ...166 Sample Miscellaneous Report ...
Page 172: ...173 Sample Clerk Report ...
Page 179: ...180 Press TARE key ...
Page 183: ...184 Press PRINT key to print label ...
Page 185: ...186 Press PRINT key to print label ...
Page 197: ...198 Press the PRINT key Markdown STRIKE THROUGH is printed on label as figure ...
Page 202: ...203 Call up a PLU and place item on the platter Press ADD key PLU is cleared automatically ...
Page 211: ...212 If price is not same void list screen is shown on the display automatically ...
Page 229: ...230 1 1 Label Format Sample 1 2 3 4 5 6 ...
Page 230: ...231 7 8 9 10 11 12 13 14 ...
Page 231: ...232 15 16 17 18 19 20 ...
Page 232: ...233 21 22 23 24 ...
Page 233: ...234 25 26 27 28 29 30 ...
Page 234: ...235 31 32 33 34 35 36 37 38 ...
Page 235: ...236 39 40 41 42 43 44 45 ...
Page 236: ...237 1 2 Label Format s field Sample 1 Label sample 1 2 Label sample 2 ...
Page 238: ...239 3 Window Character Set Information ...
Page 239: ...240 MEMO ...
Page 240: ...241 MEMO ...
Page 241: ...242 MEMO ...
Page 242: ...243 MEMO ...
Page 243: ...244 MEMO ...
Page 244: ...245 MEMO ...
Page 245: ...246 MEMO ...
Page 246: ...247 MEMO ...
Page 247: ...248 ...
Page 248: ...249 뒷표지 ...


