background image

8

POWER AND CONTROL WIRING —

1. Lift up the front panel and look for the control box cover

as shown in Fig. 11.

Fig. 11 —Accessing Control Box Cover

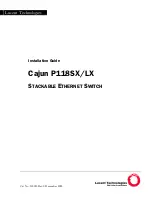
2. Remove  the  control  box  cover  plate  and  look  for  the

power and control wire holders to route the wires to the

proper terminals as shown in Fig. 12.

Fig. 12 —Removing Control Box Cover

LEGEND

ACB

— Auxiliary Control Board

ALARM

— Warning Lamp (Optional)

CS

— Condensate Switch (Optional)

EEV

— Electronic Expansion Valve

FM

— Indoor Fan Motor

GM

— Swing Motor

MDC

— Multiport Distribution Controller

PUMP

— Pump Motor (Optional)

T1

— Room Temp. Sensor

T2A

— Inlet Pipe Temp. Sensor

T2B

— Outlet Pipe Temp. Sensor

XP1-4/XS1-6 — Connectors

XT1

— Terminal

SW8

ENC1

POWER_S

CN15

XT1

RED

BLUE

TMC

EEV

To Wired Controller Bus

ON/OFF

SWITCH

T2B

T1

T2A

Display board

main control Board

CN1

CN6

CN5

CN2 CN16

Y/G

GM

XS4

XP4 

XS3

XP3

WHITE

XS2

CN18

CN24

CN8

ENC2

CN7

CN14 CN54

CN3

GM

CN53

CN4

CN10

CN30

CN19

XS1

XP1 

RED

HA

HB

ABC interface

T

o outdoor / indoor

MDC comm. bus

CN1

CN3

CN2

AUXH

HTON

CTON

FAN

L1  L2

XS5

XS6

BLUE

P

Q

P

Q

POWER IN

Occupancy sensor/

ON-OFF (Dry contact)

XS4 XP4 

Fig. 10 — 40VMW005-030 Typical Wiring Diagram

Summary of Contents for 40VMW005

Page 1: ... DANGER WARNING and CAUTION DANGER identifies the most serious hazards which will result in severe personal injury or death WARNING signifies hazards that could result in personal injury or death CAUTION is used to identify unsafe practices which would result in minor personal injury or product and property damage Recognize safety information This is the safety alert symbol When this symbol is dis...

Page 2: ...ion Start Up and Service Instructions for the 38VMAH and 38VMAR outdoor units UNIT 40VMW 005 007 009 012 015 018 024 030 POWER SUPPLY V Ph Hz 208 230 1 60 TOTAL COOLING CAPACITY Btuh 5 000 7 500 9 500 12 000 15 000 18 000 24 000 30 000 SENSIBLE COOLING CAPACITY Btuh 4 060 5 640 6 520 7 930 10 140 12 040 15 330 18 950 HEATING CAPACITY Btuh 6 000 8 500 10 900 13 500 17 000 21 000 27 000 34 000 INDOO...

Page 3: ...Routing refrigerant pipes Copper nut 1 Connect piping Flexible conduit and connectors 1 Routing power lines PQE connection wire 2 To connect outdoor unit indoor unit and sub MDC Connecting wire 1 For occupancy sensor No Beep Harness 1 Prevent beeping noise LEGEND MDC Multiport Distribution Controller 40 VM W 005 3 Product Type Equipment Type 40 Indoor Unit VM VRF Blank Voltage V Ph Hz 3 208 230 1 ...

Page 4: ...es Fig 2 40VMW005 018 Dimensions Fig 3 40VMW024 030 Dimensions 40VMW UNIT SIZE DIMENSION A B C D 005 012 36 11 3 8 9 28 3 4 015 018 42 1 4 12 3 8 9 35 1 8 40VMW UNIT SIZE DIMENSION A B C D 024 030 47 13 1 2 10 1 8 42 3 8 C D A B D A B C ...

Page 5: ...r wheels will not be covered by the manufacturer s warranty Some units and or job conditions may require some form of temporary covering during construction PREPARING JOBSITE FOR UNIT INSTALLATION To save time and to reduce the possibility of costly errors set up a complete sample installation in a typical room at jobsite Check all critical dimensions such as pipe wire and duct connections require...

Page 6: ...ompleted remove the cushioning material and make sure the unit is flush with the wall CONDENSATE PIPING The unit is supplied with a 3 4 in OD drain connection to connect copper or PVC drain piping When installing condensate piping follow these recommendations Condensate drain should slope downward in the direction of condensate flow DO NOT install any U bends or dump condensate line in a sump fill...

Page 7: ...iring or voltage is not covered by warranty Electric wiring must be sized to carry the full load amp draw of the motor starter and any other controls that are used with the unit Refer to Table 4 for electrical data Table 4 40VMW Electrical Data After the pipe work is complete the electrical supply can be connected by routing the cable through the appropriate casing holes or knockouts and connectin...

Page 8: ... Fan Motor GM Swing Motor MDC Multiport Distribution Controller PUMP Pump Motor Optional T1 Room Temp Sensor T2A Inlet Pipe Temp Sensor T2B Outlet Pipe Temp Sensor XP1 4 XS1 6 Connectors XT1 Terminal SW8 ENC1 POWER_S CN15 XT1 RED BLUE TMC EEV To Wired Controller Bus ON OFF SWITCH T2B T1 T2A Display board main control Board CN1 CN6 CN5 CN2 CN16 Y G GM XS4 XP4 XS3 XP3 WHITE XS2 CN18 CN24 CN8 ENC2 CN...

Page 9: ...tion Wire Connection OPTION EXTENSIONS OF COMMUNICATION WIRING To extend control wiring or make terminal connections use the PQE connection wire supplied in the accessory kit and follow the steps below 1 Cut the connector on the outdoor unit side as shown in Fig 15 Fig 15 Shearing Outdoor Connector 2 Strip a suitable length of the insulation layer as shown in Fig 16 Fig 16 Stripping the Wire 3 Use...

Page 10: ...n the terminal screws IMPORTANT Wiring for communication shall be two inches or more apart from power source wiring to avoid elec tric noise Do not insert control communication and power source wire in the same conduit IMPORTANT Pay attention to the polarity of the commu nication wire Connector in accessory kit Connector on indoor unit Communication cable in field Fig 19 Connecting the Communicati...

Page 11: ...unit 5 Indoor unit 6 Touch screen wired controller Note 24v DC Power Note Power from IDU Maximum wiring length L1 L2 3937 ft 18 AWG 2 Core Stranded Shield L3 3937 ft 18 AWG 2 Core Stranded Shield L4 3937 ft 18 AWG 2 Core Stranded Shield L5 3937 ft 18 AWG 2 Core Stranded Shield L6 L7 L8 L9 820 ft 18 AWG 2 Core Stranded Shield L10 L11 820 ft 18 AWG 2 Core Stranded Shield HA HB HA HB HA HB HA HB HA H...

Page 12: ...door unit 1 P Q Note Power from IDU Maximum wiring length L1 L3 3937 ft 18 AWG 2 Core Stranded Shield L5 3937 ft 18 AWG 2 Core Stranded Shield L6 L7 L8 L9 820 ft 18 AWG 2 Core Stranded Shield L10 L11 820 ft 18 AWG 2 Core Stranded Shield Note 24v DC Power Touch screen wired controller HA HB HA HB HA HB HA HB HA HB HA HB Network Resistor NOTE Network resistor is shipped with the outdoor unit for ins...

Page 13: ...th maintenance schedule In addition Be sure all electrical connections are secure Check condensate pump operation Check the heating and cooling action to confirm proper operation INDOOR UNIT ADDRESSING For proper system operation each indoor unit must have a unique address set from 0 to 63 When setting an address by remote controller the outdoor units indoor units and MDC must be powered on If FE ...

Page 14: ...25 Press OK to confirm and exit the setting interface Fig 25 Non Programmable Controller Setting IDU Address Programmable Controller When setting an address connect only one wired controller to an indoor unit 1 Press FAN and BACK simultaneously for five seconds to access parameter settings as shown in Fig 26 Fig 26 Programmable Controller IDU Addressing Menu 2 Press TEMP UP or TEMP DOWN to move th...

Page 15: ...hoose the address you want to set as shown in Fig 27 Press MENU OK to send this address to the IDU Fig 27 Programmable Controller Setting IDU Address 4 Press BACK twice or wait 30 seconds to automatically exit the parameter settings menu ...

Page 16: ... Heating Cooling Mode Conflict Error E1 Communication Error Between Indoor and Outdoor Unit E2 Check Indoor Temperature Sensor T1 E4 Check Evaporator Outlet Temperature Sensor T2B E5 Check Evaporator Temperature Sensor T2A E6 Check DC Fan E7 EEPROM Error Data Storage E9 Communication Error Between Indoor Unit and Wired Controller Eb EEV Error Ed Outdoor Unit Error EE Condensate Overflow FE No Addr...

Page 17: ...ic pressure on the unit DC motor fault Replace DC motor PC board fault Replace PC board E7 EEPROM Error Data Storage Chip or PC board fault Replace PC board E9 Communication Error Between Indoor Unit and Controller Signal wires are short circuited or disconnected Check or reconnect signal wires Signal wires close to electromagnetic source Distance signal wires from electromagnetic source PC board ...

Page 18: ... settings for each parameter controlled by a switch Switches are shown in the default settings POSITION 1 START UP POSITION 2 POSITION 3 NOT USED POSITION 4 INDOOR UNIT IDENTIFICATION Fig A SW1 SETTINGS POSITION 1 2 NOT USED Fig B SW8 SETTINGS OFF Auto Addressing Mode Default ON Factory Test Mode OFF Normal Mode Default ON Factory Self Checking Mode OFF Standard Indoor Unit Default ON Mode Priorit...

Reviews: