14
Setting of cars´
braking performance
1 – 10
1 – 10
1
2
1
8
2
7
3
6
5
4
1
8
2
7
3
6
4
5
3
6
1
8
2
7
3
6
4
5
5
(only for cars operated with speed controllers)
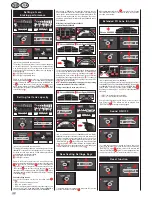
The setting of the braking performance can be effected individually
for one and/or several cars. The cars which are to be adjusted have
to be positioned on the track. The setting can be carried out on 10
levels with the 5 LEDs indicating the different levels by flashing or
permanent lighting.
1
1 LED lights = low braking effect
2
5 LEDs light = high braking effect
Switch on the Control Unit, place the cars to be adjusted on the
track and press “BRAKE”
6
once. A certain number of LEDs will
now light, showing the brake step last used. Push the “BRAKE” but-
ton
6
as many times until you have reached the braking perfor-
mance desired. Confirm by pressing “ENTER/START”
3
. A short
running light and the lighting of the middle LED confirms completion
of the setting, fig.
6
.
Setting fuel tank capacity
1 – 10
1 – 10
1
2
1
8
2
7
3
6
5
4
1
8
2
7
3
6
4
5
3
6
1
8
2
7
3
6
4
5
5
(only for cars operated with speed controllers)
The setting of the fuel tank capacity in combination with the Pit Lane
(20030356) is effected for all cars simultaneously. The setting can
be carried out on 10 levels with the 5 LEDs indicating the different
levels by flashing or permanent lighting.
1
1 LED lights = low fuel capacity
2
5 LEDs light = full tank
Switch on the Control Unit, place the cars to be adjusted on the
track and activate the fuelling function by means of the slide switch
2
, fig.
3
. Press the “FUEL” button
7
once. A certain number of
LEDs will now light, showing the fuel capacity last used. Push the
“FUEL” button
7
as many times until you have reached the fuel
capacity desired. Confirm by pressing “ENTER/START”
3
. A short
running light and the lighting of the middle LED confirms completion
of the setting, fig
6
.
Extended fuelling function
You can choose between 3 modes via the sliding switch
2
,
fig.
3
:
• OFF = cars don´t consume any “petrol”
• ON = cars consume “petrol”
• REAL = maximum speed depending on fuel tank capacity / cars
consume “petrol”) (only in combination with Pit Lane 20030356 or
Pit Stop Lane 20030346 and Pit Stop Adapter Unit 20030361)
When driving in “REAL-mode” the car with a full tank is “heavier”,
drives slowlier and shows a lower braking effect; a car with an empty
tank is “lighter”, drives faster and shows a higher braking effect. The
current fuel tank capacity and the “fuel consumption” can only be
displayed in combination with the Driver Display 20030353 and Pit
Stop 20030356.
Refuelling of cars with Pit Lane 20030356
and Driver Display 20030353
8
7
Pit Lane 20030356
Driver Display 20030353
9
10
The car´s present tank capacity can be read via the bar display with
5 green and 2 red LEDs at the Driver Display. For refuelling drive
your car into the Pit Lane across the refuelling sensor fig.
7
. The
bar display now starts to flash, fig.
8
, and the car can be refuelled
by keeping the lane-change button pushed. fig.
9
. The number of
refuellings are indicated by flashing or lighting of the yellow LEDs,
fig.
10
(also see Driver Display).
Note: cars with an empty tank are disregarded for lap-counting
in combination with Position Tower 20030357.
Setting of tank capacity at the start of the race
Pit Lane 20030356
Driver Display 20030353
1
8
2
7
3
6
4
5
11
12
14
13
(only in combination with Pit Lane 20030356 and Driver Display
20030353) Irrespective of the basic setting of the tank capacity it is
possible to individually set the tank capacity for one or several cars
at the race´s start for the number of laps till the first pit stop. Push
“START/ENTER” once
3
; the 5 LEDs at the Control Unit will light
permanently, fig.
12
, and the Driver Display´s bar display will flash,
fig.
13
. Clicking the lane-change button at the corresponding speed
controller enables you to change the fill level, fig.
14
.
Deactivating Settings Keys
8
7
3
6
4
5
2
1
8
2
7
3
6
4
5
1
1
8
2
7
3
6
4
5
3
To deactivate the keys for setting Speed, Brake and Fuel, proceed
as follows: Hold down the Code Key
8
.
While holding down the Code Key
8
, turn on the Control Unit and
then release the Code Key. To reactivate the above keys, repeat the
procedure just described.
Extended Pit Lane function
Pit Lane 20030356
1
8
2
7
3
6
5
2
1
8
2
7
3
6
4
5
1
1
8
2
7
3
6
5
4
1
8
2
7
3
6
4
5
3
1
8
2
7
3
6
4
5
6
5
(only in combination with Pit Lane 20030356)
It is possible to activate/deactivate the lap counting function in the Pit
Lane 20030356 or Pit Stop Lane 20030346 with the Pit Stop Adapter
Unit 20030361. Switch off the Control Unit, keep “SPEED” button
5
)
pushed, switch on Control Unit and release “SPEED” button
5
.
By pushing the button again, 1 or 2 LEDs will light depending on
the setting.
• LED 1 = lap counting function deactivated
• LED 1 + 2 = lap counting function activated
Select the desired setting and push or drive a car across the Pit
Lane Sensor, fig.
5
. The settings will now be adopted. Push
“START/ENTER”
3
for leaving the settings again.
Sound ON/OFF
1
8
2
7
3
6
4
5
2
1
8
2
7
3
6
4
5
1
1
8
2
7
3
6
4
5
3
The confirmation sound when crossing the sensors and the key
sound can be switched off. Switch off the Control Unit and keep the
“START/ENTER” button
3
pushed, switch on the racetrack and
release “START/ENTER”
3
again. The acknowledgement sound
for switching on the Control Unit cannot be switched off however.
Reset function
1
8
2
7
3
6
4
5
2
1
8
2
7
3
6
4
5
1
1
8
2
7
3
6
4
5
3


