background image

Configuration 

Scanner DS457 


14 

Operating Manual 

08.19 


4.1  Settings of the Scanner Software 

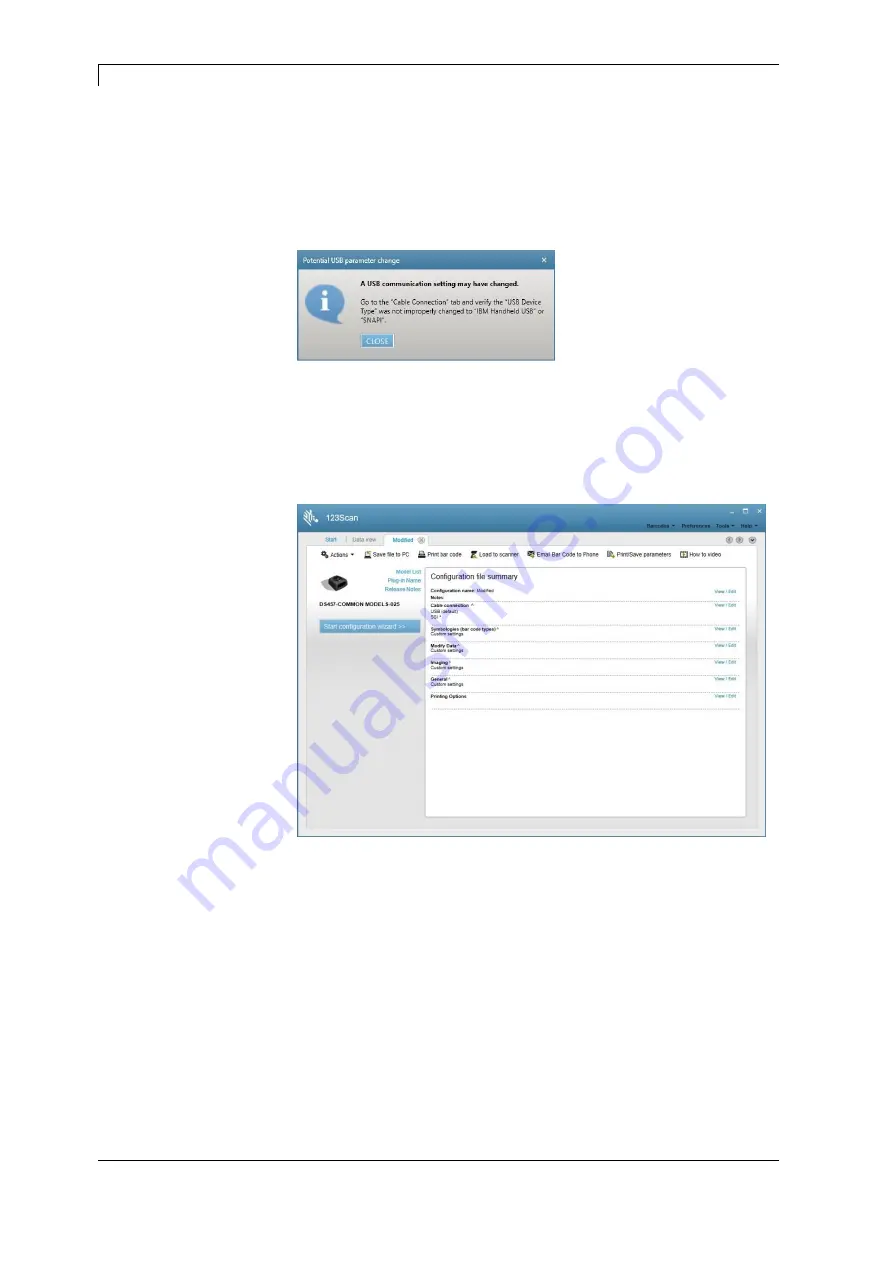
In order to modify the settings of the scanner attached to the PC, the 
function "Clone/modify my connected scanner settings" must be 
selected. The following dialog box "Potential USB parameter change" 
can be closed. 


Figure 6 


An overview of the configuration is displayed and either the 
configuration wizard can be started with "Start configuration wizard" or 
a parameter area can be directly selected for modifications to the 
configuration. 


Figure 7 


Summary of Contents for DS457

Page 1: ......

Page 2: ...l Valentin GmbH Due to the constant further development of our devices discrepancies between manual and device can occur Please check www carl valentin de for the latest update Trademarks All named br...

Page 3: ...ra II 9 3 2 Vario III 10 3 3 Vita II 11 4 Configuration 13 4 1 Settings of the Scanner Software 14 4 2 Save the Settings 26 5 Function Menu Scanner 27 5 1 Scanner Mode 27 5 2 Scanner Type 28 5 3 Scann...

Page 4: ...Table of Content Scanner DS457 4 Operating Manual 08 19...

Page 5: ...tely 1 1 Environmentally Friendly Disposal Manufacturers of B2B equipment are obliged to take back and dispose of old equipment that was manufactured after 13 August 2005 As a principle this old equip...

Page 6: ...ner for 1D and 2D bar codes The scanner can be attached to the printer without external voltage supply With a base of 5 8 x 6 2 cm the scanner fits into any small operating environment A permanently h...

Page 7: ...Postal User environment Supply voltage 5 00 V 0 5 V Current consumption 2 5 mA typical Idle current 160 mA typical Operating current scan decode 280 mA average Peak current 450 mA Ambient light Absolu...

Page 8: ...Technical Data Scanner DS457 8 Operating Manual 08 19...

Page 9: ...ption scanner disconnect the label printer from the mains supply and wait for a moment until the power supply unit has discharged Figure 2 1 Open the right printer cover 2 Remove the lower front panel...

Page 10: ...connect the label printer from the mains supply and wait for a moment until the power supply unit has discharged Figure 3 1 Open the right printer cover 2 Remove the lower front panel 3 Fasten the sca...

Page 11: ...onnect the label printer from the mains supply and wait for a moment until the power supply unit has discharged Figure 4 1 Open the right printer cover 2 Remove the lower front panel 3 Fasten the scan...

Page 12: ...Installation of Scanner Bracket Scanner DS457 12 Operating Manual 08 19...

Page 13: ...e scanner must be connected to the PC using the supplied USB cable Zebra no 25 58926 04R If necessary for the operation at the printer remove the RS 232 cable from the scanner In the main menu of 123S...

Page 14: ...tion Clone modify my connected scanner settings must be selected The following dialog box Potential USB parameter change can be closed Figure 6 An overview of the configuration is displayed and either...

Page 15: ...n number can be assigned here Moreover notes can be entered These data are not relevant for the operation of the scanner at the printer and serve only for information purposes Cable Connection The sca...

Page 16: ...must be set to Enabled so that the scanner activates as default the serial interface after switching on The baud rate and parity must comply with the values set in the Scanner menu of the printer The...

Page 17: ...re to be read from the scanner can be made here depending on application Further information to the possible settings can be found in the Help of 123Scan As default the scanner is adjusted in that way...

Page 18: ...necessary settings at the printer for the operation of the scanner for the data formats before the read data as prefix the STX sign is send CTRL B 02hex behind the read data as suffix 2 the ETX sign...

Page 19: ...Scanner DS457 Configuration 05 19 Betriebsanleitung 19 Imaging There are no settings to enter for the operation at the printer The default settings are displayed in the following figures Figure 13...

Page 20: ...Configuration Scanner DS457 20 Operating Manual 08 19 Figure 14 Figure 15...

Page 21: ...Scanner DS457 Configuration 05 19 Betriebsanleitung 21 Figure 16 Figure 17...

Page 22: ...Configuration Scanner DS457 22 Operating Manual 08 19 Figure 18 Figure 19...

Page 23: ...herwise the scanner changes after the set time to the Low Power mode and possibly does not react to commands of the printer Figure 21 The parameter Transmit No Read Message is to be activated so that...

Page 24: ...Configuration Scanner DS457 24 Operating Manual 08 19 Figure 22...

Page 25: ...Configuration 05 19 Betriebsanleitung 25 Figure 23 The Beeper Volume is set to the value Medium and the parameter Beep After Good Decode is deactivated Otherwise the scanner gives a beep after each sc...

Page 26: ...4 2 Save the Settings Figure 24 The revised scanner configuration can be saved as a file on the PC can be printed as bar code to program the scanner can be transferred to the scanner can be sent per...

Page 27: ...read the printed bar codes This mode is to use if the bar code is available as graphic e g printing with printer driver In this case the printer cannot recognize that a bar code is placed onto the la...

Page 28: ...a bar code is read then the read data is indicated in the display and the scanner is immediately again set to on Is the scanner in the correct position it starts to flicker Is the scanner not in the c...

Page 29: ...n Mode With this parameter can be adjusted at which time the scanning of the bar code is to be effected during printing or after printing While printing The scanning of bar code is effected while the...

Page 30: ...e parameter scan timeout is set to 0 the printer waits until the bar code could be read If the bar code is not read withing the fixed time the printer switches Off the scanner again non readable When...

Page 31: ...6 bad readings N 6 7 bad readings N 7 8 bad readings N 8 9 bad readings Number of consecutive bad readings after which an error message is displayed With 0 NoReads no error message occurs i e the pri...

Page 32: ...printing Enquire scan mode SOH F C D M C w p p p p p p p p ETB Answer SOH A N p p p p p p p p ETB N current scan mode Set scan delay scanning after printing SOH F C D M D r N N N N ETB N Scan delay i...

Page 33: ...provide the possibility to define the order of bar code data to scan multiple codes onto a label Because of this reason it is necessary to define the bar code data in the text statements as scanner v...

Page 34: ...Parameter Sets for Scanner Mode Scanner DS457 34 Operating Manual 08 19...

Page 35: ...high Increase the contrast Clean the printhead or exchange if necessary Reduce the print speed 70 Scanner data Scanned data does not correspond to the data which is to print Exchange printhead 94 Scan...

Page 36: ...Error Messages Scanner DS457 36 Operating Manual 08 19...

Page 37: ...arameter 30 Scan delay 30 scan length 29 scan mode 29 scan offset 28 Scan timeout 30 scanner mode 27 scanner setup 28 type 28 G general notes 5 I installation Spectra II 9 Vario III 10 Vita II 11 inte...

Page 38: ......

Reviews: