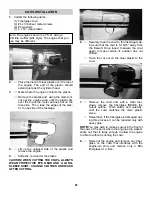
COWL INSTALLATION
2.
!
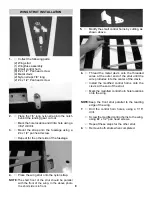
Place the piece of clear plastic over the top of
the engine. The end of the plastic should
extend just past the cylinder head.
3.
!
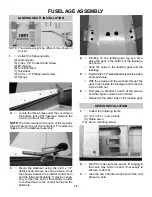
Mark where the engine contacts the plastic.
!
Remove the plastic and, using the moto tool,
cut out the engine area until the plastic fits
over the top of the motor and lies flat on the
fuse side. Then, tape the edges of the plas-
tic to one side of the fuselage.
1.
Collect the following items:
(1) Fiberglass cowl
(4) #4 x 3/8 sheet metal screws
(4) #4 washers
(1) 4 x 12” clear plastic
Note: The engine shown is a YS 91 using a
Slimline muffler (pitts style). The engine that you
use may be different.
4.
!
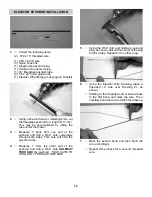
Lift up the untaped side of the plastic and
remove the engine.
5.
!
Slide the cowl under the plastic.
CAUTION! WHEN CUTTING THE COWL, ALWAYS
WEAR PROTECTIVE EYE GEAR AND A LONG-
SLEEVE SHIRT. CHANGE CLOTHES AND WASH
AFTER CUTTING.
6.
!
Securely tape the cowl to the fuselage,mak-
ing sure that the cowl is 5-15/16” away from
the firewall. Once taped, measure the cowl
again to make certain its position has not
shifted.
!
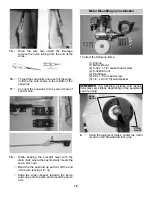
Trace the cut out on the clear plastic to the
cowl.
7.
!
Remove the cowl and, with a moto tool,
slowly remove the fiberglass INSIDE the
cutout outline. Work slowly and carefully,
until the cowl matches the clear plastic
piece.
!
Remember, if the fiberglass is damaged dur-
ing this process, it can be repaired only with
epoxy glue.
NOTE:
You may wish to make a cutout in the front of
the cowl, at the point where the engine prop washer
sticks out, that is large enough to allow the engine
to vibrate without touching the cowl.
8.
!
Remount the engine and remove any fiber-
glass on the cowl that interferes with the
engine.Go slow and remove only a little
fiberglass at a time.
21
Summary of Contents for decathlon arf
Page 29: ......


