Note:
Do NOT use any CA accelerator/kicker - you will
immediately ‘fog’ the clear canopy!
Tape the front of the canopy to the frame temporarily.
Mount the canopy frame to the fuselage (use all 4 bolts),
and tape the back of the canopy frame tightly to the fuse-
lage. Using the masking tape handles to pull the canopy
outwards firmly against the frame, working from the back
towards the front, glue the edges of the canopy in place in
2 more places each side, with just a single small drop of CA
at each position, all the time checking that the edge of the
canopy is tight up against the frame at the front.
Then make visual check from the front and back to make
sure that the canopy is straight. Now that the canopy is
fixed in position and cannot twist or warp anymore, you can
carefully glue the rest of the canopy firmly in place. You can
either complete the gluing from the outside, allowing the CA
glue to wick into the joint between the frame and the clear
plastic or, if you prefer, you can carefully remove the
canopy frame from the fuselage, and use a 30 minute or
24hr epoxy and micro-balloon mixture for gluing all the
edges to the frame on the inside surface. Even if you use
the CA glue method, we recommend that you also glue the
inside edges with the the epoxy mixture to be sure that the
canopy cannot come off in flight.
If you wish you can tint the inside of the canopy using one
of the aerosol spray paints used for painting the inside of
polycarbonate car bodies (eg: the Tamiya or Lexanit
ranges). Use many very light coats to get even coverage.
Finally the 4 holes for the heads of the M3 bolts that hold
the canopy frame in place need to be ‘counterbored’ into
the outside surface of the fuselage, so that the boltheads
do not squash the relatively soft foam cored vacuum
moulding.
Counterboring means making a larger hole for the bolt-
head to go in, so it sits flush with the outside surface of
the fuselage, and the head sits against a
flat
surface
inside the hole - not an angled surface like that made with
a normal countersink. The easiest way to do this is with a
Dremel and a small mill. Make the counterbored bored
holes 6mm Ø and about 5mm deep, so that the bolt head
sits against the plywood squares in the fuselage. Even bet-
ter is to glue metal washers into the holes for the bolts to sit
flat against.
Note:
This ‘counterboring’ technique also needs to be used
in the bottom surface of both horizontal stabs for the M3
bolts that hold them onto the 20mm aluminium tube.
Composite-ARF Yak-55 SP
(2.6m span)
18
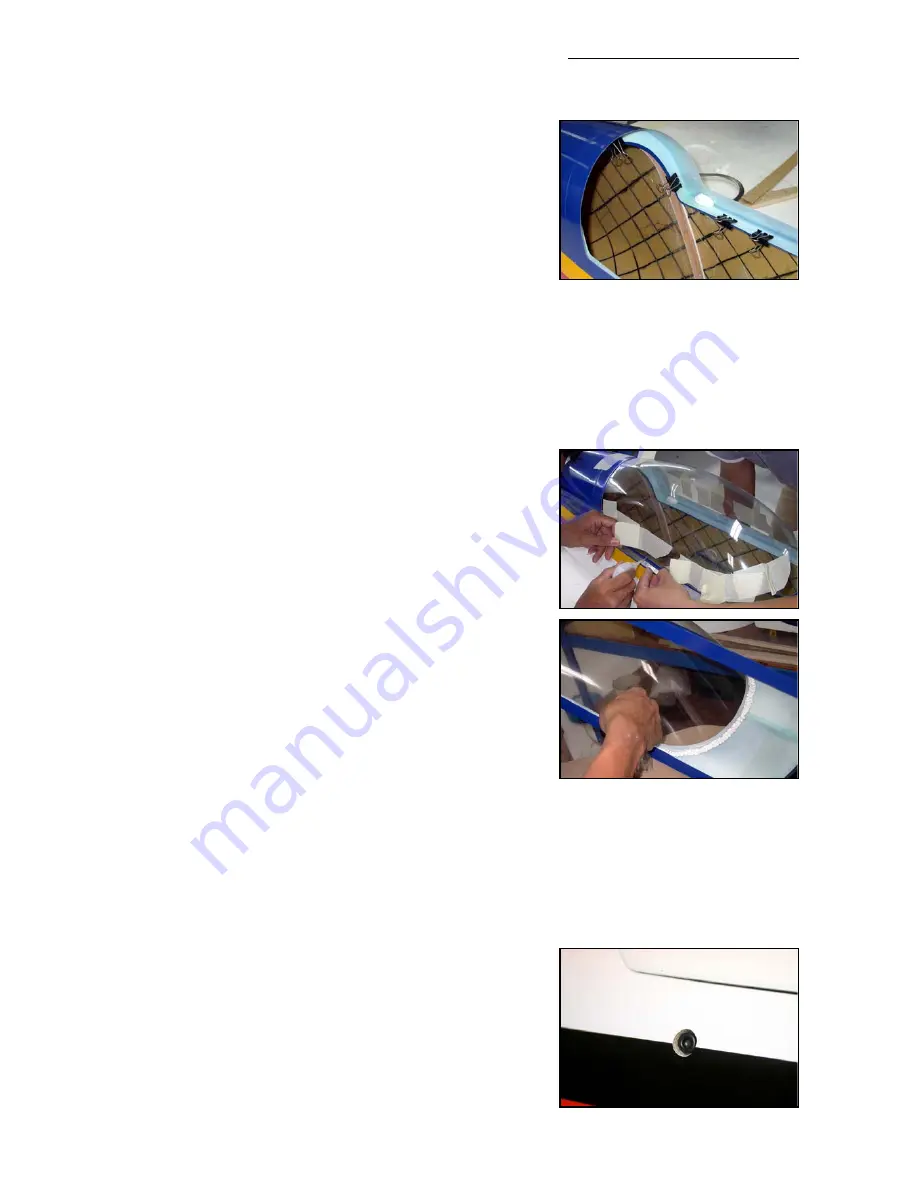
(above) Clamp the canopy frame
securely in position while the
epoxy/microballoons mix dries.
(below) Use masking-tape handles
to pull the clear canopy tightly
against the canopy frame while glu-
ing it in position with a few small
drops of thick odourless CA.
(above) Finally secure the canopy
to the frame with an epoxy and
microballoons mixture inside.
(below) Counterbore the 4 holes
for the M3 canopy bolts so that the
heads sit against the plywood
plates inside the fuselage.


